win![]()
|
© 2022 Drake Smith - Please do not use or reproduce this elsewhere. Feel free to link to it though. 1995 K75-ABS Rehab
Quick Links: Air Filter Change - Air Box Removal - Access Coolant Sensor
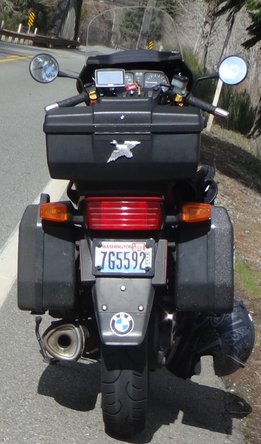
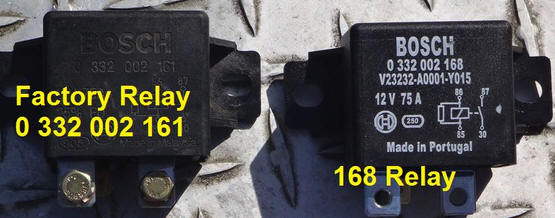
Intro: I purchased this Mystic Red K75-ABS with 74,348 miles on it in March of 2021. It had a stuck starter relay and had sat for about two years. Fortunately it was only 67 miles away. After trailering it home I swapped in a new WestCo 12V20P battery and a factory starter relay (Bosch 0-332-002-161) to replace the stuck relay (0-332-002-168.) The relay ending in 161 is the correct relay.
Since it only sat for two years the tank was nice and clean inside and the fuel pump was in good working order.
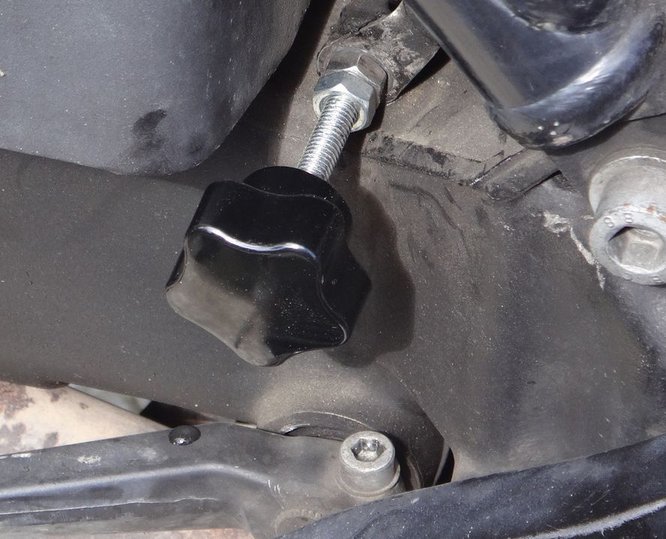
After getting all of the old gas out, replacing it with fresh gas and installing a new fuel filter, the K75 started right up. Just to make sure that I had resolved the starter relay issue I killed and restarted it several times. All good. And just in case it has starter relay issues in the future I replaced the transmission ground bolt with an M6x45 knob so that if the starter relay sticks in the future I can quickly disconnect the ground by hand without needing to dig for tools while the starter motor keeps turning.
Even though it started/ran OK and was rideable as it was, I decided to service it from stem to stern and modify it to my liking. What follows is what I did to "rehab" it. It is not necessarily in order or all inclusive.
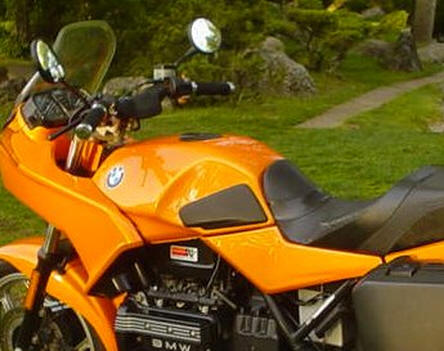
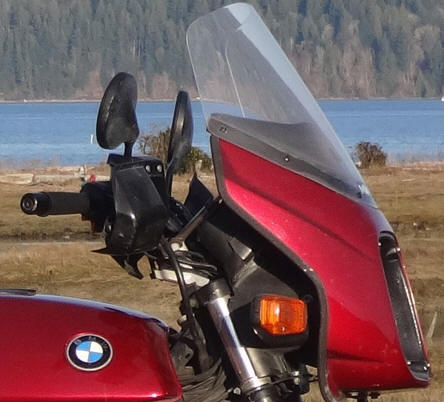
Fairing: The bike is a standard model K75 fitted with a small color-matched Mystic Red Rifle brand fairing/windscreen. I like it because it reduces chest blast at speed but let's me look over, not through, the windscreen - similar to the K75C model.
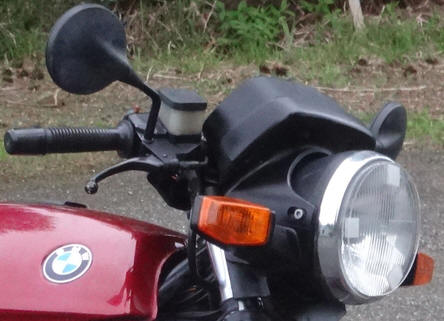
Underneath the Rifle fairing is the K75 standard headlight configuration so the bike is easily convertible if I ever want to ride it "naked."
I don't know if this Rifle fairing was made specifically for K75s or not but it's fits the headlight and turn signals "perfectly."
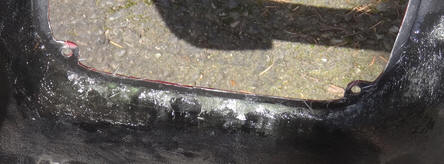
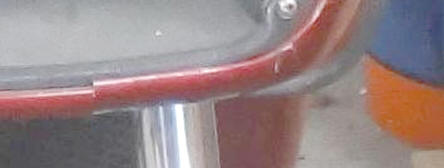
The Rifle had a long crack along the bottom lower left and didn't align well at the center.
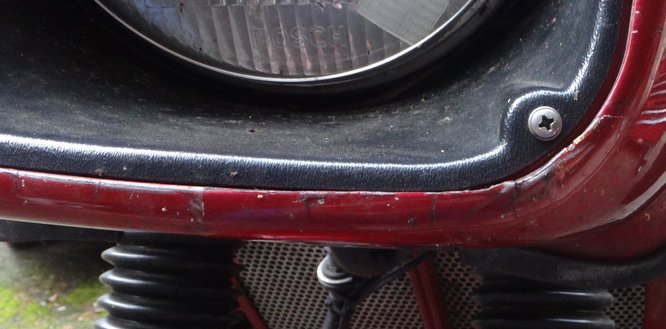
So I removed it, took the inner headlight shroud out and did a ghetto fiberglass repair from the inside. It's better looking and much more stable after I did this. Fiberglass repair:
After my repair:
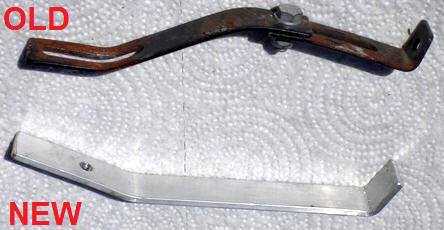
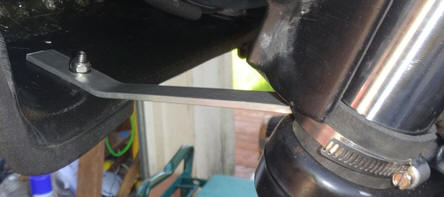
The support brackets that attach the lower part of the Rifle fairing to the forks were somewhat flimsy and a little rusty so I fabricated some sturdier, better looking brackets out of 1/8" thick aluminum bar stock to replace them.
I also installed some new stainless steel hose clamps where the brackets attach to the forks.
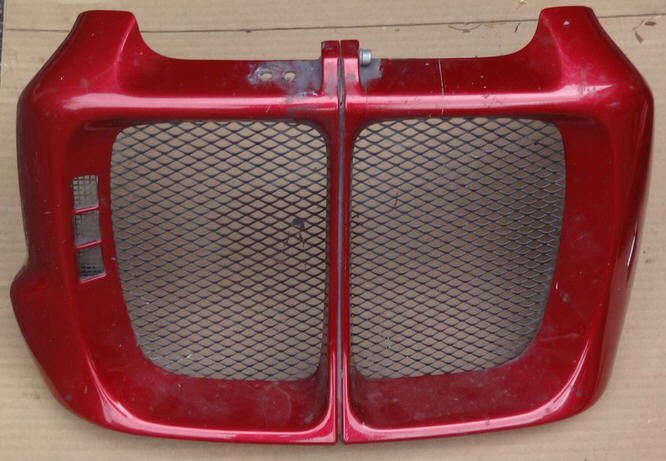
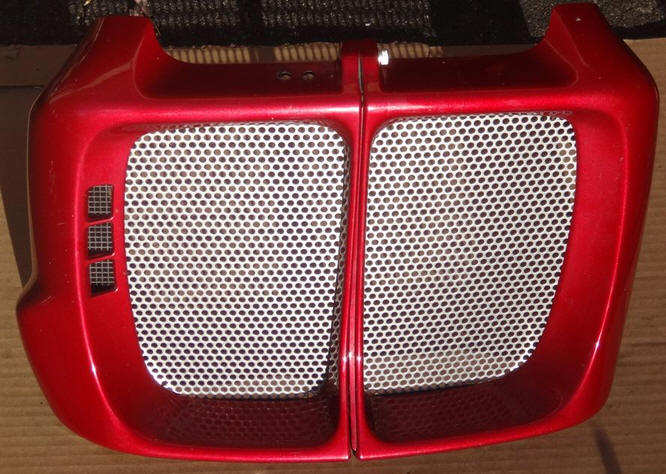
Radiator Grill: I replaced the factory radiator grill with perforated stainless steel because I think that it looks better. Factory radiator grill:
Perforated stainless steel:
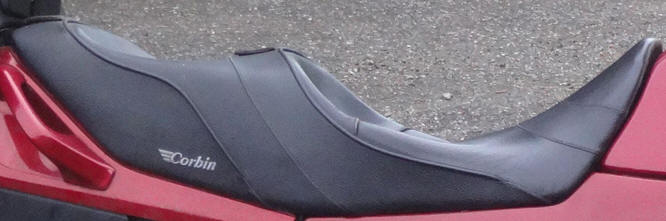
Seat: The K75 came with a Corbin Dual Sport seat in OK shape when I bought it.
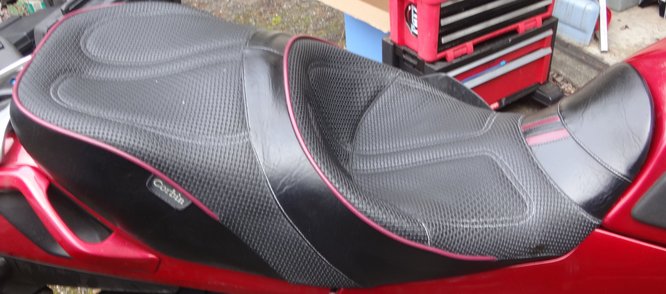
However, a few months after I purchased the K75 I was able to get a good deal on Corbin Dual Tour seat in excellent condition with piping that matches the color of the K75 pretty well. At least for me, the Dual Tour seat is more comfortable for LD riding.
In order to make them easier to install/remove and not get lost so easily, I added small neon green zip-ties to the seat clips.
Handlebars: The K75 came with C-bars and barbacks which resulted in a very upright "sit up and beg" riding position. I prefer to lean forward a bit when riding.
Since I had them on hand I decided to swap in some "sportier" K1100RS handlebars. At first I tried them without the barbacks but the throttle, clutch and choke cables were very scrunched between the dash pad and the instrument cluster so I found that using barbacks with the K1100RS handlebars works best. The K1100RS handlebars also allowed me to move the bottoms of the upper fairing supports out a bit for a cleaner appearance since they no longer block the lower corners of the instrument cluster.
Barbacks:
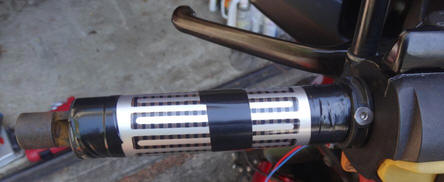
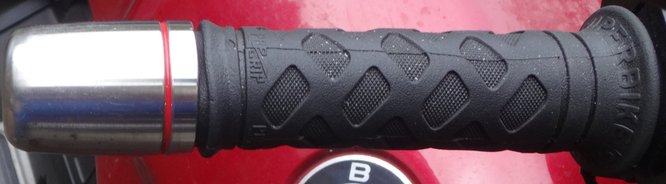
HEATED GRIPS -The factory heated grips weren't working very well so instead I found some $10 heated grips on Amazon to install over them. They're only 15 watts each vs. the factory 18 watts but they still work pretty well.
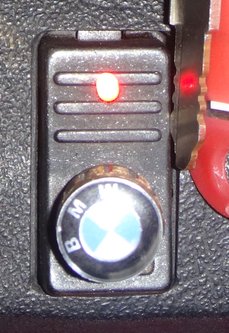
I also made a PWM (pulse width modulation) variable control for the heated grips mounted in a BMW switch blank. The LED brightens and dims as the power output varies.
BAR ENDS - I installed some Throttlemeister bar ends on the K1100RS handlebars. These are just for show since I also installed real electronic cruise control.
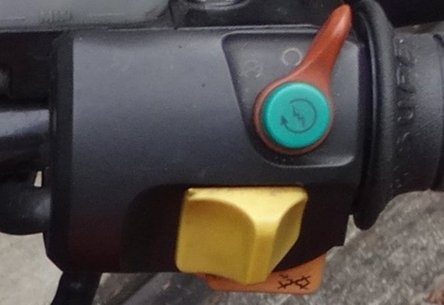
ProGrip 699 GEL GRIPS - I use these on all of my Ks. They are comfy even without gloves and work well with heated grips. "EURO" HEADLIGHT SWITCH - US K bikes come with always on parking and headlights. The so-called "Euro" switch allows the rider to control those with this yellow switch on the right combination switch.
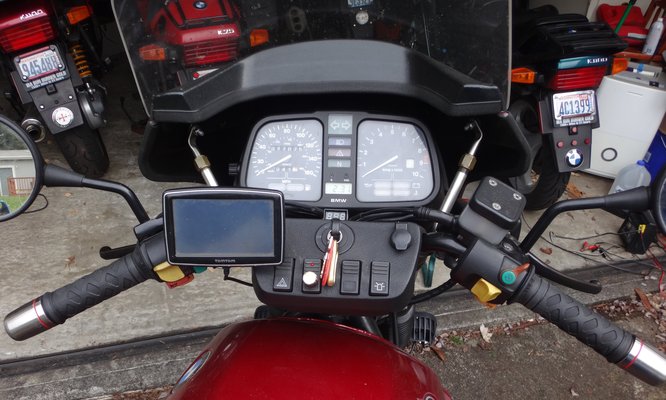
Other Controls: Here's how I set up the dash pad:
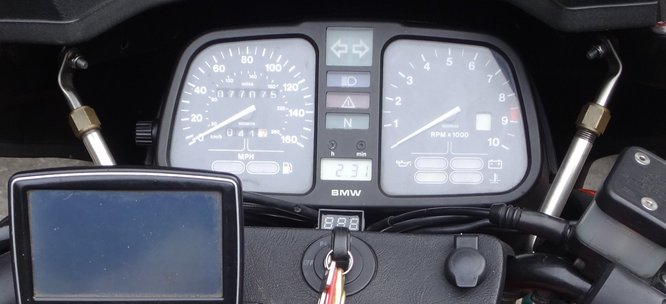
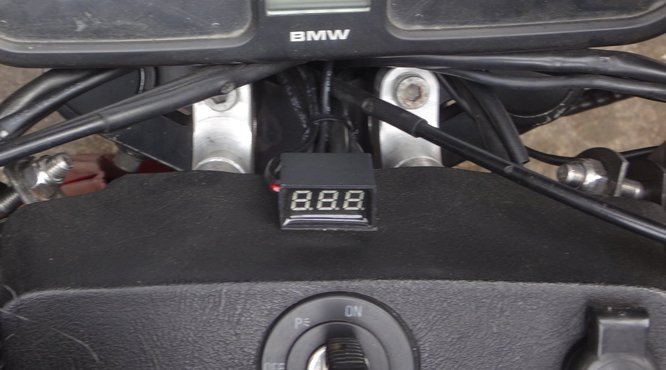
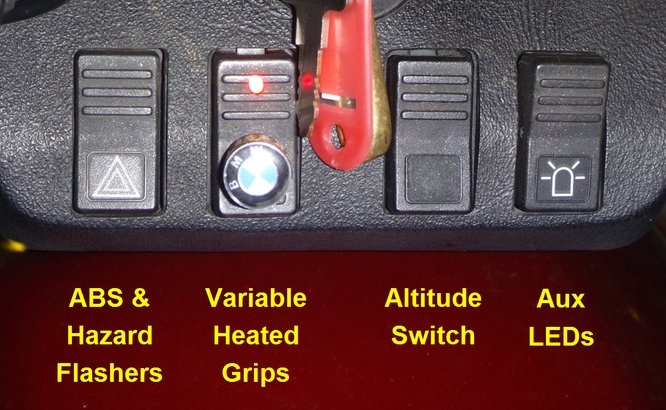
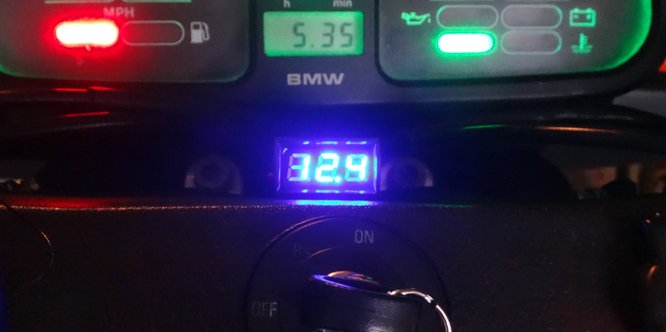
COMBO HAZARD/ABS SWITCH - Since the dash pad only has four switch slots I customized and installed a three way switch to serve as both the ABS switch and hazard flasher switch. The down position is non-momentary for the hazard flashers and the up position is momentary for the ABS switch. VARIABLE HEATED GRIPS - As described above. ALTITUDE SWITCH - Instead of having to plug in the altitude plug when going above 4,000' I added a dash switch for that. AUX LIGHTING SWITCH - This controls the 20W amber LEDs that I installed on the forks. "ON DEMAND" LED VOLTMETER - This shows the voltage when the turn signal cancel button is pressed. It's wired so that it works even when the bike is turned off in order to easily check the battery voltage in the garage, even without a key.
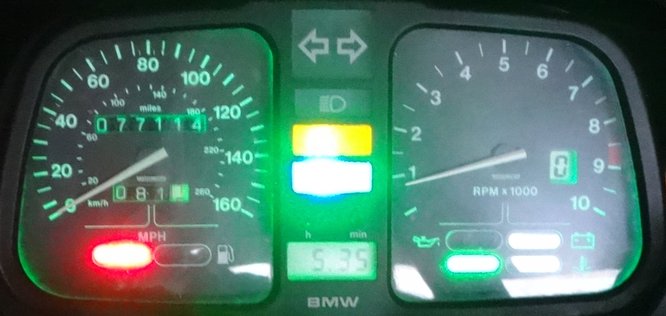
(It looks better in real life. My camera doesn't like LEDs.) Instrument Cluster: The face plates were warped so I swapped in another ABS instrument cluster after I adjusted the odometer to match the K75's original mileage reading.
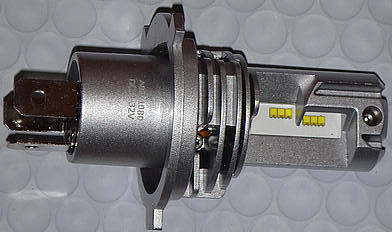
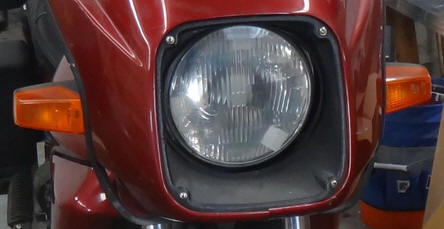
I calibrated the speedometer and replaced all of the light bulbs in the cluster with LEDs. I put a green LED in the choke indicator since I'm also using that as an indicator for when the cruise control is engaged. I put a yellow LED in the BMU indicator that makes it a little less bright at night as I have that wired to serve as an reminder indicator for when the altitude switch is engaged. Lighting: LED HEADLIGHT - I replaced the factory halogen headlight bulb with a brighter, whiter LED H4 bulb.
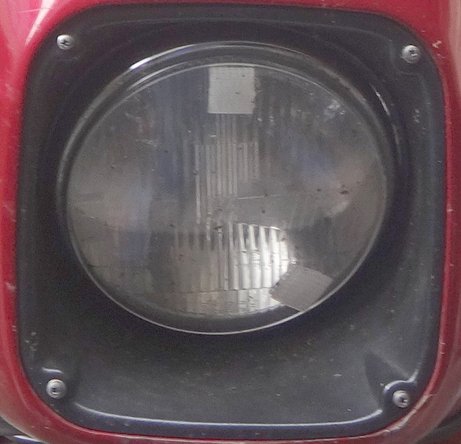
The headlight also has an Aeroflow protective cover. Since these headlights very rarely break I don't think the Aeroflow cover is really necessary but since it was already installed when I bought the K75 I just left it on.
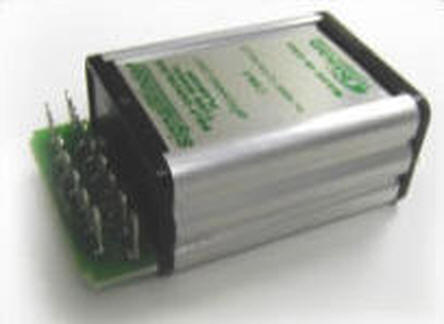
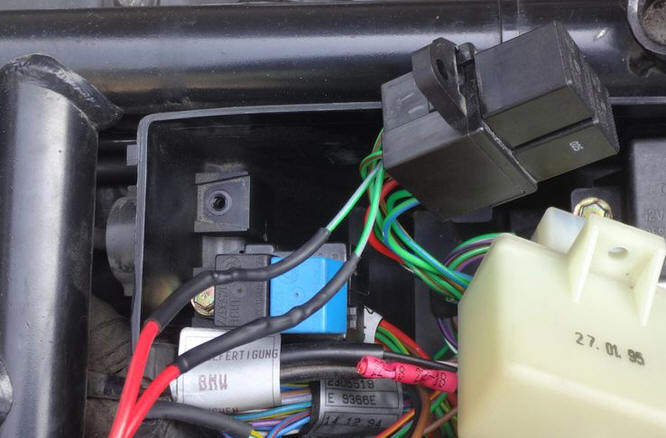
FLASHER RELAY - In order to run LED turn signal bulbs and add some other functionalities I replaced the stock flasher relay with a spare Kisan SignalMinder SM-6 that I had on hand.
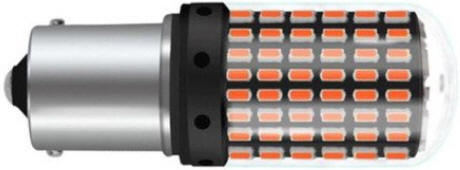
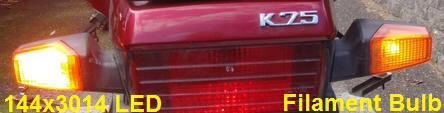
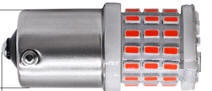
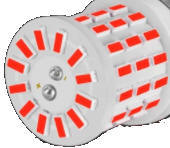
LED TURN SIGNAL BULBS - I installed these 1156 LED bulbs that have 144 3014 LEDs. They are much, much brighter than the stock filament bulbs or any other LED bulbs that I've ever tried over the years. They really stand out.
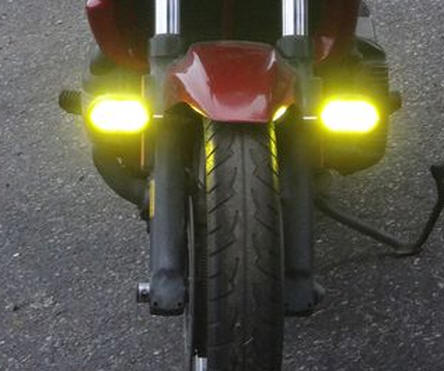
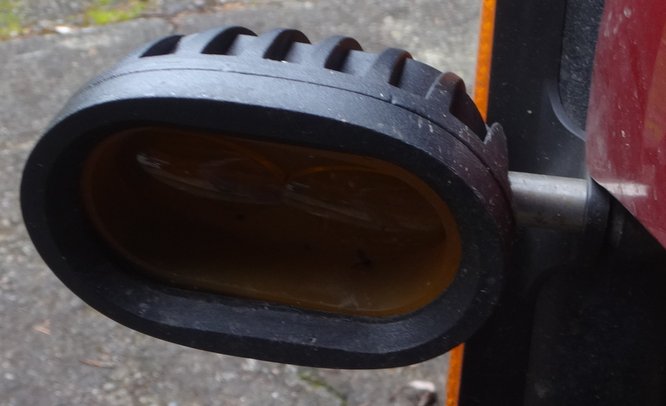
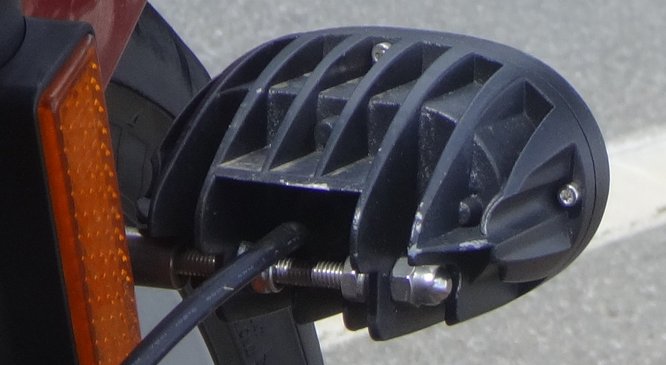
AUX FORK LIGHTING - I found these 20 watt each amber aux lights at AliExpress for $20 per pair and mounted them to the forks. Since they're only 40 watts total I didn't need to add a relay for them.
I mounted the LED aux lights with some spacers and long M6 bolts at the fork reflectors. This works well and is simpler than using brackets to mount them.
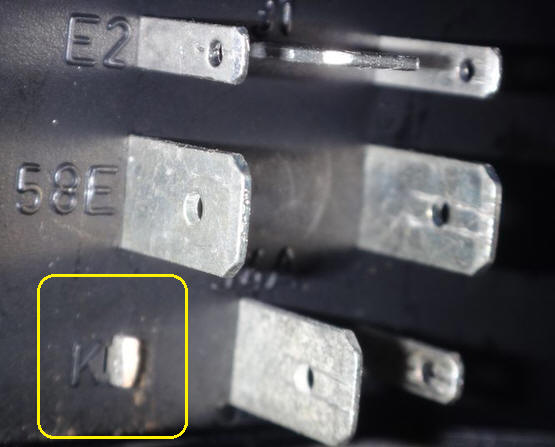
BMU MODIFICATION - Since the Bulb Monitor Unit would not be "happy" with LED brake and tail lights I modified the BMU to "ignore" the LEDs so that it does not illuminate the BMU indicator in the instrument cluster. I did this by removing the K pin from the BMU.
BRAKE LIGHT - I installed a nice bright red LED bulb in the brake light. It has 57 3014 LEDs.
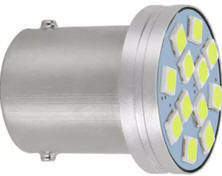
TAIL LIGHT - I tested several different tail lights and found this one to be the best LED bulb that doesn't generate a lot of heat which can melt the plastic of the lens since it is always on. The LED bulb that I used has 12 3030 LEDs. Since the tail light compartment of the lens isn't reflective like the brake light compartment lens there's no point in having an LED bulb with LEDs pointing radially out to the side.
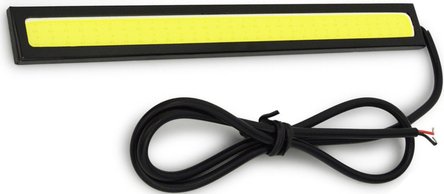
LICENSE PLATE LIGHT - The OEM filament tail light bulb also lights up the license plate with white light as required by DOT standards. My red LED tail light bulb doesn't do that. To illuminate the license plate I added a waterproof 14 cm long white COB LED bar to the bottom of the tail light lens.
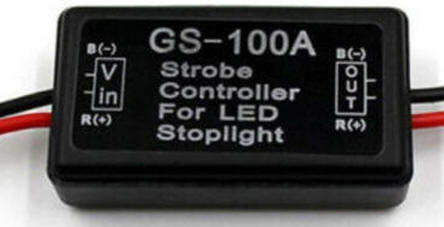
EAGLE EYE LEDs - I added three VERY bright Eagle Eye LEDs under the license plate. The center one is always on with the tail light. The bottom two are brake lights controlled by a GS-100A strobe unit. It's pretty much impossible for someone behind me not to see when I'm braking. (Unless they're looking at their phone.) I added a micro-relay so they "wag" when braking. Here's a video of them in action:
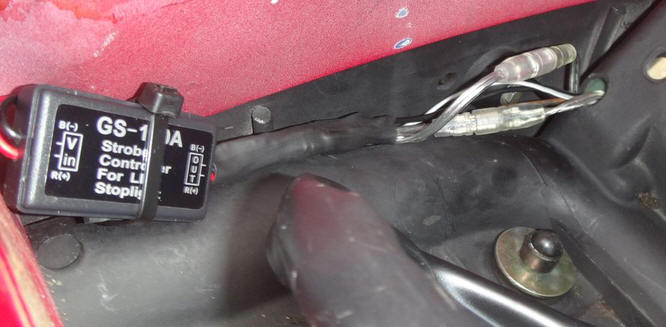
Here's the GS-100A strobe controller that I use. It only costs about $3 on Ebay. It does four short quick pulses, four long pulses and then goes solid.
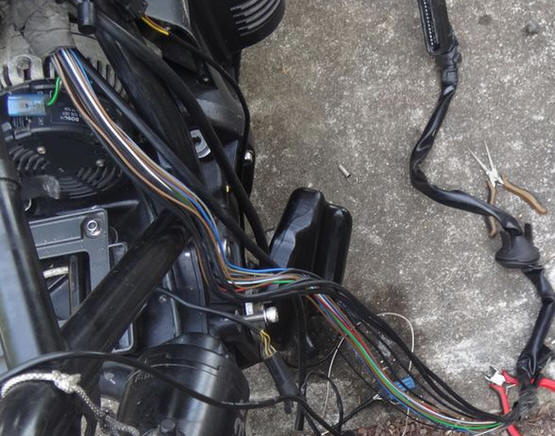
In order to keep things neat I built a compact setup with all of the wiring clumped together in a large piece of heat shrink tubing.
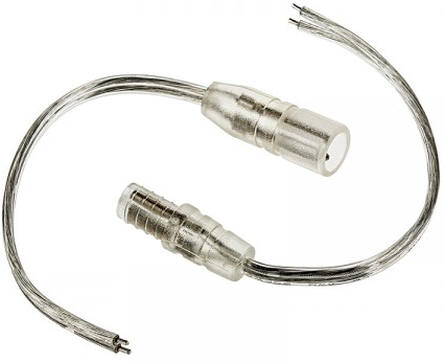
It has three inputs: * Wire that taps into the brake light wire * Wire tat taps into the tail light wire * Wire that taps into ground It has two 2-wire outputs to the Eagle Eye LEDs: * One to the Eagle Eye tail light * One to the Eagle Eye brake lights I use these waterproof connectors for the outputs to the Eagle Eye LEDs:
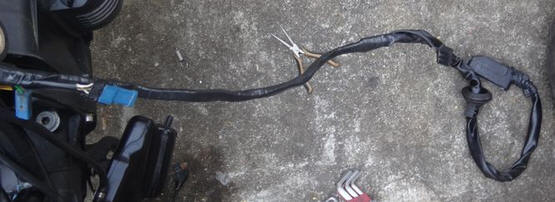
Here's the wiring to the LEDs:
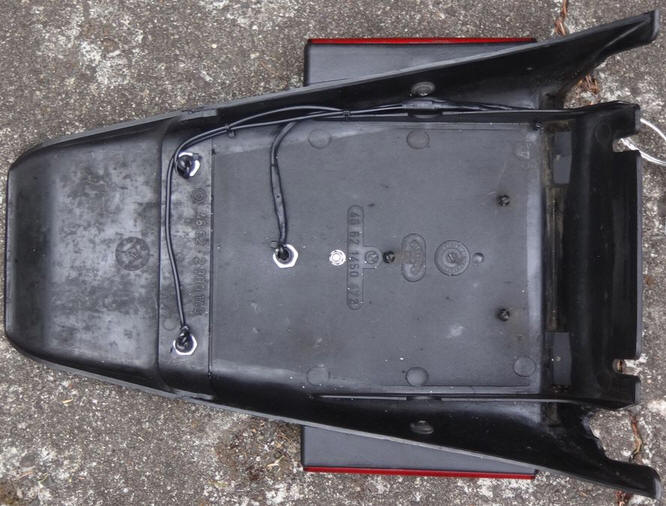
And here's the control unit installed in the tail cowl:
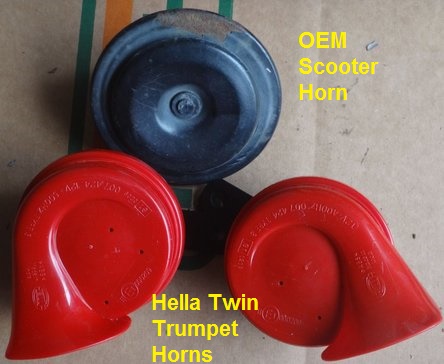
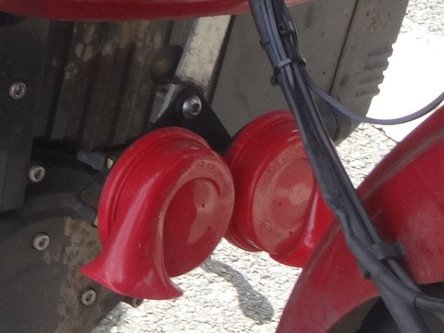
Horn Upgrade: The stock horn on non-RT K75 models is a wimpy little horn that sounds like scooter. I upgraded to a pair of 110 dB Hella Hi/Lo horns. They aren't quite as loud as the dual Fiamm horns used on the RS/RT/LT K bikes but they're much better that the scooter horn. I mounted them where the scooter horn used to be.
In order to get the most voltage to the Hella horns I upgraded the wiring from the horn relay to the horns with 14 AWG wire. They're both grounded with 14 AWG wires as well.
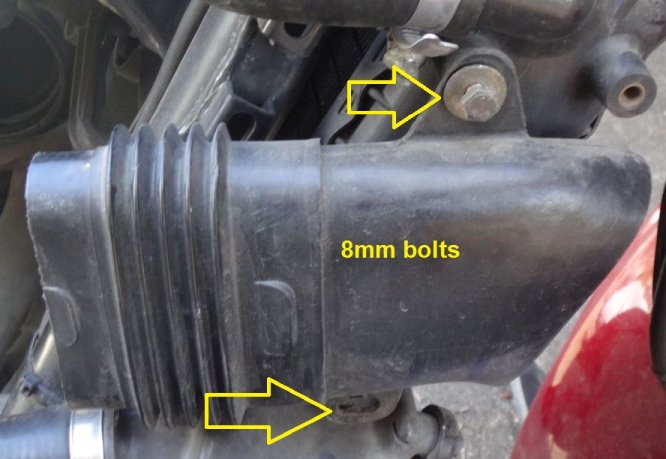
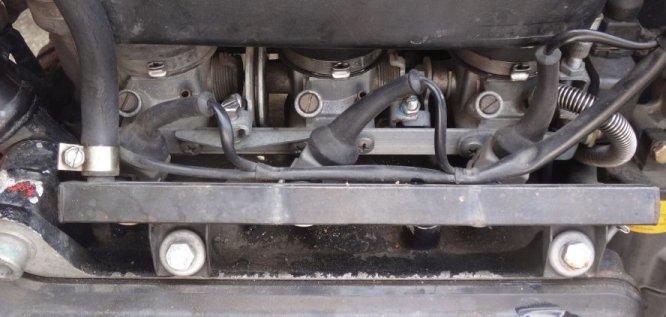
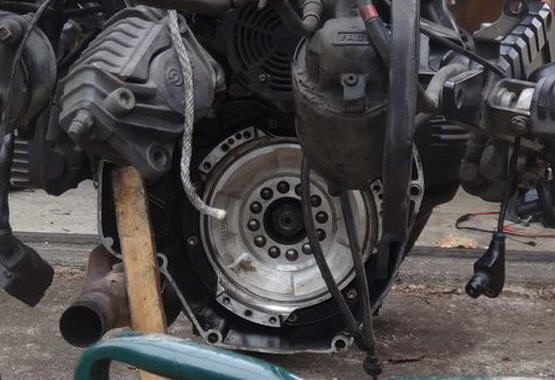
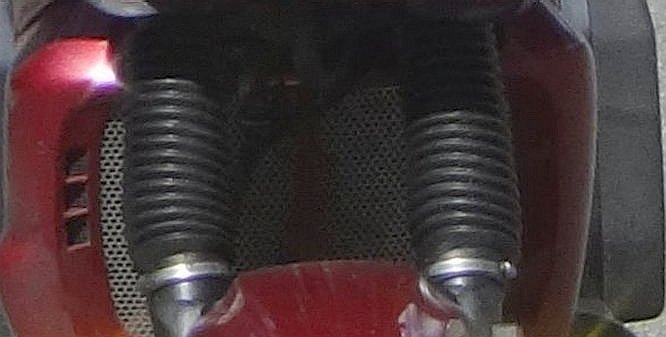
The prior owner told me that one of the throttle body boots was leaking. It ran OK but I decided to pull the air box and throttle bodies and rehab everything on top of the engine block just for the heck of it. Here's how:
Front half of snorkel:
Airbox clamps:
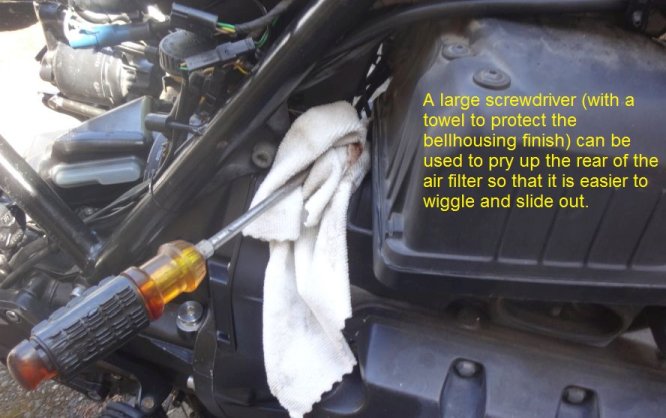
It's a tight squeeze to lift the rear of the airbox to get the air filter out but there's a way to get some leverage:
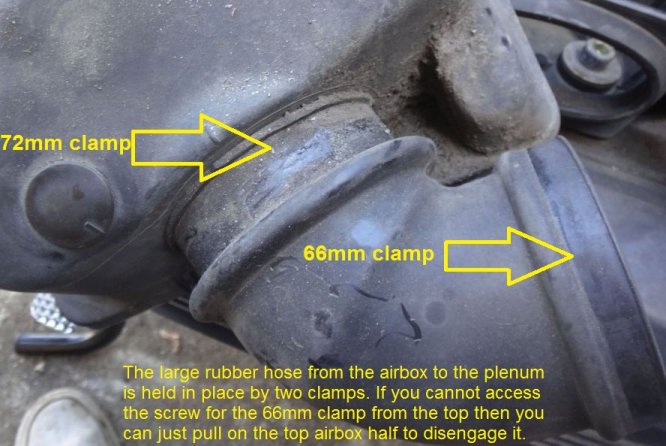
Hose clamps at front of airbox::
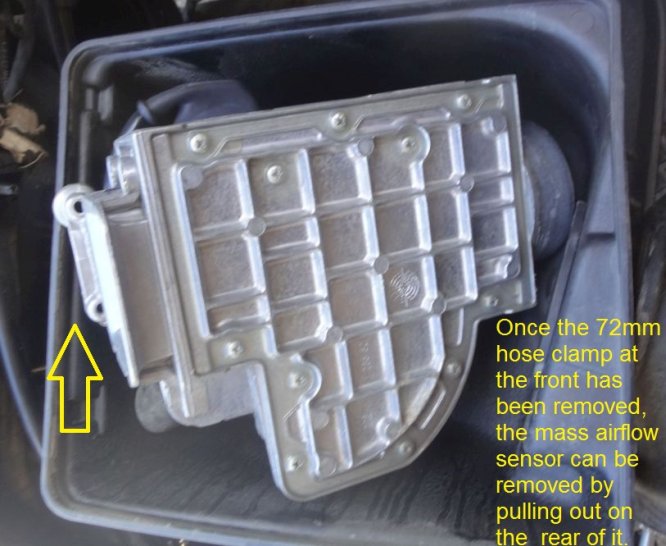
Mass airflow sensor:
Removing MAF:
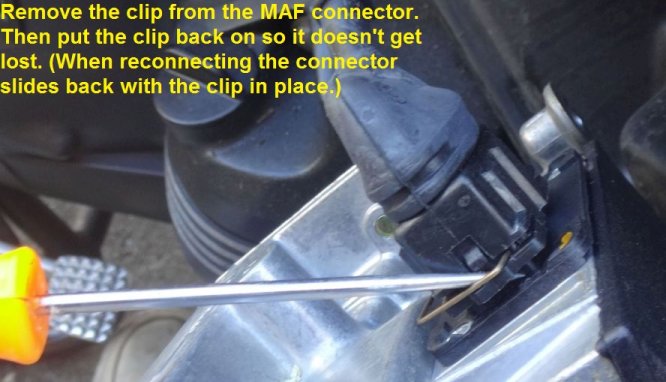
MAF connector:
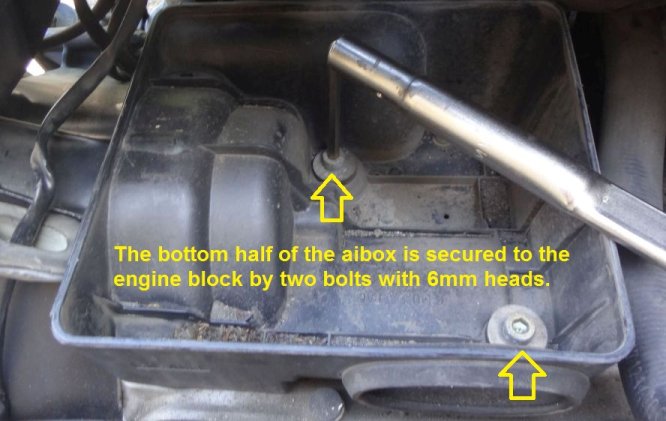
Bottom half of airbox:
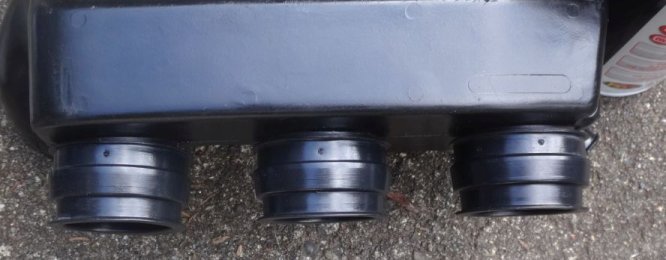
Airbox removed:
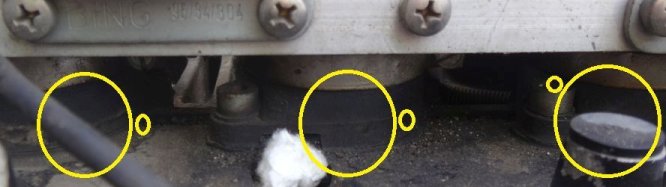
After I'd removed the airbox I cleaned the collected gravel bits and dirt from the top of the engine block.
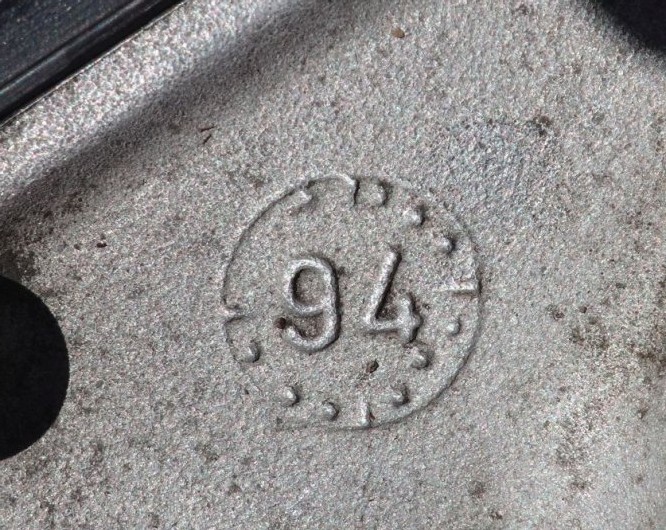
: There's a casting date for the engine block in the right rear corner. This block was cast in the latter part of 1994.
New parts to install:
In hindsight I should've removed the two fuel line hose clamps before removing the two bolts that hold the fuel rail to the cylinder head. Not a big deal though:
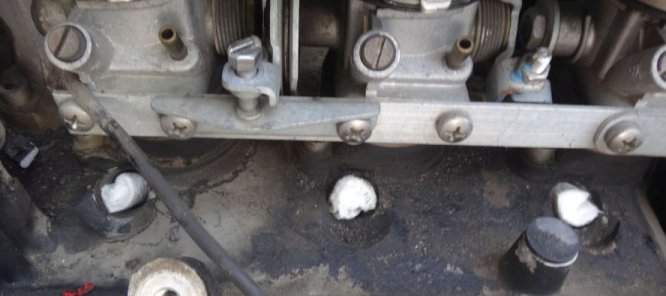
Be careful not to lose the special washers or spacers on the two bolts that hold the fuel rail to the head:
Before pulling the fuel rail with the injectors from the cylinder head it's a good idea to use compressed air or a vacuum to remove any dirt or tiny gravel bits that may have collected in the wells around the bases of the injectors. You don't want any dirt falling into the cylinder head when you pull the fuel rail and injectors.
Before removing the worm drive hose clamps on the throttle body boots, note the positions of them and reinstall them in the same positions. Otherwise they can interfere with throttle return. Remove those clamps.
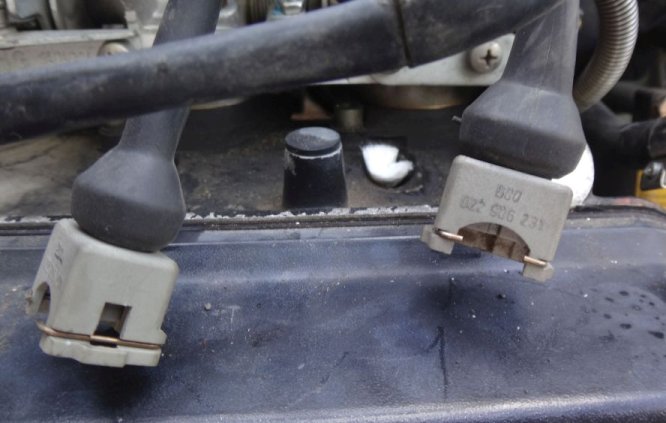
Pick the wire clips off of the fuel injector connectors. Put them back on the connectors so they don't get lost. When you put them back on they will just slide over the nubs on the sides of the fuel injectors:
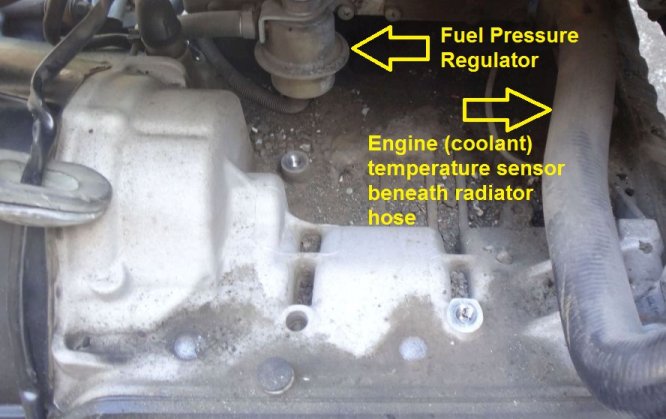
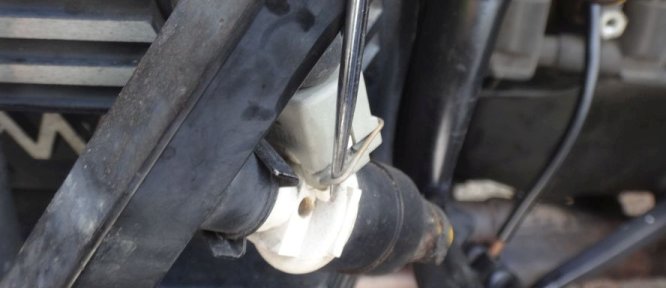
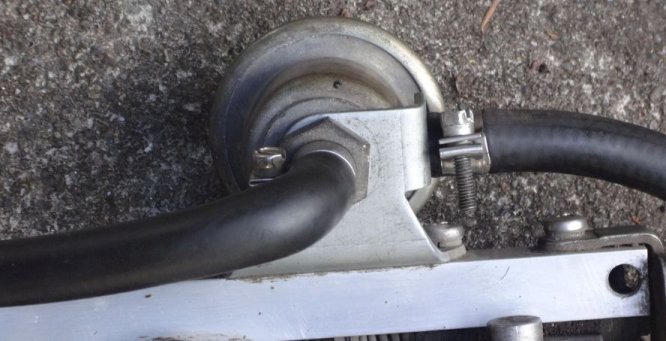
More information about removing and installing fuel injectors can be found at this link. Pull the fuel pressure regulator vacuum hose from the throttle body assembly:
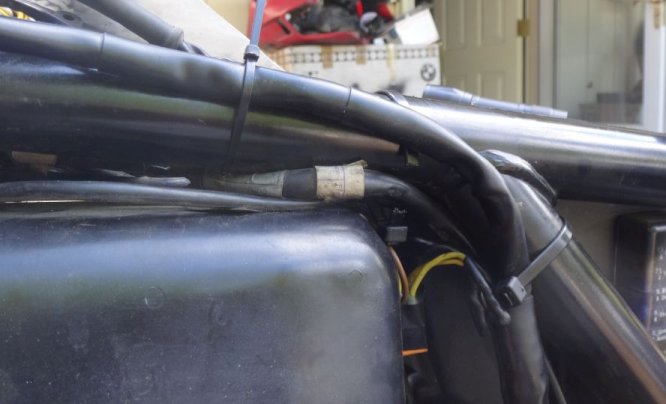
Like the airbox, the air intake plenum doesn't have a lot of frame clearance. Life is easier if you zip-tie the wiring out of the way:
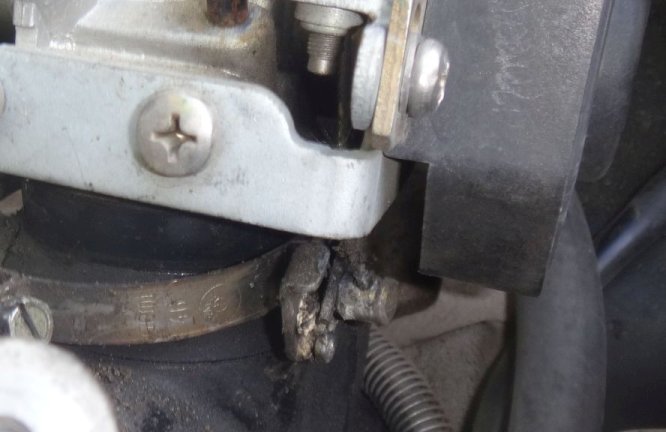
Loosen the nut for the choke cable:
Disconnect and unscrew the choke cable:
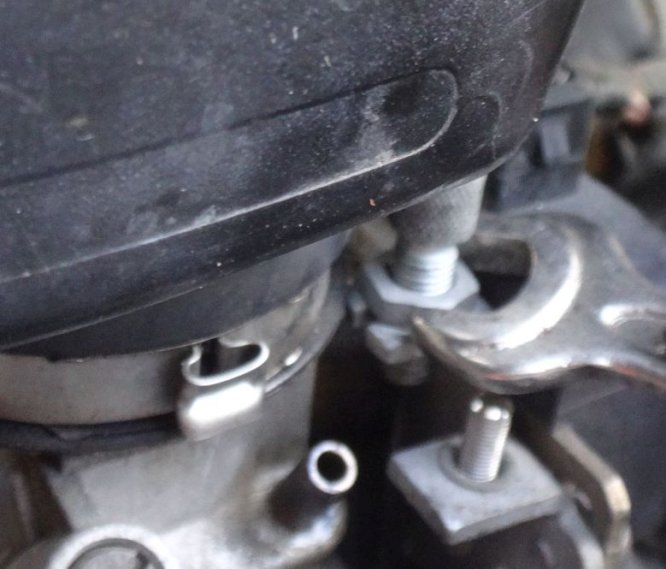
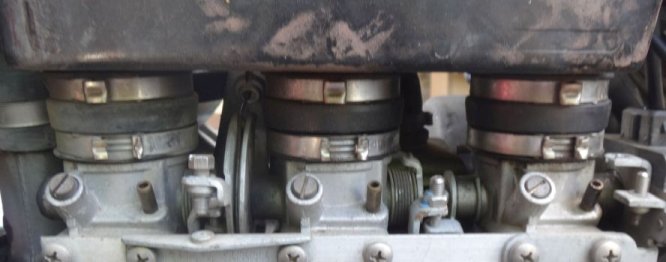
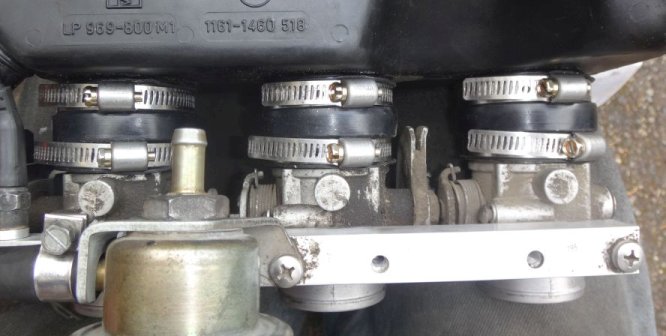
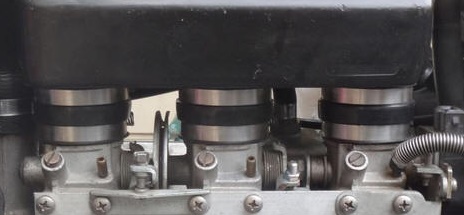
Cut the lower Oetiker clamps on the boots above the throttle bodies:
:
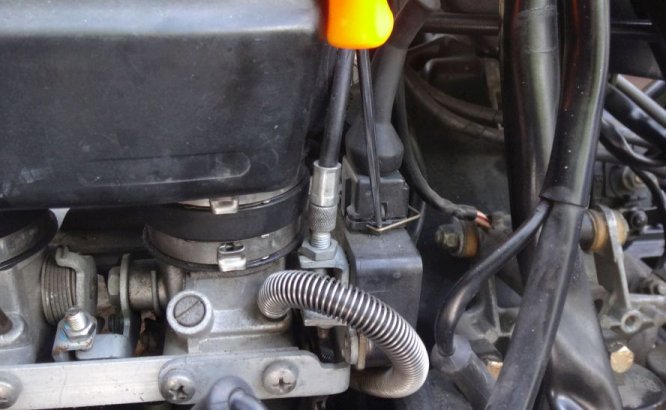
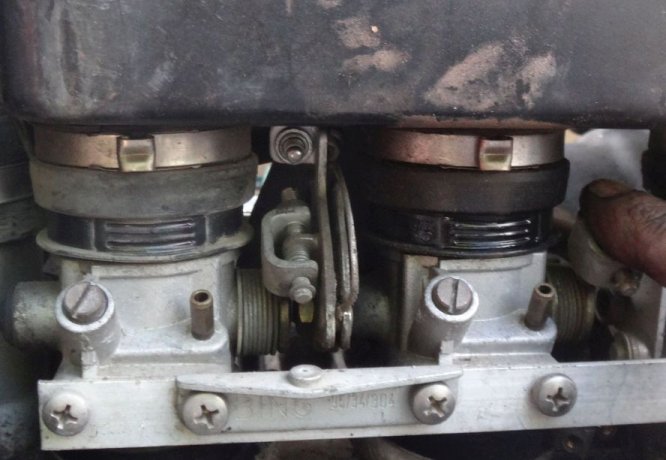
Disconnect crank case breather hose at the rear of the plenum and disconnect the throttle cable:
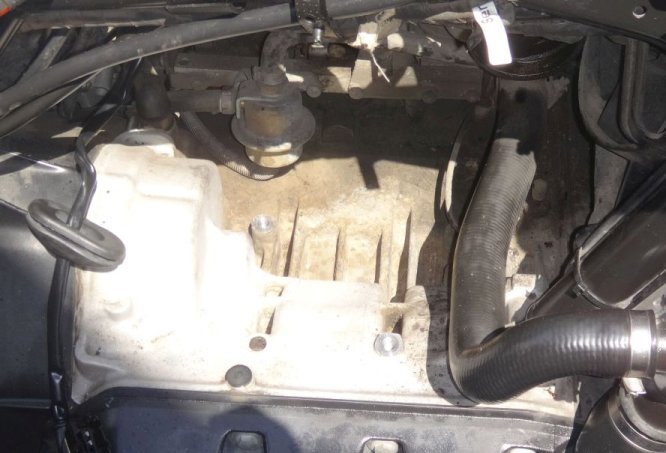
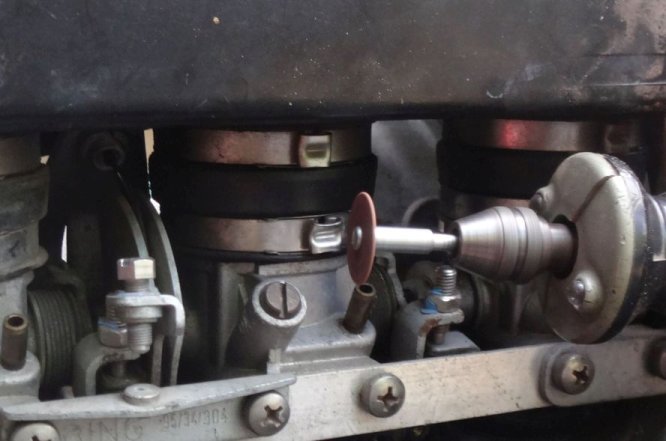
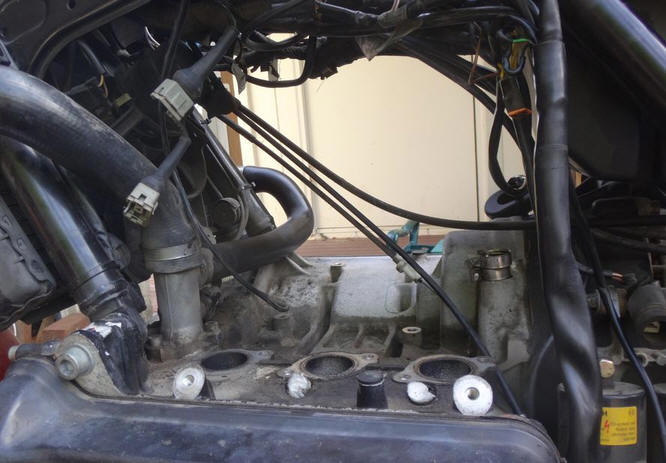
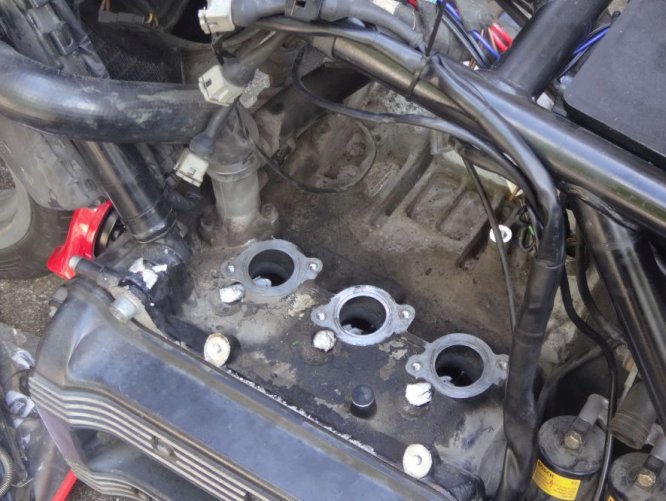
Then pull the plenum and throttle bodies off. Voila! A see-through K75!
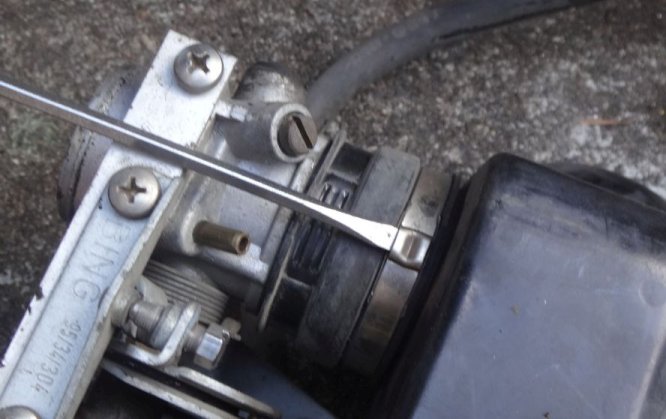
I then loosened the remaining Oetiker clamps with a small screw driver.
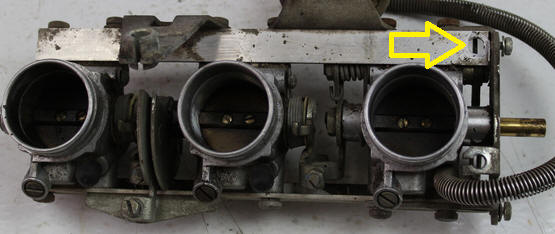
And removed the plenum from the TBs:
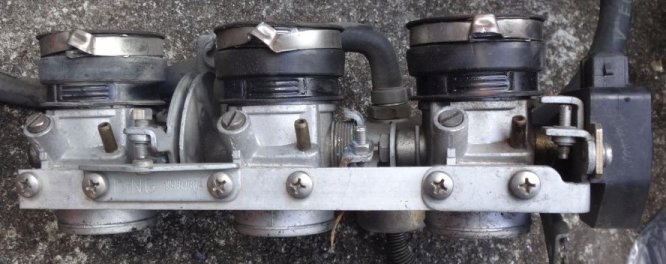
New upper TB boots installed:
For a cleaner look I installed the new worm drive clamps with the screws on the back:
I replaced all three external fuel lines with new (fuel injection compatible) fuel line. At the fuel pressure regulator I replaced the two Oetiker clamps with "normal" fuel line hose clamps:
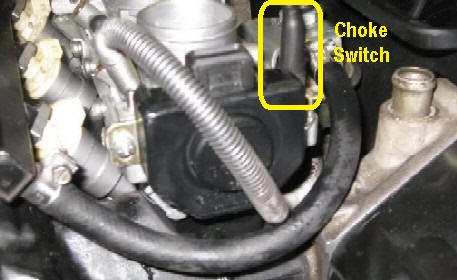
I also replaced the fuel pressure regulator vacuum hose with new vacuum hose. After 1990 BMW got rid on the instrument cluster choke indicator switch - but the wiring in the main harness in all there so I installed a choke indicator switch with spacer ring before re-installing the TB/plenum assembly:
The choke switch and spacer install in the threaded hole at the inner rear corner of the TB assembly:
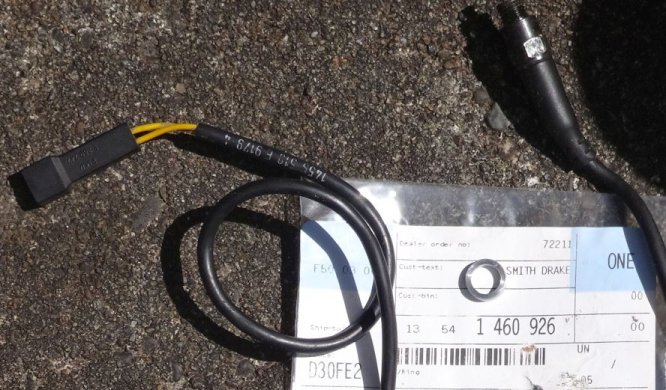
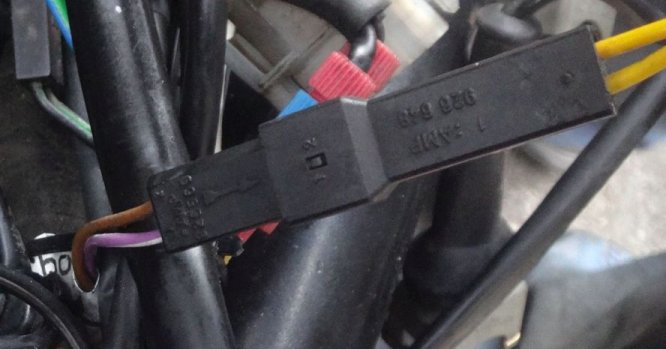
The connector for the choke indicator has a two terminal connector under the left side of the gas tank with violet/white and brown wires:
I didn't get pictures but the next steps were:
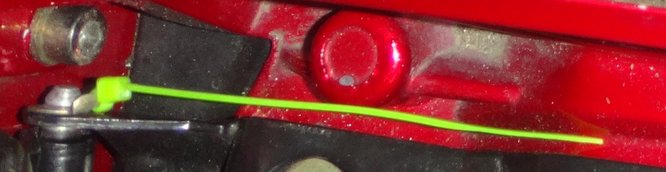
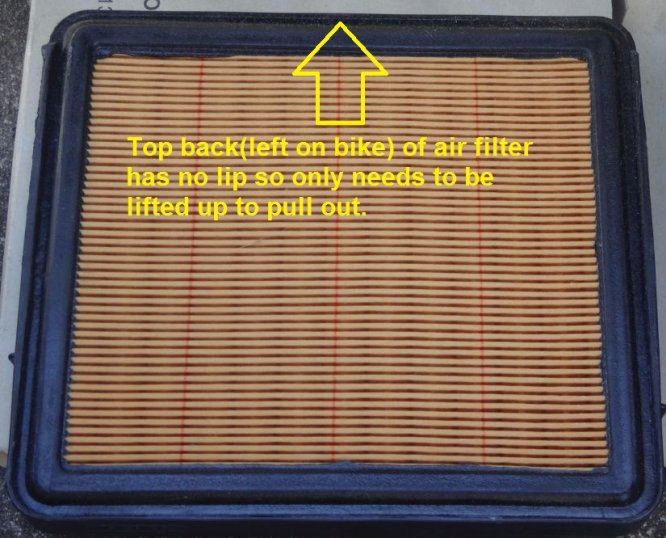
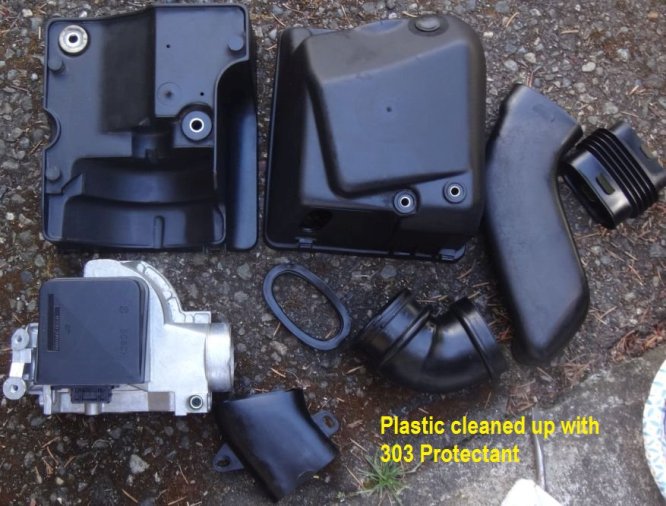
Then I went around to the right side of the K75 and re-installed the airbox and snorkel. Note that the air filter is much easier to slide in if you Armor All the top and bottom grooves around the perimeter. Once I had everything put together again, I put on the gas tank, warmed it up and synced the throttle bodies. While I had the tank off I installed "the cup" under the outpipes at the right rear of the tank. This part likes to float around some but I've found that zip-tying the cup to the frame keeps it right where it should be.
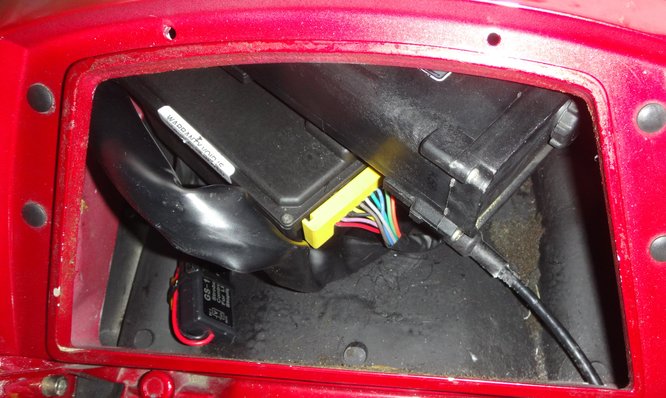
Cruise Control: I installed a Rostra electronic cruise control in the tail cowl.
The mounting bracket for the ABS control unit doesn't fit with the cruise control in the tail cowl so I just left it loose in the tail cowl sitting atop the cruise control. While I had the tail cowl off to drill a hole for the cruise control cable, I cleaned up the rear of the frame and waxed it. Here's the "before" picture:
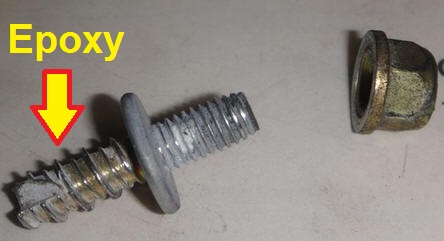
And while I had the tail cowl off and apart I repainted the inside top of the "wedge."
As often happens when taking the tail cowl apart, a couple of the bolts the hold the "wedge" to the painted tail cowl came out before their nuts came off. When I put them back I used some epoxy so that they will stay in place in the future.
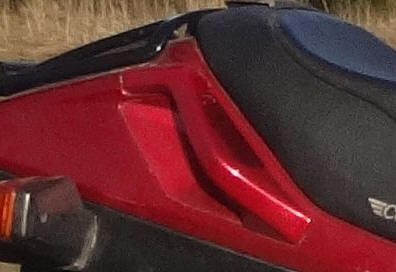
Another thing I did while I had the tail cowl apart was install the black plastic tail cowl handle inserts that the early K bikes had but BMW didn't bother to install in the later year bikes. Before:
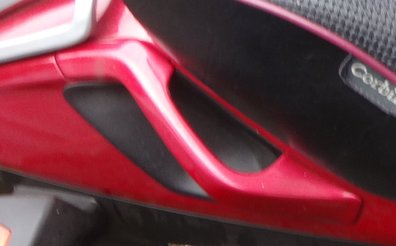
After:
I noticed that the sheathing for the wiring back to the ABS control unit was pretty beat up so I removed that and rewrapped the ABS wires, first with cloth wiring harness tape and then with electrical tape.
Cruise control throttle linkage:
I swapped in a K1100LT left combination switch with windscreen switch to operate the cruise control.
Since the Rostra cruise control has an output to signal when the cruise control is engaged, as mentioned before I put a green LED in the choke indicator in the instrument cluster so that it now doubles as both a choke indicator and cruise control indicator.
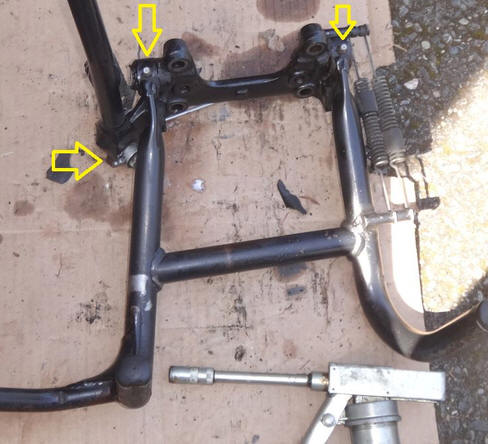
Spline Lube & K1100 Transmission: As I do with every "new to me" K bike, I tore the rear end apart to lube the drive shaft and transmission input splines. Since the K75 has 74K miles on it I took the clutch apart to measure the clutch plate thickness. (Remembering to mark the clutch components so that they could be re-assembled in the same rotational orientation.)
The minimum spec for clutch plate thickness is 4.5 mm so this one has oodles of miles left in it and did not need to be replaced. While I had the side and center stands off I cleaned them, waxed them and then lubed the three Zerks at the pivots with Lucas Marine Grease.
The original transmission worked fine but in case I ever decide to convert the final drive from monolever to paralever, when re-assembling the rear end I swapped in a K1100 transmission.
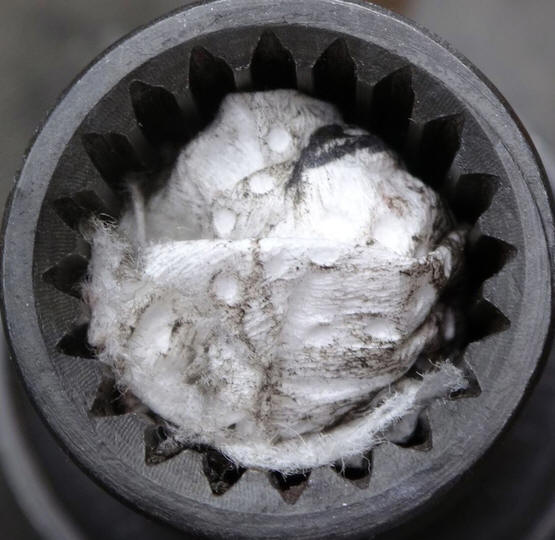
It's just dumb luck but this turned out to be a VERY good decision. Of all of the dozens of K bikes I've owned over the years this is the smoothest, bestest shifting K bike transmission I've ever ridden. If I ever sell this bike I'm going to take this transmission off and keep it. The drive shaft splines show a little wear but still have oodles of miles left in them. (The paper towel is temporarily stuffed in there in order to get my point-and-shoot camera to focus properly.)
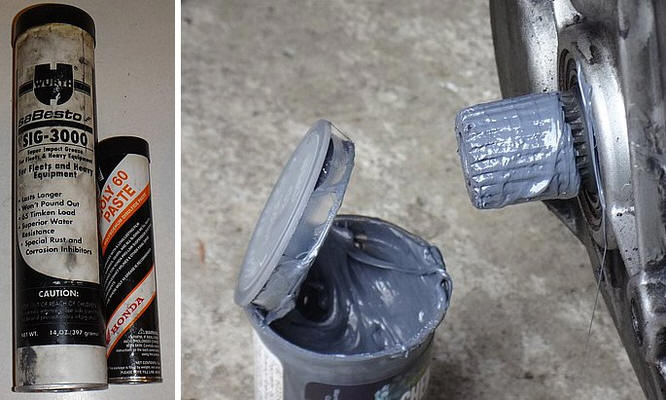
The magic elixir that I use for lubing splines is a 50/50 mix of Honda Moly 60 and Wurth SIG-3000 as recommended by K bike guru Paul Glaves who kept a K75 running for 370,000 miles. (Until a careless car driver ran into it.)
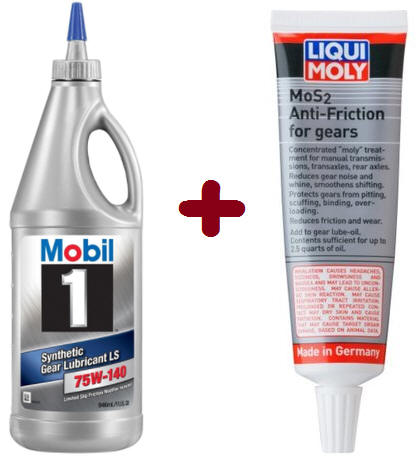
The gear oil that I use in the transmission and final drive is Mobil 1 75W-140 with Liqui Moly 2019 MoS2 Anti-Friction Gear Lubricant additive. The moly additive helps K bikes shift more smoothly.
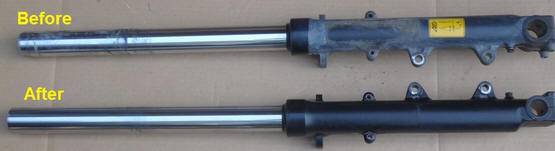
Suspension: FORKS - Since it's a 95 it has the supposedly best Showa forks. The forks seemed to be OK and the seals weren't leaking but they were pretty dirty so I took them off to clean them thoroughly and install some fork boots.
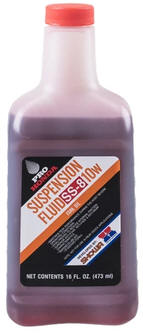
I drained the forks and refilled them with 410 ml each of Honda SS-8 10W fork oil.
While I had the forks off to clean them I also installed some fork boots:
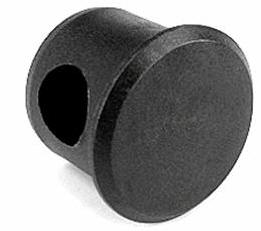
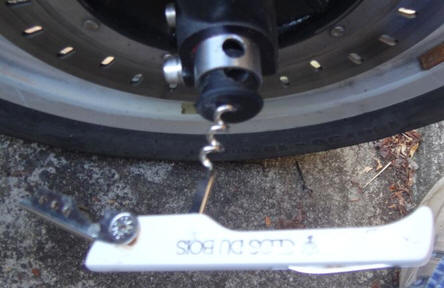
While I had the front end jacked up I tested for play or wear in the steering head bearings. All seemed fine. The plastic cap on the right end of the front axle had some minor scraping so I replaced that. (Part 36311451468)
It's a little hard to get the old one out but using a corkscrew helps.
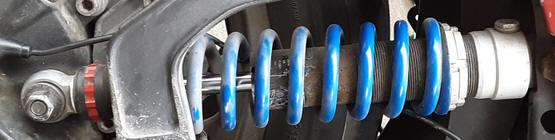
WILBERS SHOCK - The K75 came with a Wilbers 630 shock. (Probably made in 2009.) These are good shocks but the bike handled poorly so I sent the shock to Ted Porter's Beemershop to have it serviced. Before:
When they received the shock, Jeff at Beemershop called to tell me that the spring was too stiff (50 N/mm) and recommended a "lighter" spring (35 N/mm) for my weight solo riding so I had the spring replaced while it was being serviced. This added roughly a week to the turnaround time since they did not have the 35 N/mm spring in stock. Total turnaround time from the day I mailed it to the day I got it back was 48 days. In the meantime I installed a spare Progressive shock that I keep as a "backup" shock. I had the option of the new spring being either black or Wilbers blue. I chose black.
The shock works great now. I'm a pretty "spirited" rider and the K75 now handles exactly as I want it to.
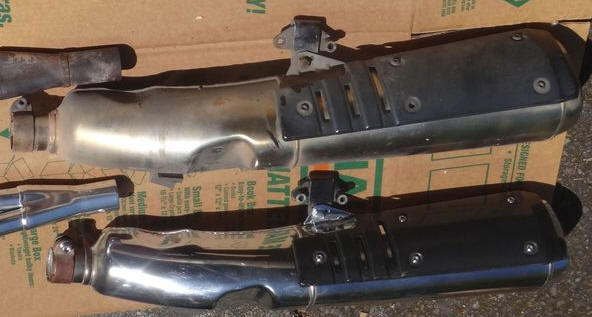
Exhaust: After 74K miles the exhaust was showing its age so I swapped in a nicer exhaust I had on hand after I'd cleaned it up.
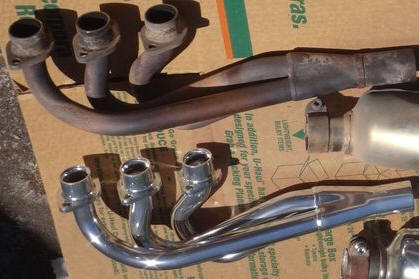
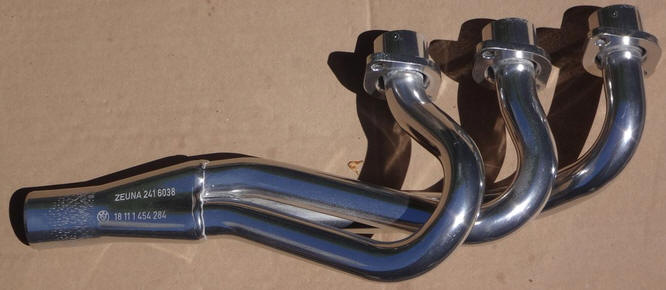
The headers were pretty rusty so I swapped in some headers coated in Chromex ceramic coating that looks much better.
Here's what the headers look like once installed.
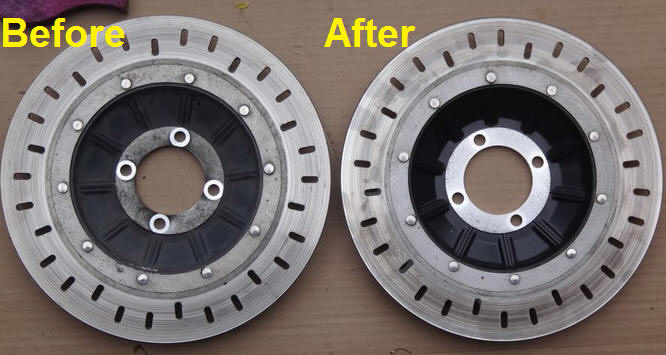
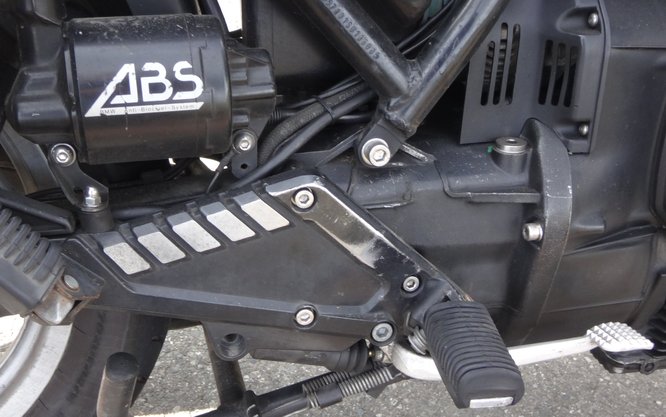
Brakes: The first order of business was to ensure that the ABS control unit ("brain") was operational. The easiest way to test this is to just ride a few feet and see if the ABS warning lights stop flashing and go out. They didn't. However, once I replaced the battery and did an ABS reset things worked fine and the ABS warning lights now go out as they should. The front rotors were a little dirty so I removed them to clean and wax them.
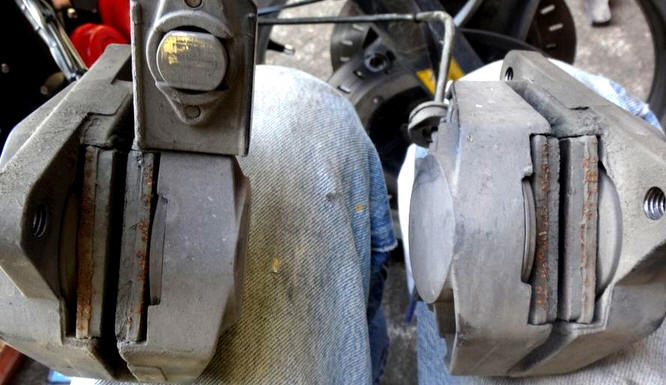
The front brake pads still have some life in them and did not require replacement.
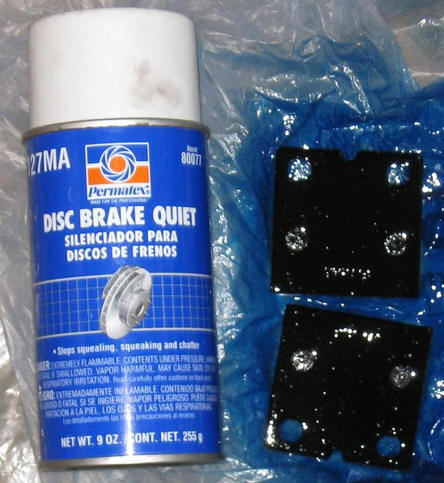
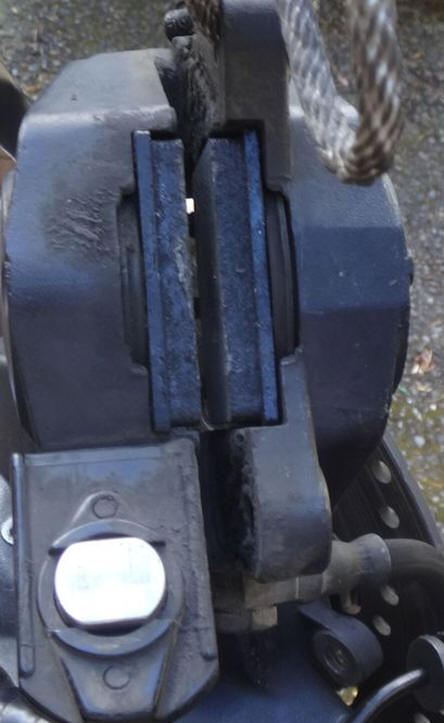
The rear brake pads were pretty worn so I installed new ones after spraying the backs of the pads with Disc Brake Quiet.
Then I bled the front and rear brakes with DOT 4 brake fluid.
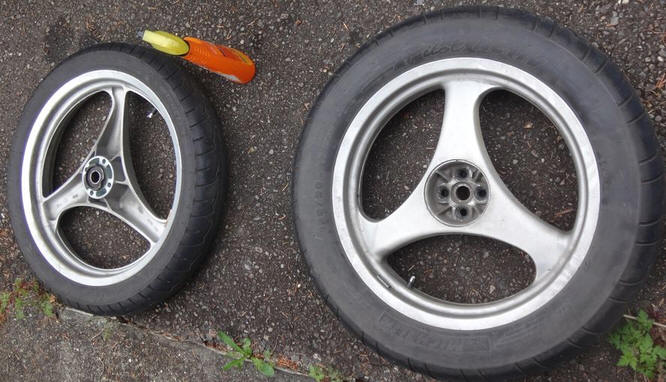
Wheels and Tires: The wheels that came with the K75 were in pretty decent shape after I gave them a scrubbing.
The Michelin Pilot Activ tires that came with the bike are good tires but for better handling I swapped in some wheels from one of my other K75s that have Bridgestone T31 radial tires.
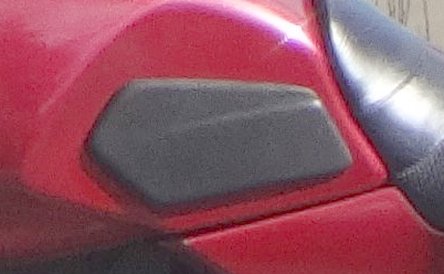
Miscellaneous: I did a bunch of other miscellaneous cleaning/waxing and other things along the way. Here's a few of them. K75 KNEE PADS - I added some K75 (not K100) knee pads made of uber-unobtainium. BMW only made these for a short while so they're extremely rare. You can use the K100 knee pads on a K75 but I prefer these. K75 Knee pad:
K100 knee pad on a K75:
RADIATOR FAN - Since K bike fans fail occasionally, while I had the tank off I shorted 12V to the fan connector (violet/yellow and brown wires) to ensure that the fan was still functional. It worked. CLUTCH CABLE - When I was doing the clutch spline lube I lubed both ends of the clutch cable and adjusted the clutch. THROTTLE CABLE - I improved the throttle return by replacing the gooey factory grease in the throttle with spray silicone lubricant and adjusted the throttle cable. STAINLESS STEEL HARDWARE - As I do with all of my K bikes, I replaced all of the visible hardware with stainless steel parts. Examples:
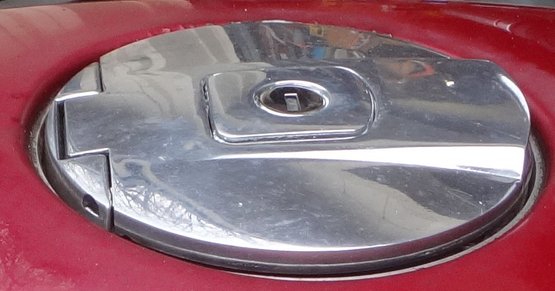
CHROMED 1985 GAS CAP - Since it didn't have a key, I found this chromed 1985 gas cap on Ebay for only $30. Fortunately the gas cap works with this K75's ignition key. The 1985 gas caps can be left locked or unlocked so they don't require a key every time you refill.
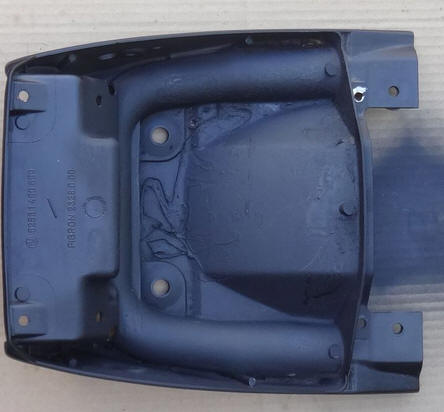
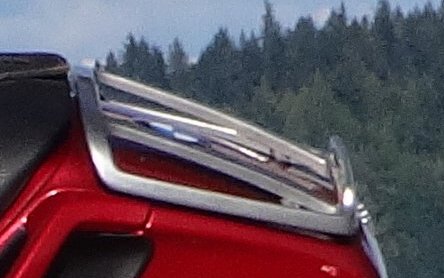
TAIL RACK - I replaced the black tail rack with a silver one.
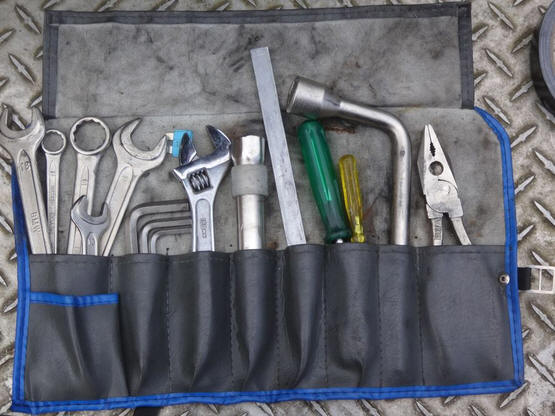
TOOLKIT - The factory toolkit that came with the bike was only missing two Allen wrenches for me to make it complete again.
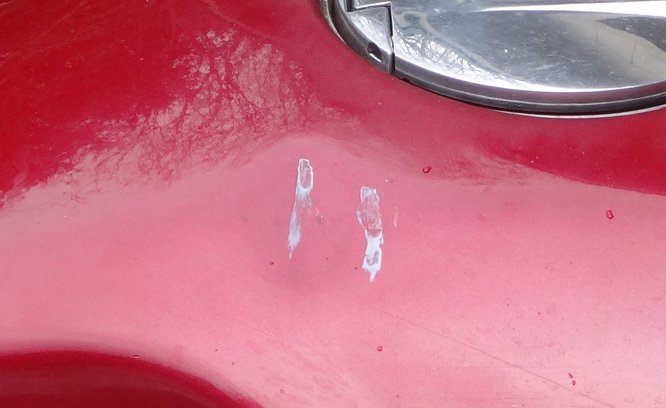
One Glaring Flaw: The one remaining issue with this K75 is a really ugly tank dent. I'll just live with that for now. It's a nice K75 aside from that. At least the dent is covered up by the tank bag when I'm touring.
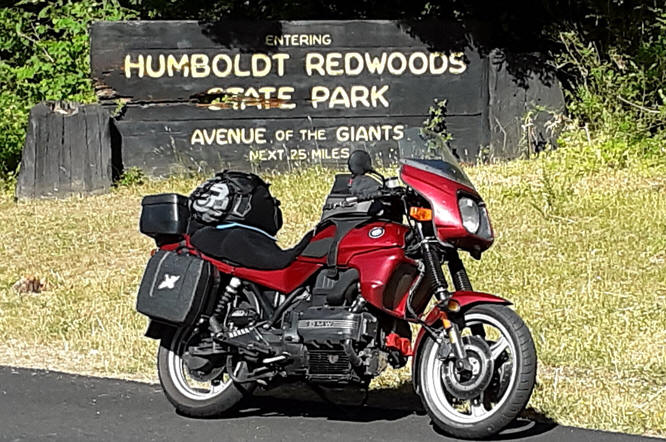
First Long Ride: In June of 2021 I took the K75 for a 2,000 mile ride down the pacific coast to The Bay Area and back. It ran flawlessly and was a pleasure to ride. I'll probably keep this K75 for a while.
© 2021 Drake Smith - Please do not use or reproduce this elsewhere. Feel free to link to it though. |
![]()

 .
.