![]()
|
© 2021 Drake Smith - Please do not use or reproduce this elsewhere. Feel free to link to it though. Windscreen Switch Rehab 61312306058
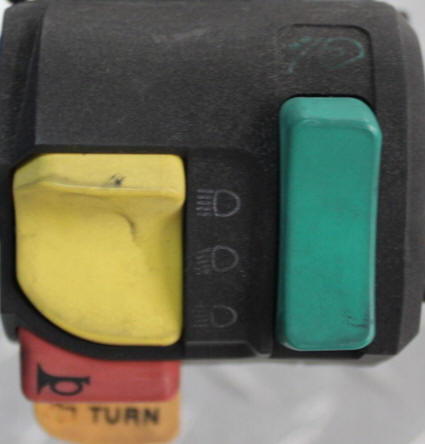
After many miles the windscreen switch built into the left combination switch of later K1100LTs can become sticky and/or unresponsive. It is possible to take the switch apart and rehab it so that it functions "like new" again. If you have an earlier K75RT or K1100LT with the windscreen switch in the center of the handlebars then instructions on how to rehab that switch can be found at this link. Tools needed:
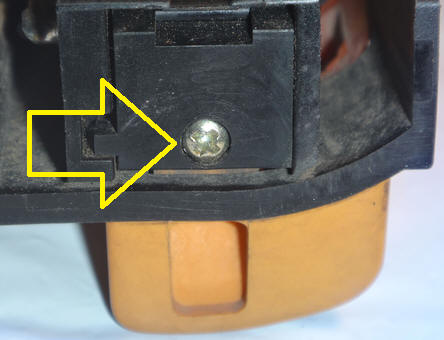
Warning: There are many tiny bits (screws, springs, pins and a ball bearing) that can be easily lost when doing this. Therefore, I strongly advise that you remove the switch from the bike and do this at your workbench because if you drop and lose any of these tiny parts in the garage then you have just made useless a switch that costs $270 new from a dealer. If you want do do this "in situ" on the bike then placing a shoebox or similar container under the switch while working on it is a good idea to catch any tiny parts that might get dropped. (But you really should do it at the workbench.) 1 - Remove switch from clutch perch: There's a small Phillips screw at the bottom center that holds the switch to the clutch perch. It can be sticky so use a good screwdriver and apply lots of pressure to initially break it free. If you don't then you might strip the head of the screw.
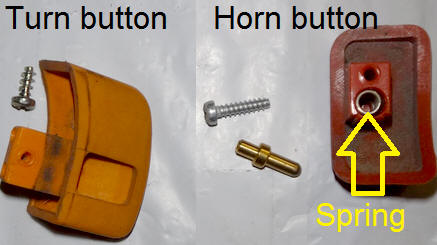
After that one screw is removed the switch lifts off of the clutch perch. You'll then need to remove the gas tank to disconnect the switch from the main wiring harness so that you can take the combination switch to the workbench. 2 - Remove the turn signal and horn buttons: The turn signal button is held on by a small Phillips screw in the back. Once this screw is removed you can wiggle the button out.
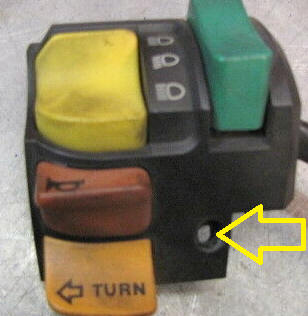
The horn button is held on by a small screw that can be accessed via a hole inside the back of the switch assembly. It's easiest to to do this if you depress the horn button while removing the screw. Note the spring and rod where the horn button mounts. (When putting the horn button back on the long end of the pin goes into the switch, the short end goes into the spring in the button.)
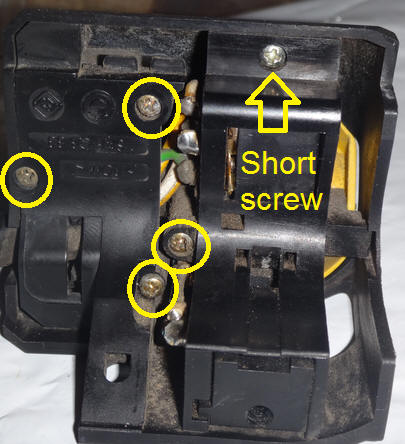
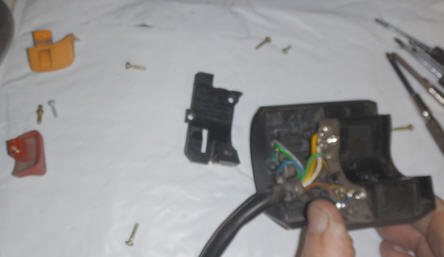
3 - Remove the 5 screws that hold the switch together: There are different types of Phillips screws used so note the location of each screw when removing them.
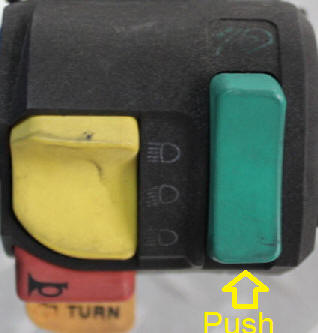
4 - Remove the switches from housing: The switch is comprised of two switch subassemblies, one switch for the headlight hi/lo and the other switch for the windscreen up/down. The headlight switch should just slide out. To remove the windscreen switch push up on the bottom of the switch button and wiggle it out of the housing.
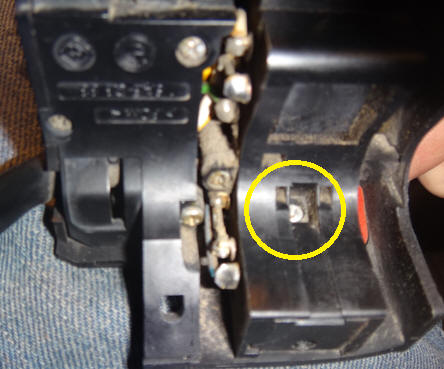
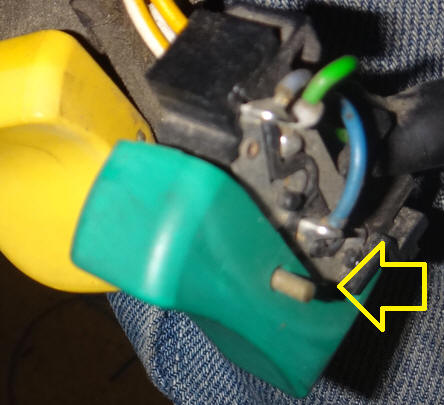
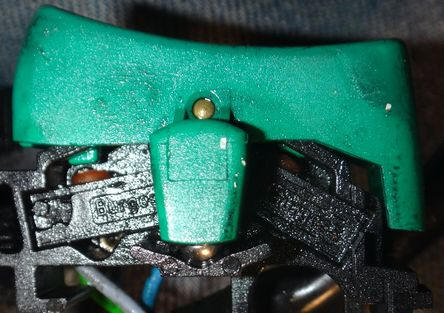
5 - Push the pivot pin out: The windscreen switch pivots on a pin in its center. While pushing down on the center of the button, push that pin out with a sturdy pin or tiny screwdriver. If the pivot pin has worked its way partially out like the one shown below then needle nose pliers can be used to extract the pin. Be careful at this stage as this is when a small ball bearing can escape and roll off into oblivion.
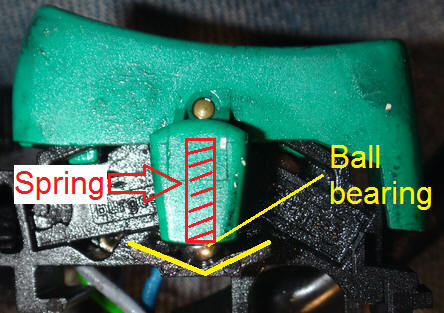
The windscreen switch re-centers itself via a spring and ball bearing on one side. The middle of the "V" shown below is the neutral switch position.
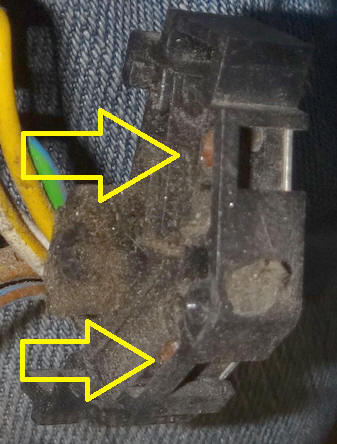
6 - Clean and lubricate: Clean out any dirt or dust that has accumulated in the "V." There are momentary micro-switches at the top and bottom of the windscreen switch. Spray some silicone lubricant into each one of those from the side.
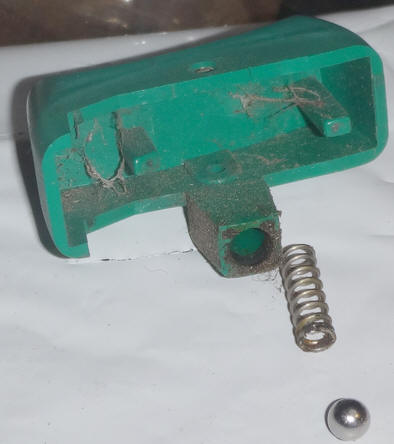
7 - Reassemble the switch: Place the ball bearing in the bottom of the "V" and put the spring back into the switch button. Push the button back on and wiggle it around until you can push the pivot pin back through. Make sure that the pivot pin is side-to-side centered in the button.
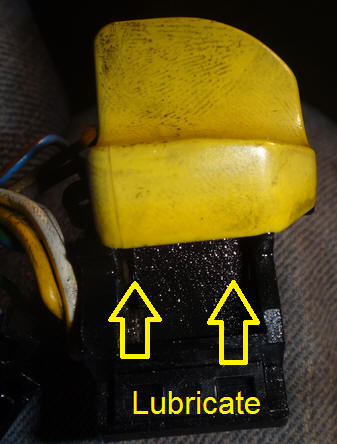
8 - Lubricate the headlight switch: Similar to the windscreen switch, the headlight switch pivots on a pin. It has some tiny springs and other small movable parts in it. Unless it is having serious issues it is not worth taking apart. Just spray some silicone lubricant into the sides of it and cycle it a few times.
9 - Reassemble and reinstall: Put the two switches back into the housing and reinstall the five screws that hold the switch together. Then reinstall the horn and turn signal buttons. As with disassembly, it's easiest to put the horn button screw in if the button is depressed. © 2021 Drake Smith - Please do not use or reproduce this elsewhere. Feel free to link to it though. |
![]()