![]()
|
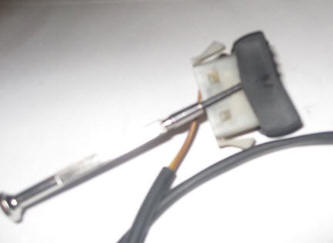
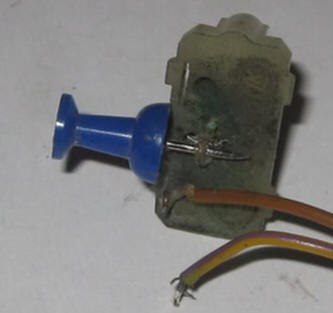
© 2013 Drake Smith - Please do not use or reproduce this elsewhere. Feel free to link to it though. K Bike Dash Switch Rehab This applies to the dash switches used in K75s, K100s, K1s, K1100s and a few R bikes of the same era. The switches can become dirty inside making them not operate so well or the wiring breaks where it's soldered to the terminals on the back of the switch. Here's a PDF of switch and switch insert part numbers: Step 1) Remove the switch from it's slot. If mounted in one of the soft dash pads, with a little wiggling you can usually pull them out from the front. If they're mounted in hard plastic then you'll need to use a small screwdriver or whatever from behind to depress the prongs that hold the switch in place. Step 2) Disconnect the switch from the wiring harness. I usually do the switch rehab in situ on the bike but there are tiny bits to lose so I'd recommend doing this at the workbench your first time out. Step 3) Use small screwdrivers on both sides to pry the top part of the switch off. It pivots on a couple of nylon nipples. It's easiest to pop both sides at once which is why I use two screwdrivers.
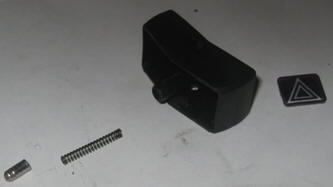
This is the step where you can lose tiny bits. In the rocker is a little tube holding a spring and a little part at the end which, when translated into English by German engineers, is called the little hollow phallus.
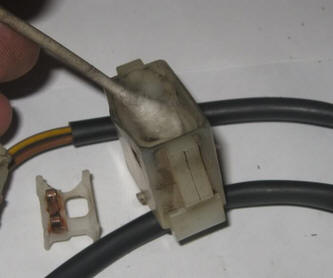
(Optional) If the graphic insert on the switch is worn you can push it out from the inside. A replacement can be had from BMW for about $4-5. They just pop right back in and make the switch look brand new again. Step 4) From the side pry the back off of the switch. For some reason it seems to go easier if you do it on the side with the wire terminals. Now you see the little slider inside and understand how the switch works. Step 5) Clean the contacts on the slider and the back of the switch. I usually just scrape them with one of my little screwdrivers until I see shiny copper. Step 6) Clean/lubricate the switch. Soak a Q-tiip in silicone, WD-40 or whatever you lubricant of choice is. Clean out the inside of the switch where the slider goes and the sides of the slider.
Also do the upper outside of the switch body and the inside of the rocker.
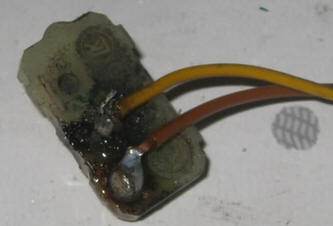
Step 7) Check the wiring. If a few strands of the wire have broken or it's broken altogether then it's time to get the soldering iron out. Step 8) Melt the solder on the terminal and remove the old wire. You have to be careful doing this so as not to heat the terminal so much that it melts the plastic it's mounted in. When you melt the solder, clean out the hole it in with a tack or needle to make room for the wire to pass through.
Step 9) Cut the old end of the wire off and strip about 1/4 inch. It helps to put some soldering flux on the wire. Then put it through the hole and resolder it.
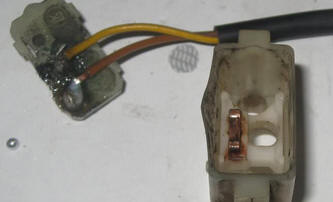
Step 10) Put the slider in and snap the back on.
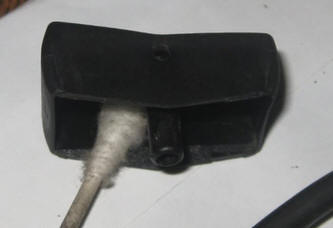
Step 11) Put the rocker back on. Before you do this use a pen or something to get the slider in a halfway position. Put the rocker on it's back (otherwise the little hollow phallus will escape) and push the switch straight into it.
© 2013 Drake Smith - Please do not use or reproduce this elsewhere. Feel free to link to it though. |
![]()