![]()
|
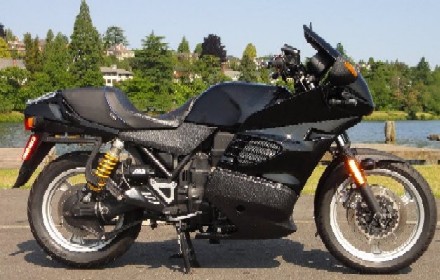
Building the K75F
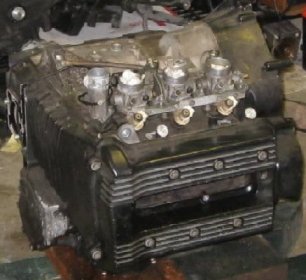
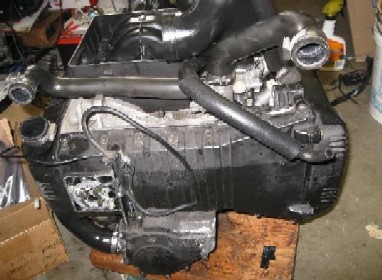
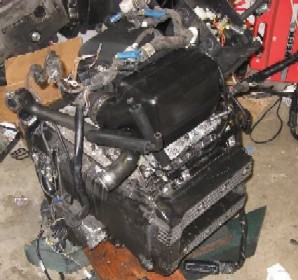
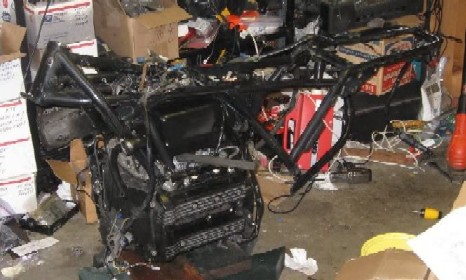
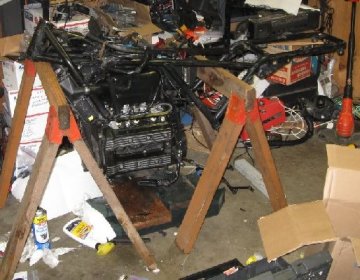
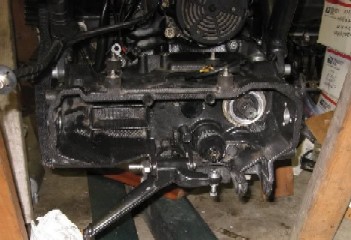
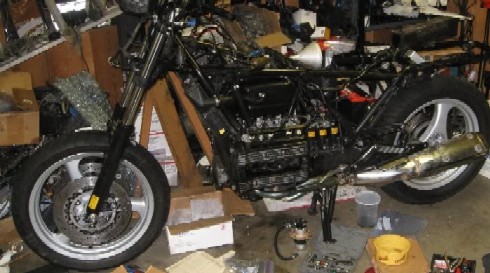
This K75 is a Frankenbrick built from the parts of who knows how many different models and years of K bikes. While I was building it I kept a running record of my progress on the ADVrider forum. Then all of my Photobucket picture links got broken when I was reorganizing my pictures there so that thread is pretty useless now. I've parted a few K bikes and rebuilt and resurrected several different ones but I had a K75 spare engine laying around and one day the notion of building a K bike from scratch occurred to me. Since at the time I owned a K1100LT and a K1100RS it seemed like a good idea to add a K75 to the stable as a "city" bike. I wanted it to have better front brakes so I decided to build it with a K1100 front end. I have a basement full of K parts but there were a few I was missing so I spent about a year watching for low mile/good condition parts on Fleabay and other places to pick up the remaining needed parts on the cheap. I've always thought that the stock front brakes were not that great on K75s so I really became committed to this endeavor when I picked up a nice low mile set of K1100 forks for only $10.49 on Fleabay. On January 30, 2010, I decided it was time to get started. Here's the engine I had lying around in the basement. I picked it up on the local Craig's List from a guy who had just sold his K75 and was getting rid of his parts stash. I got this engine and a bunch of other miscellaneous parts for $150. Here's what it looked like when I set it on the basement floor to get started on this project:
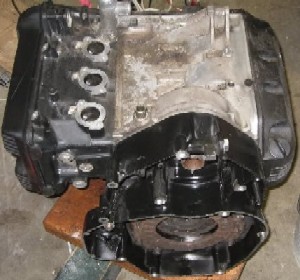
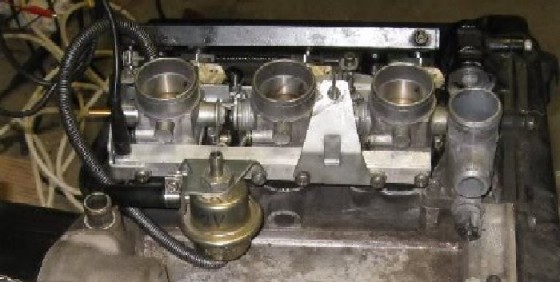
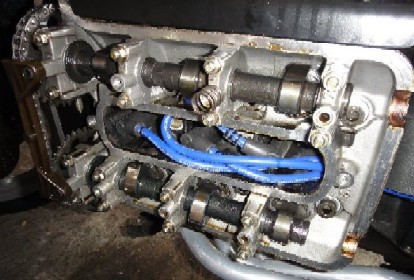
The first step was to remove the old throttle bodies and fuel injectors and get it cleaned up a bit:
I'm not anal retentive about getting things perfectly clean, especially if it will be hidden but I do like to get stuff as clean as possible without putting in excessive effort. These are some throttle bodies that I picked up cheaply on Fleabay. I'm not sure how old they are but they'd been cleaned and looked to be in good shape so I used them.
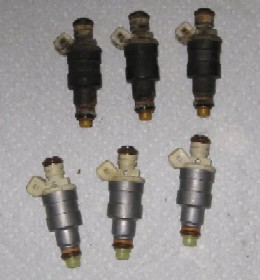
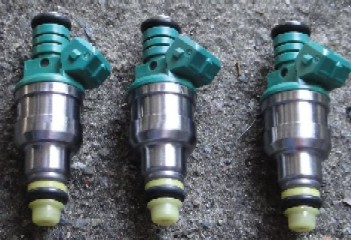
The chances of the fuel injectors being worth a toot after sitting for so many years was probably between zero and none. Here's the old ones and a set I had reconditioned for this project the prior month.
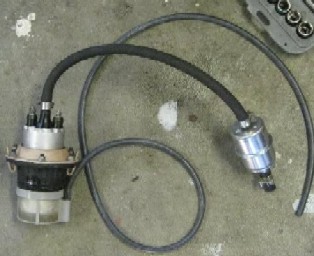
Then I installed the fuel pressure regulator on the back of the TBs. I replaced the vacuum hose with a new one. I was going to get a new one from BMW but they cost like $20. I just used generic vacuum hose and put the BMW springy thing around it.
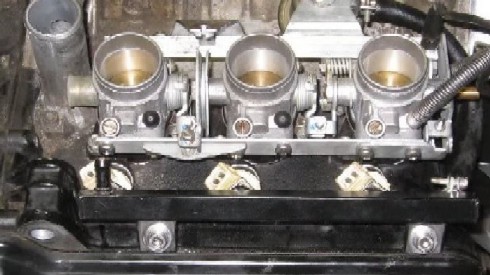
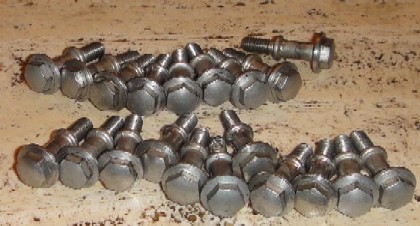
Then I installed the FIs and the fuel rail. You'll notice that the fuel rail is installed with stainless steel bolts. I used a lot of stainless steel hardware putting this bike together.
I looted the Hall Effect Sensor off of this engine and sold it as a part a while back. But I had this known good one from a 52k bike I parted out several years ago. In she went:
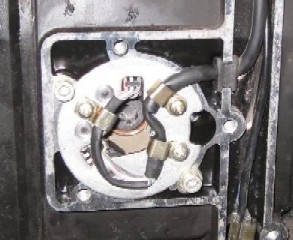
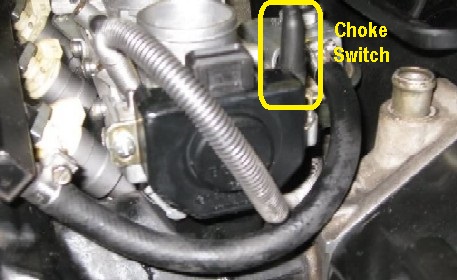
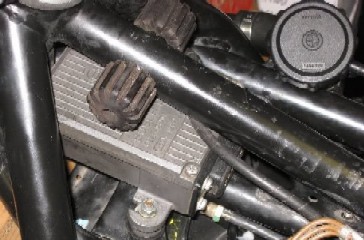
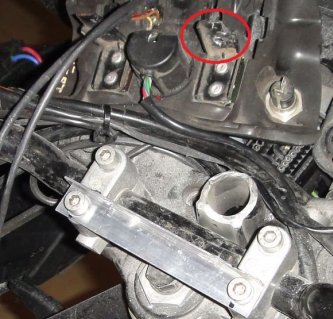
Then I installed the throttle position switch. Here's a little K bike secret: The Ks up through 1990 had an idiot light in the instrument cluster to remind you if the choke was on. They stopped that in 1991 but everything is there to make it work in the wiring harness and instrument cluster. All you have to do is add one of the BMW piston switches (like the ones for the front brake switch and clutch switch) at the back of where the choke cable connects. There's a little spacer you need too.
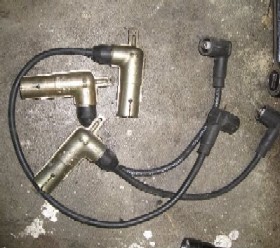
I found these spark plugs leads in my stash. They looked pretty clean so I doubt they have many miles on them. I was going to replace the plugs too but they looked pretty nice so I didn't bother. I dealt with the spark plugs later and replaced them with NGK iridium spark plugs.
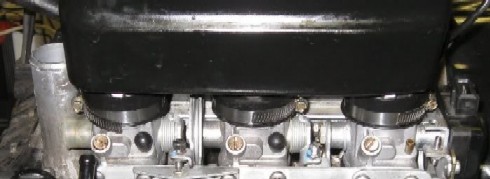
Then I installed the air plenum on the top of the TBs. BMW uses those dumbass one-use Oetiker clamps but I use these thin stainless steel hose clamps so no special tools are required.
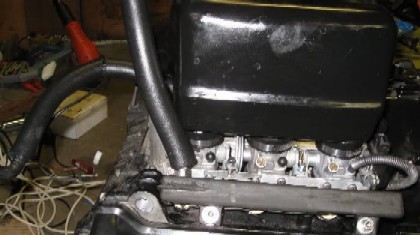
The crank case breather hose is another part that gets old. Figured it was best to install a brand new one.
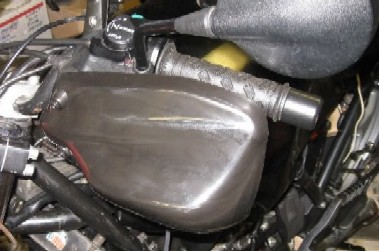
One of the reasons that the tank gets so hot on K bikes is that the return hose from the fuel pressure regulator is routed right behind the radiator and this takes heated gas back to the tank. I insulated the entirety of that return line. Since eventually the fuel rail and injectors will be covered (more on that later) I also insulated the other fuel line and the fuel rail.
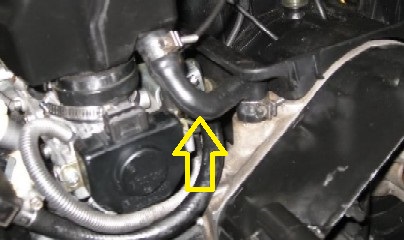
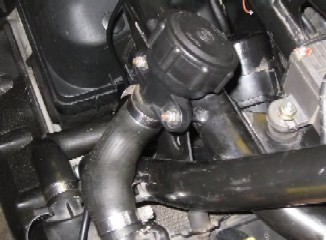
Then I installed the radiator hoses. That one that goes through the hole in the crank case cover is really a bugger to get through the hole but using Armor All as lubricant and folding it over like so made that a bit easier.
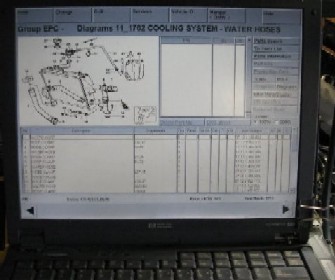
I had my old Pentium II laptop in my basement workroom. It's good for Internet radio but I've also got the BMW parts catalog loaded on it. It came in handy so I didn't have to guess which size hose clamps (BMW has a million sizes of them) to use for the radiator hose connections.
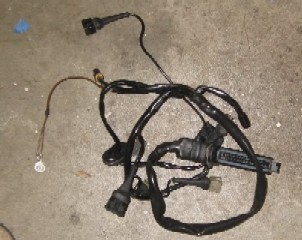
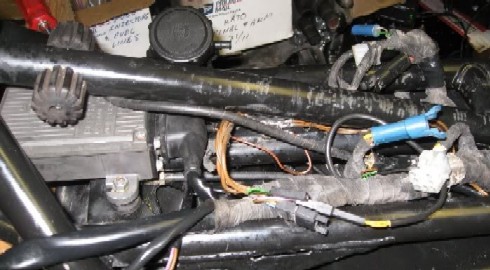
Before putting the frame on, I installed the fuel injection wiring harness. It's much easier to hook up the temp sensor and mass airflow sensor before the frame is attached. The best FI wiring harness I had had 100k on it but I test rode the donor bike before I parted it out so I was sure it worked. It also looked pretty good when I cleaned it up.
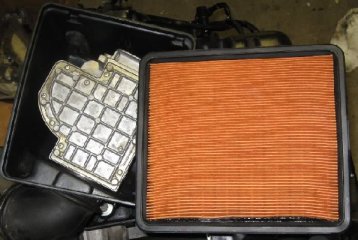
I scored the mass air flow sensor on eBay for $9.99. It’s only got 18k on it. The air filter is an almost new one that came out of one of my parts bikes. It's probably only got another 50-60k in it. LOL
Now it was time to put the frame on. Life is easier if you lay the wiring harness on top of the engine first. This is a nice main wiring harness from a 92 with only 24k. Since the bike would have ABS, it's an ABS wiring harness. (More on the ABS later.)
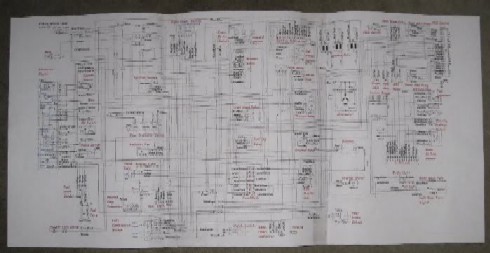
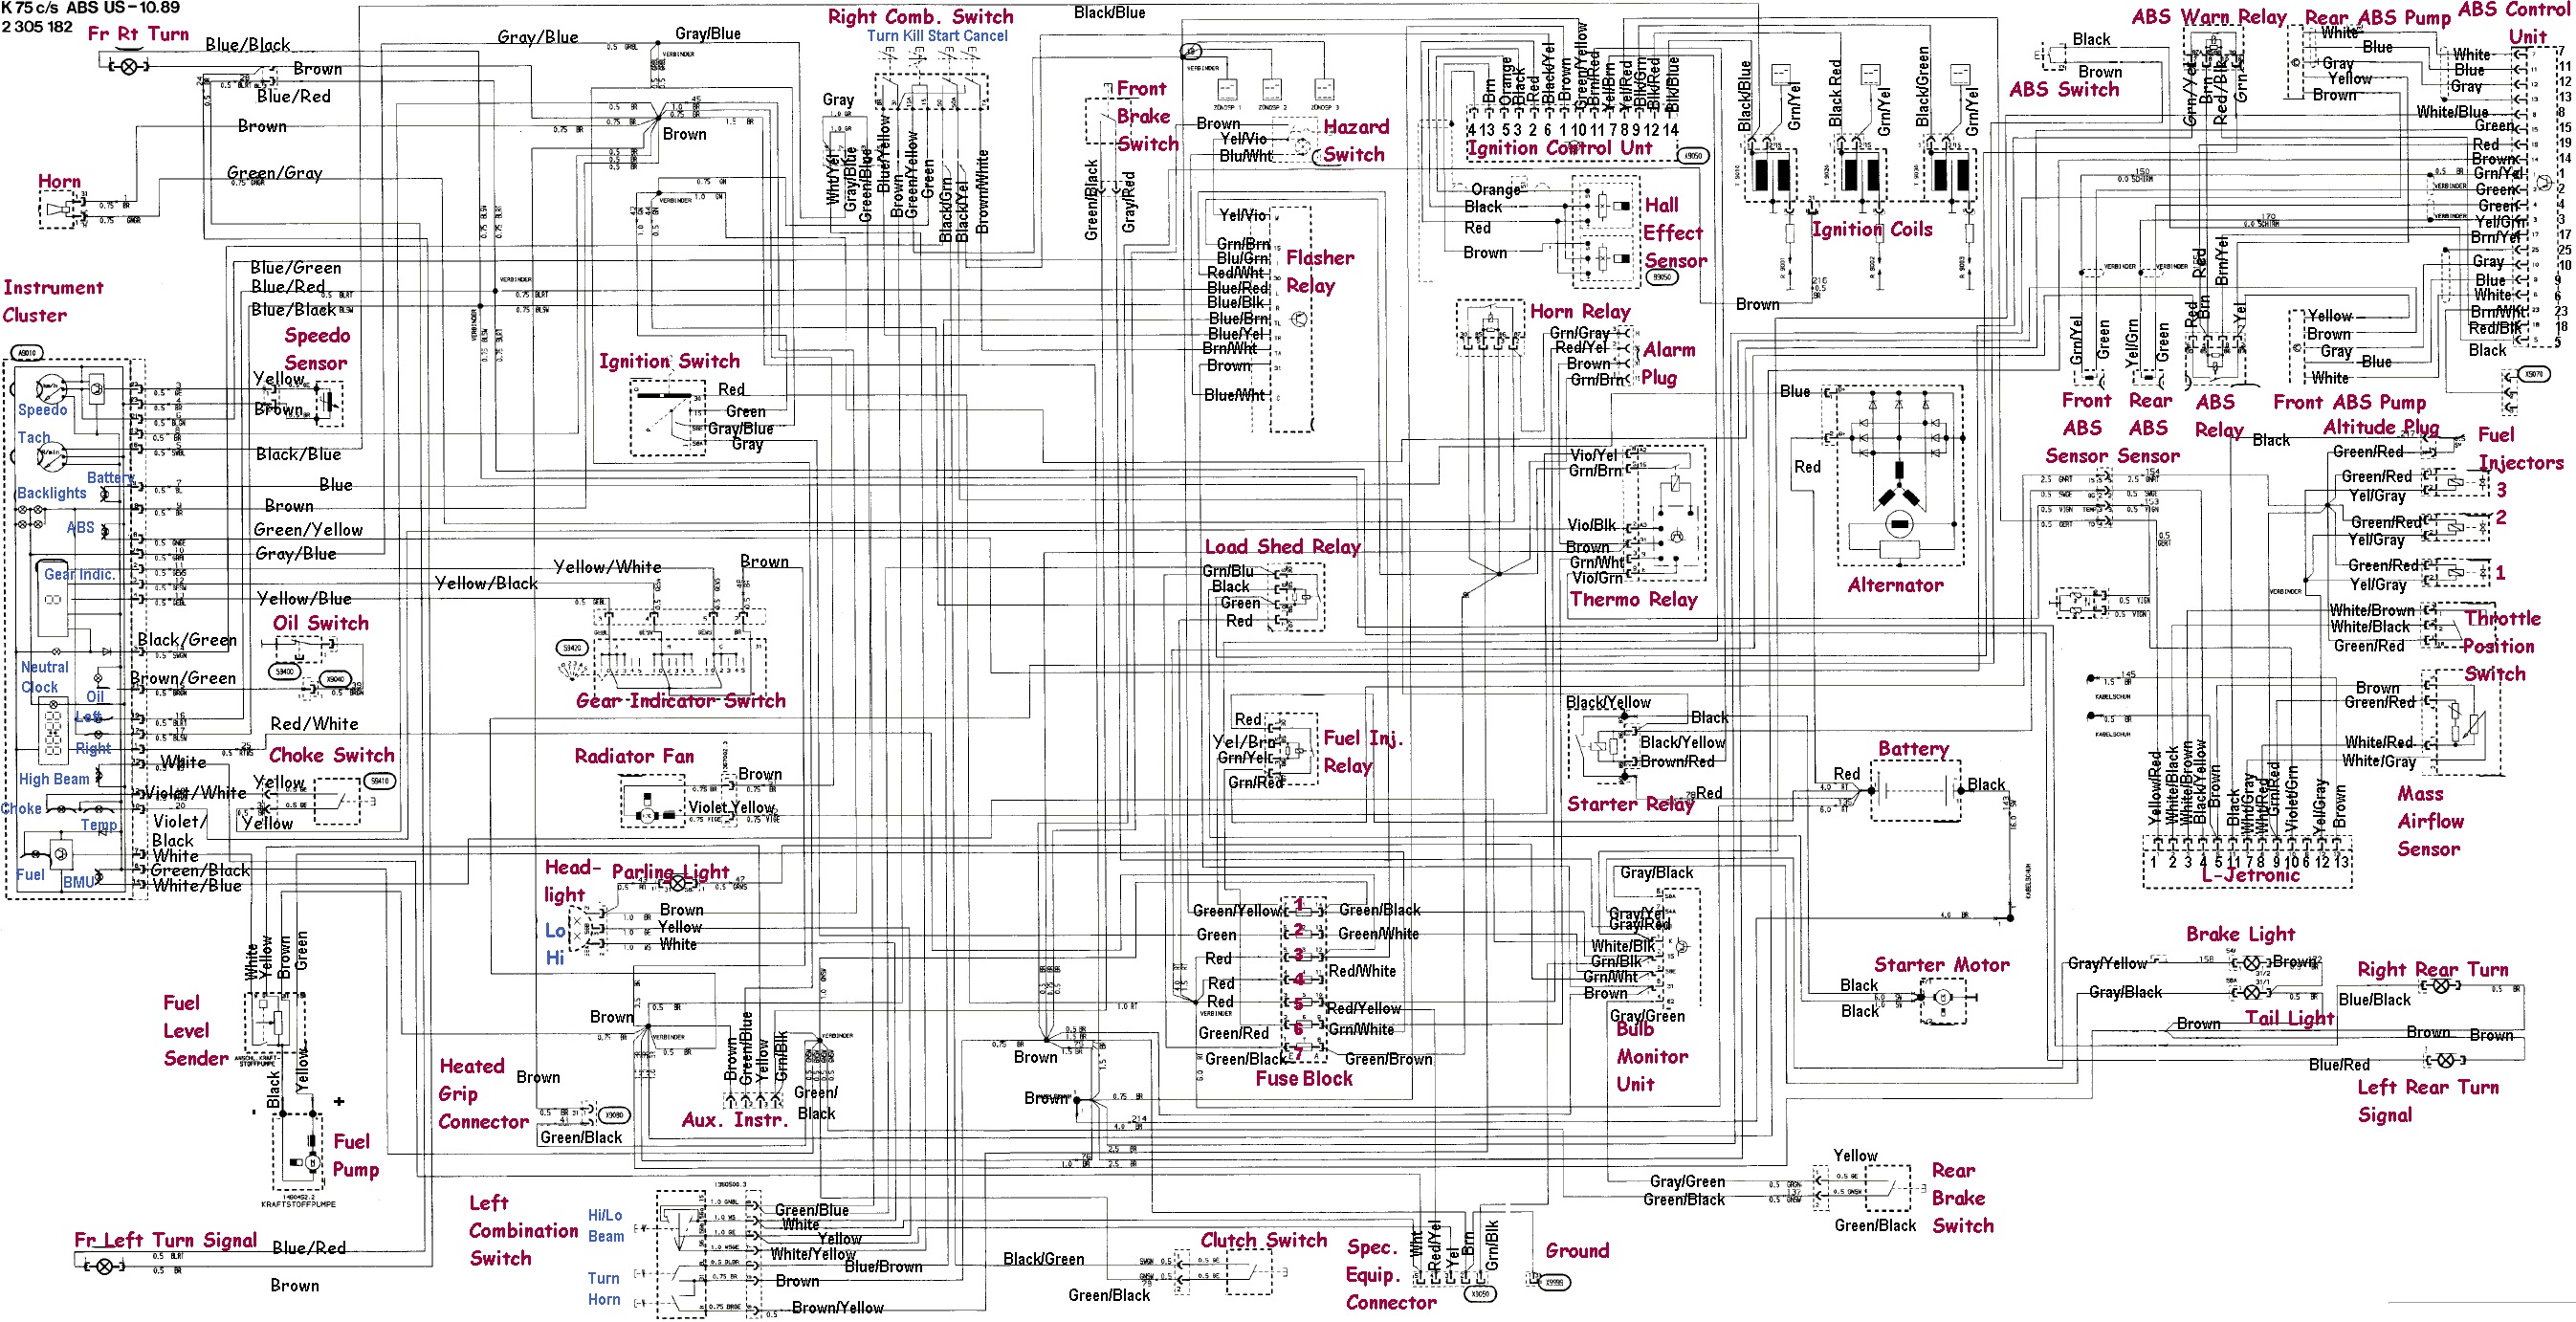
When I had some spare time over the prior Christmas, I took the BMW wiring diagram and re-labeled it in English.
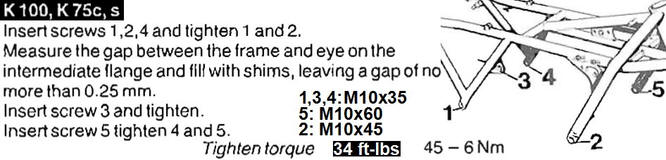
OK, time to drop the frame on. What works for me is to get the two front bolts on and get them fairly tight. Then I lift up the back of the frame to get the wiring harness and relay box in their proper places. I've since learned from the BMW manual that the correct way to install the frame is after the transmission has been attached:
I scored the frame from a salvager for $150 shipped with a clean title. It's from a 1987 K75S and in good shape. It's only got a few paint nicks here and there so I didn't bother having it repainted. If I'd realized at the time how nice this K75 would turn out then I would've had the frame repainted or powder coated but it's not worth tearing the bike apart to do that now.
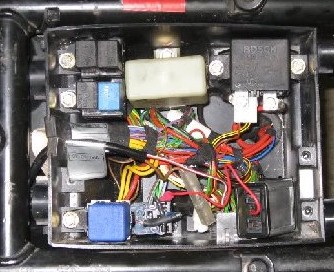
Time to populate the relay box. Since I planned to be running LED turn signals, brake and tail lights, I swapped in a Kisan SignalMinder for the flasher relay and jumped the connector terminals to get rid of the bulb monitor unit.
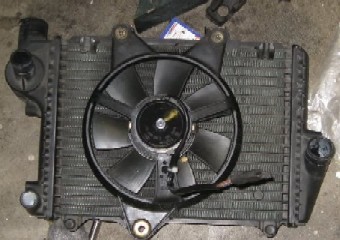
Up to this point I'd done everything in the right order until I realized, DOH!, I forgot to install the metal brake lines for the front ABS before I put the frame and wiring harness on. Fortunately all I had to do was lift the rear of the frame off of the engine and I was able to squeeze them in. Then I installed the fan on the radiator.
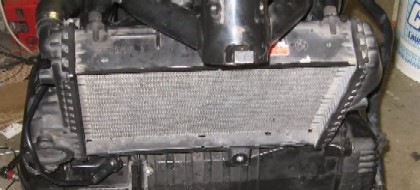
And mounted the radiator to the engine and frame.
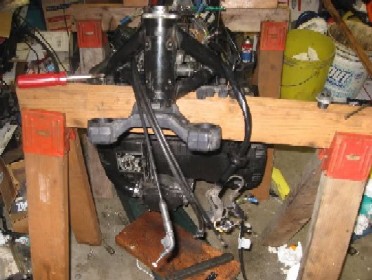
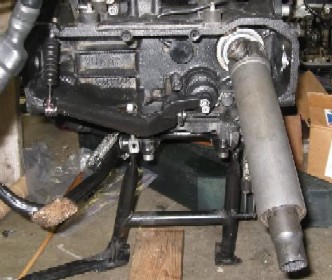
Now it was time for the engine to shed it's earthly bonds and get some legs:
I installed the ICU as a random act and installed the cooling system filler hose/cap as well.
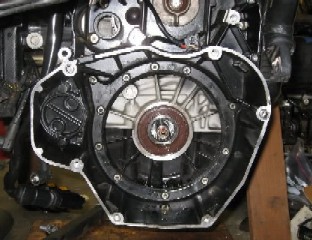
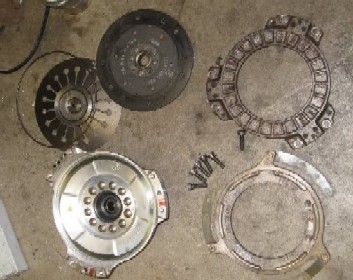
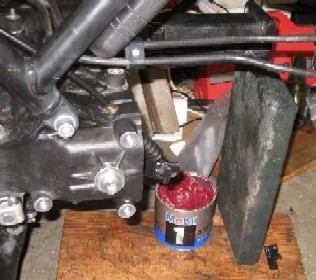
Since the engine had sat for sometime, there was a good chance that the clutch nut O-ring had gone dry and might be leaking oil onto the dry clutch if not replaced. So I removed the clutch and clutch housing so I could replace the O-Ring. To my surprise, the old O-ring actually had some life in it but it was a little hard so it was worth the extra effort to replace it in order to keep it from causing problems in the future.
While I had the clutch off, I cleaned the parts. Here are the clutch parts all nice and clean: the clutch housing, diaphragm spring, ring the diaphragm spring rides on, pressure plates and clutch plate:
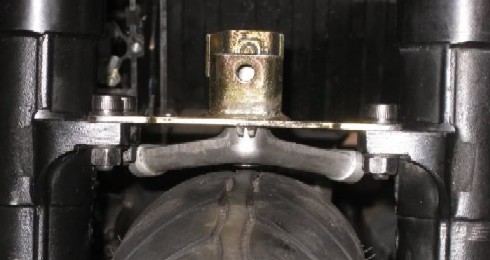
I installed a good used clutch plate that measures 5.25mm. Factory specs are 4.5-5.55mm so this one’s got a lot of life left in it. In order to torque the clutch nut without it turning itself and the motor, you’re supposed to have some obtuse (and most likely ungodly expensive) “BMW special tool” to hold the clutch housing in place. I find that a scrap of wood wedged in the bellhousing works fine though.
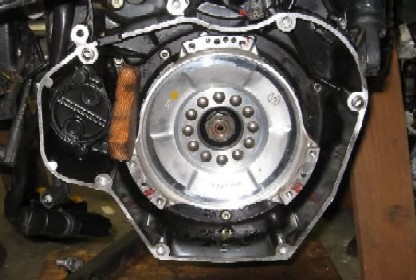
Then I installed the clutch assembly. At this point I didn't tighten the six clutch bolts fully – more on that later.
Next up, the alternator. Until model year 94, K bikes came with a 32 amp alternator. This was adequate for running the bike, heated grips and some heated gear but if you wanted to do any serious aux lighting it wouldn’t cut the mustard. In 94 BMW switched to a 50 amp alternator which has plenty of extra juice. Of course I upgraded this bike to a 50 amp alternator:
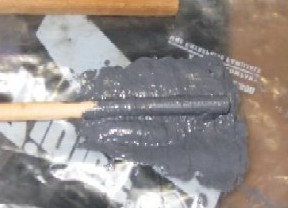
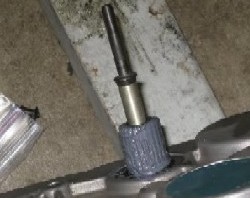
Next it was time to install the transmission. I scored a 40k 1992 K75RT transmission on eBay for $99.99 because nobody else bid on it. It was in great shape and a good score at that price. Even though it was relatively clean those still tend to be the part that collects the most grunge so I took it outside and gave it a good detailing with engine degreaser. I also removed the clutch arm in order to clean the accumulated grease off it and regrease it’s pivot bearings. Finally it was time to install the transmission, a major milestone. In order to center the clutch plate so the transmission can be mounted, once again you’re supposed to have another BMW special tool. However, by tightening the clutch bolts so that there’s just enough friction to hold it in place and centering it by hand around the edges you can get it pretty close. Then I slide the transmission on and wiggle things around and use the transmission itself as the clutch centering tool. Then I pull the transmission straight back and diagonally tighten down the six clutch bolts. Then it was time to lube the splines. I used a 50/50 blend of Honda Moly 60 and Wurth 3000. The Honda stuff does the lubing and the STICKY AS HELL Wurth stuff keeps it in place longer. (Don’t mix it in the palm of your hand like I did the first time I used it. It took forever to clean it off of my hands.) I’ve done so many spline lubes on different Ks that I actually used up the last of a tube of Honda Moly 60!
Splines lubed, clutch pushrod inserted and ready to be installed:
Here’s the transmission installed and bolted to the bellhousing and frame:
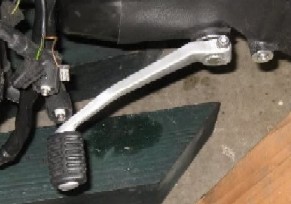
I installed the shift lever and verified that it shifts well though all gears:
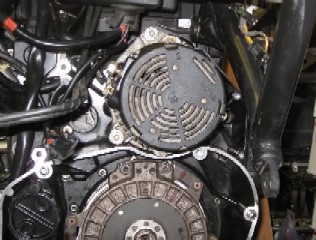
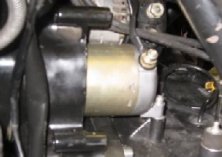
I then installed a 60k starter from a 96 K1100RS-SE that I parted a few years back:
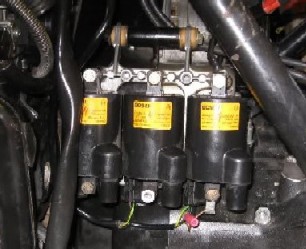
Then I installed the coils. The Posi-Tap on the #3 coil wire is for the Audiovox cruise control I installed.
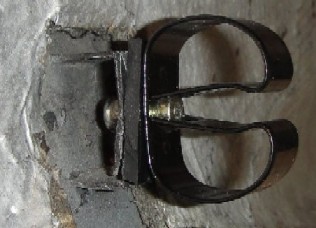
This frame came with a seat lock/K bike worthless helmet lock installed. I removed that to rekey the lock core of it later to match the ignition key:
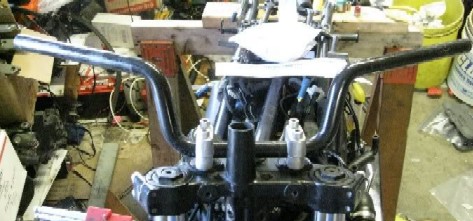
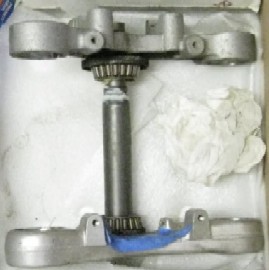
I hooked up the choke and throttle cables and routed the clutch cable in preparation for installing the handlebars. I also installed the lower fork tree preliminarily to see in what condition the bearings and races are. The bearings were a little stiff so I repacked them with some Mobil 1 synthetic bearing grease but I was happy to discover that the bearing races were good and there wasn't a “notch” in the center which is common on higher mile frames. One less thing to have to replace.
I also hooked up the grounds for the wiring harnesses, connected the ignition control unit and hooked up the Hall Effect Sensor to the ICU:
I found the nicest choke perch I had and actually found a choke lever that didn’t have the typical paint rubbed off of the tip. The plastic cap is brand new. I also found a nice unscratched straight clutch lever in my stash.
I hooked up the clutch switch (after testing it) and then the choke and throttle cables. A couple of years ago I made myself a little 75mm long tool for adjusting the clutch cable:
Then I adjusted the choke cable and the throttle position switch at the throttle bodies.
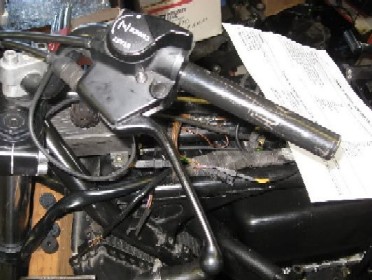
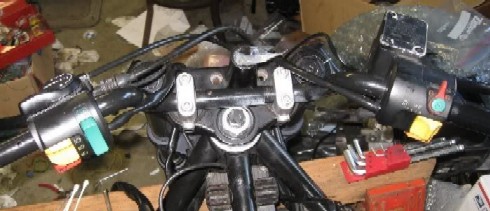
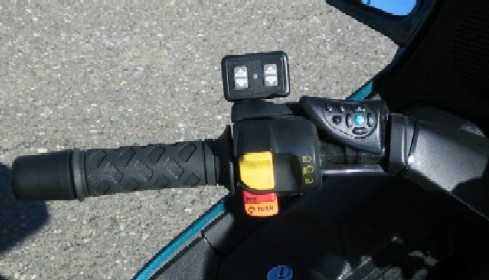
Then I installed the left and right combination switches. The right is a “Euro switch” that allows you to control the parking light and headlight instead of them always being on which is how US bikes came. That one’s actually from an R1100 so I had to graft it to a K75 wiring harness connector but I got it cheap on eBay ($26) and I was doing the other switch anyhow. The left combination switch is from an K1100LT and has a green windscreen momentary up/down switch. I grafted the regular switch wires to a K75 wiring harness connector. The green switch will be wired up to control the Audiovox cruise control with the up button being accelerate/resume/tap up and the bottom being set/coast/tap down. I used to make a mounting bracket and install the Audiovox control pad above the choke until I came up with this bright idea. It not only looks better because it uses OEM switches but it’s also ergonomically better with easy thumb control. It’s also actually waterproof.
The old way:
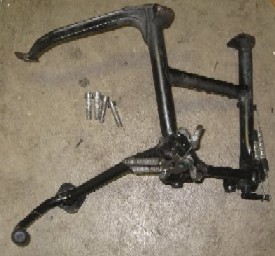
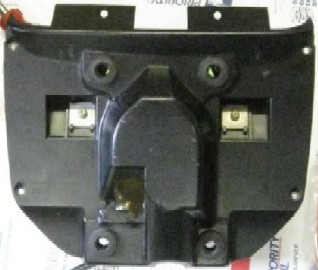
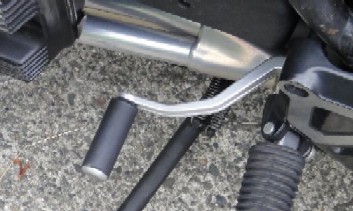
I got the K1100 master cylinder, throttle cable and unscathed brake lever from a $50 eBay auction from another local K rider. The paint was bad on the cover so I bought a new one from BMW. Next I wanted to get it off of the rear sawhorse first to get it out of the way and make working back there easier. It took a while to disassemble, detail, clean, regrease (using water resistant marine grease) and re-assemble the center and side stand assembly. I’m using the side and center stands from a 4 valve K bike for several reasons: a) Unlike the K75 center stand, it’s designed so that the center stand tubes don’t fill up with water, rust and fail, causing your bike to take an unexpected and expensive nap. b) The arm that sticks out for your foot is also reinforced at the base and lasts longer.
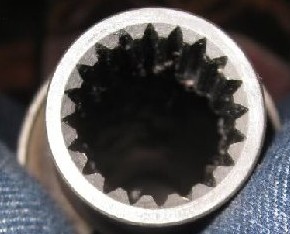
I considered making the bike a paralever but decided not to for a few reasons. Since the K75 has less power than a K100, the monolever jacking effect is not as noticeable on a K75. (Or so I thought.) Next, I’d lose torque since I’d drop the rear end ratio from 3.2 to the 2.91 on an K1100LT paralever final drive. I got the final drive and drive shaft from a 100k 91 K75S I parted a few years back. When taking it apart I was pleased to find that the drive shaft and final drive were not original and pretty close to new. The bike was stored under a cover outdoors for a couple of years (PO had a kid and quit riding) so some of the paint on the edges is a little worn but I’ll use some black stove polish on that later to spiff it up. Yummy splines:
There can’t be more than a few thousand miles on those. I cleaned and lubed the front drive shaft splines with the same 50/50 mix I use on the transmission input splines. I installed the drive shaft using a hammer and a block of wood to tap it past the circlip in drive shaft splines.
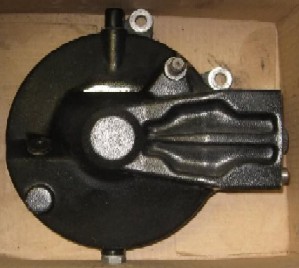
I cleaned up and detailed the best swing arm I had and installed that after cleaning and regressing the pivots. Once the rubber boot at the front of the swing arm is pushed on, I support the rear with a block of wood because if you let it drop too far the boot can pop off and then you have to take it off and put it back on again. If the boot isn’t on right then it’s possible for the water to get into the swing arm.
Then I lubed it's splines and installed the final drive. I put a layer of the marine grease on the face of the final drive where it meets the swing arm to keep water out.
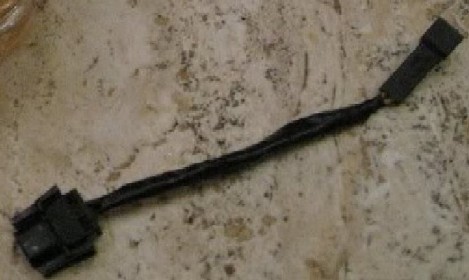
I forgot to mention that the 4 valve RS bikes use a different throttle cable so I had to modify the cable slightly and also where it mounts to the throttle bodies. My next objective was to get it running… until my common sense kicked in and I realized that if I was going to start it that it would be nice to have it rolling so I could roll its rear end back to the open basement door and not asphyxiate myself. The wheels/tires I used were from my K1100LT. They had some Michelin Mac 50s on them that are about a year and a half old and only had about 2,000 miles on them. I took them off of my LT when I put on a wider RS rear wheel and switched that bike to radial Pilot Road 2s. I also did a bunch of random electrical preparation for the electrical phase. The 4 valve bikes used a different brake switch so I spliced together some old connectors to make an adapter for the front brake switch by soldering and heat shrinking the connections.
Since the fork brace is from an RS and the LT wheel/tire combination has a taller profile I did run into a clearance issue and I couldn’t mount the wheel because the tire was hitting the mounting bolt for the brake Y. Ideally I’d use the gear from an LT but it was nothing that a little grinding of the fork brace and bolt head didn’t resolve. There's more clearance now than the picture shows, about a third of an inch.
Then I installed the rear wheel, threw on some headers, installed the left peg plate to hold the exhaust and then put a K75 exhaust on it. That’s not the exhaust I’d be using, it was just convenient. It was starting to look like a motorcycle.
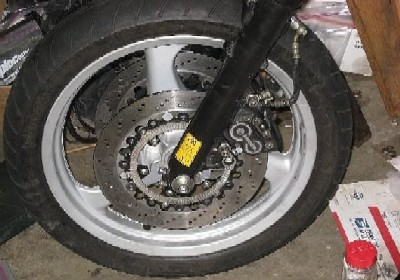
While I was at it I installed the front rotors. Got those off of eBay for $99. From the thickness and the fact that the bobbins for the floating rotors are in very good shape, I’d guess they don’t have very many miles. Maybe 10k or so, if that. For some reason the right one was mounted backwards on it’s carrier (during Oktoberfest?) so I had to take it apart and flip the rotor. I replaced the mounting bolts and bolts for the ABS ring with stainless steel gear (and the axle clamp bolts too.) Then I mounted the front calipers. I didn’t have the correct brake line to go from the Y to the ABS brake line but I did have a front brake line from a non-ABS K100RS4V so I decided to run that to the front master cylinder for the time being and deal with the ABS later.
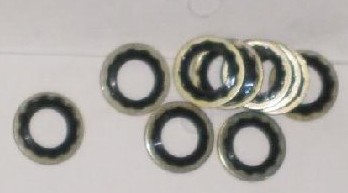
I was really looking forward to riding a K75 with good front brakes. I found these rubber centered banjo bolt washers somewhere on The Internet a while back. Thought I’d give them a try. (I found out later that they split when torqued and are pretty sucky so I would not use them again.)
Then I got the stuff for the fuel tank ready and installed it in a K100 tank along with a fuel level sender with a new O-ring.
Then came the moment of truth. Would it start? Of course. I ran it up to about 4,000 RPM. It sure seemed happy to be alive again and ready to hit the road. (Since the engine had been sitting for quite a few years, I sprayed some fogging oil into each of the cylinders before attempting to start it.)
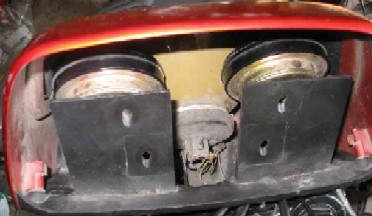
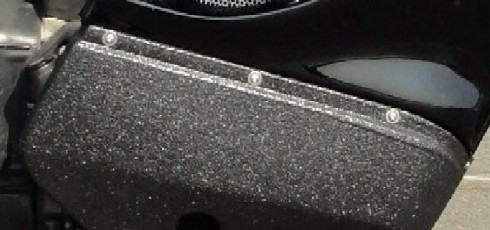
I synched the throttle bodies (which were actually pretty close from my when I just put the plugs in and turned each one out a turn and a half,) adjusted the idle to 1,000 RPM and verified that the TPS positioning was still good. I had a K75 belly pan on hand that came as an extra part with another K75 I'd bought a while back. However, the left "ear" had some nasty cracks and was barely hanging on. I solved that with a beefy three layer fiberglass reinforcement. The nice thing about Line-X truck bed liner I'd be using to "paint" it is that the fill and sand on the exterior of the cracks doesn't have to be wet-sanded or perfect since the texture of the truck bed liner hides any minor imperfections. Fiberglass repair:
Coated belly pan:
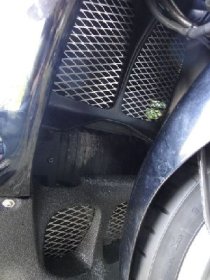
Since parts of the interior of the belly pan can be seen, I rattle canned that with some flat black spray paint. Then I installed the perforated stainless steel grill I made for it. (The radiator grill above it will be a matching one.)
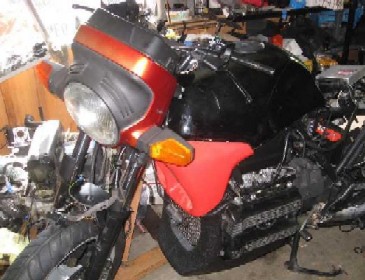
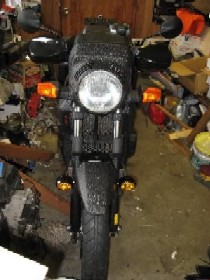
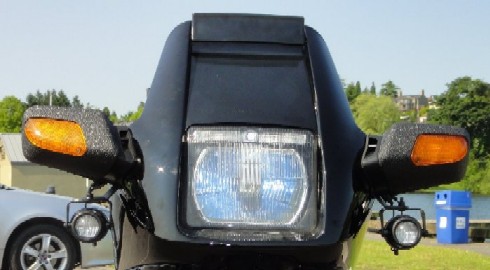
Initially I'd wanted to make it a naked bike so I used a headlight surround from a standard K100. I had a black K100 tank and tail cowl so I used those. And a K75 radiator cover. I had the radiator surround, the K100 fairing and the front fender halves done in Line-X to match the belly pan and then I had a "ruggedized" black Frankenbrick. Anyhow, here's what it looked like before the Line-X on the headlight cowl, radiator surround and fender pieces:
The K100 fairing came with that wimpy little scooter horn. With some creative Dremeling of the horns and adding some mounting brackets, I was able to squeeze a pair of the much better 135 dB Fiamm horns into the K100 fairing pointing down to help keep the latte-drinking, texting SUV soccer moms at bay.
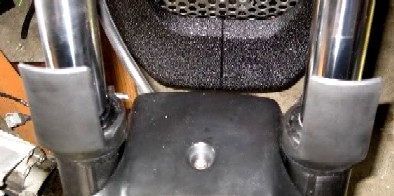
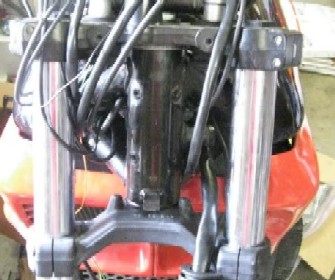
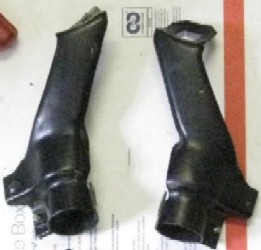
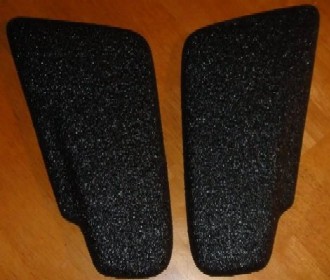
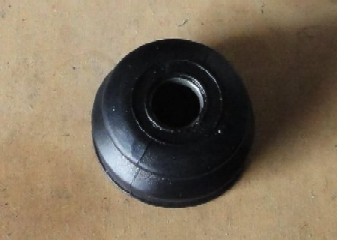
I installed these fork protectors:
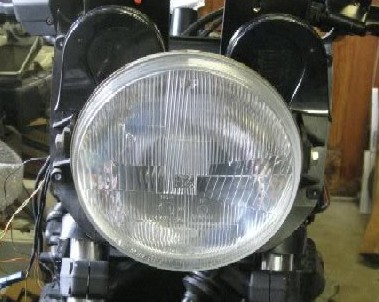
I rekeyed the gas cap and seat/helmet lock to match the ignition key. My next challenge was mounting the K100 headlight on the K100RS4V forks. It's really easy on two valve K bike forks since they have four nice mounting holes:
that are perfect for the four mounting holes on the headlight assembly:
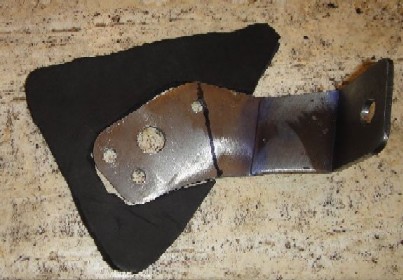
However, the K100RS4V fork trees are spread further apart and don't have any bottom holes either. Really wasn't sure how to address that and pondered a few different solutions like custom brackets.
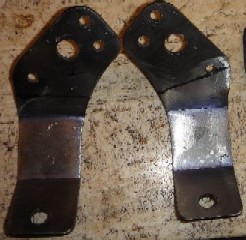
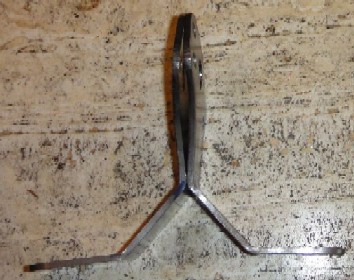
I needed to make sure this was resolved before spending money to get the headlight cowl and radiator grill coated in Line-X. I found these in my parts stash. I think they're for mounting a headlight on a naked K75. I trimmed them, inverted them and, voila! They have holes right where I needed them:
Now I had a nice four point headlight mount and could install the K100 headlight:
Another issue was that there wasn't room for the cables and wires between the headlight and upper fork tree. That was easily resolved by adding some spacers.
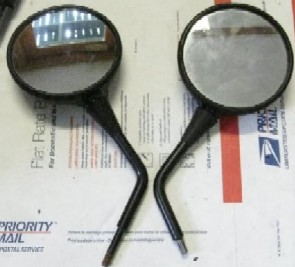
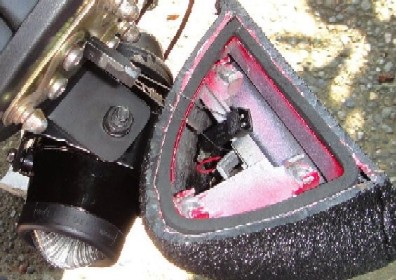
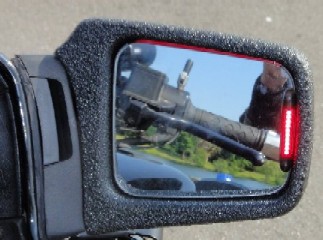
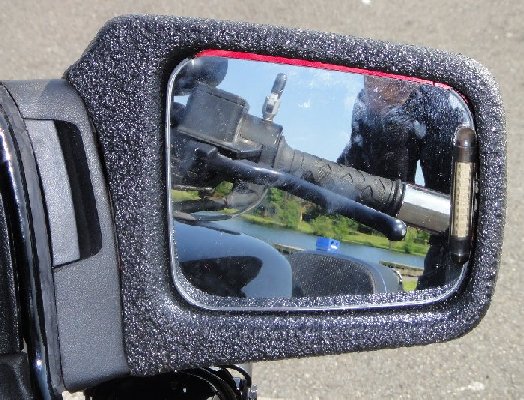
Both of the mirrors I had used to be like the one on the left that go through the clutch and throttles perches and have a nut on the bottom. I threaded and shortened the mirror on the right so I could install it in the threaded hole next to the K1100 master cylinder.
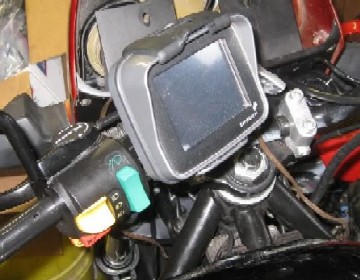
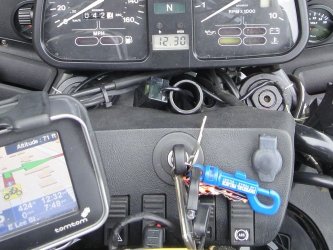
Handlebar mount for my TomTom Rider:
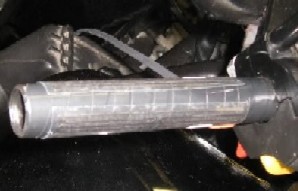
Symtec heated grips:
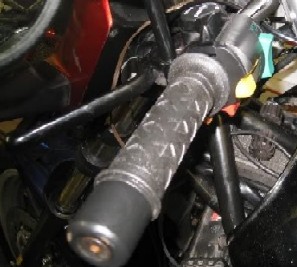
My favorite ProGrip gel grips and K100 bar ends. The bar ends weren't perfect but I ended up dealing with that later.
And then the R1100GS hand guards. Since the R1100 uses the same front master cylinder and clutch perch as a K1100 they bolted right up.
Then I installed a couple of more parts and it was ready to ride...
Then I finally got it out of the basement and took it out for a shakedown ride on July 7, 2010. It rode perfectly and the front end was VERY well-behaved. Not to mention the much better brakes than on a stock K75.
I got a deal on one of these recently developed custom shocks last summer so I decided to try it out: http://www.realmengineering.com/page15.html What I didn't know when I got it was that it came sprung for 2-up loaded touring. I tried it last summer and even with no preload it beat the hell out of me. So I worked with their engineers and they found me a spring that works for my skinny ass with little to no luggage. What a world of difference. I have an Ohlins that I was going to get redone for this bike but really didn't see the need given how well this shock seemed to do. I didn't really care too much about the appearance as that wasn't the point of building this anyhow. This was the first naked bike I'd owned since my Nighthawk 650 back in the early 90s. Since I already have a K1100RS I probably won't bother putting the RS fairing on it - it's been done before anyhow and I'd just as soon not add the weight. (I changed my mind later though - couldn't resist.) Only two downsides: I found out that the engine has the old smoker rings. Not a big deal but I may swap in a newer motor sometime in the future. It still needed an intake snorkel but I eventually tracked one down. Here's some of the other stuff I did along the way not previously mentioned: I am not a fan of having in-line fuses scattered around a bike. There's a lot of expensive aux fuse blocks out there but what works for best for me is this simple $5 four-circuit fuse block. By rearranging the relay box and moving the flasher relay over a bit I can mount it next to the OEM fuse block and it fits nicely under the side cover. Once I've got the flasher relay out of the way, I take a 1" wood bit and drill a hole next to the OEM fuse block. Then I install a grommet and route all of the wiring as necessary. Here it is all wired up and ready to be installed:
Here it is installed:
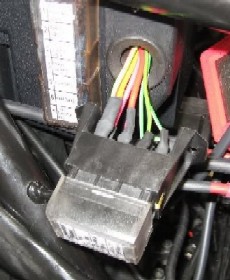
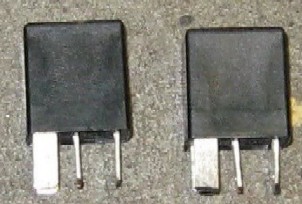
I’m not very good at German so on all of my bikes I laser print fuse block labels, laminate them to make them waterproof and then use double-sided tape to put them on the fuse block covers. Next up was the altitude switch. Many people don’t know about it (can’t remember if it’s the owners manual or not) but K75s and K100s have an altitude plug. (North American models only for some reason.) It’s supposed to be inserted into a connector that’s cleverly hidden along the left frame rail in the fuel injection wiring harness. When operating above approximately 4,000 feet above sea level, you’re supposed to insert the “altitude” plug. It closes a circuit that tells the L-Jetronic fuel injection computer to adjust the mixture in order to compensate for the thinner air. Instead of dismounting every time you pass through 4,000 feet, it’s much more convenient to simply wire it up to a switch. I modified a flasher switch so that the down position activates the flashers normally while the up position triggers a relay to complete the altitude circuit.
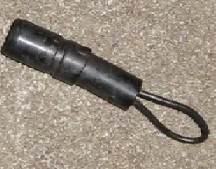
Not exceedingly useful to someone living at sea level but I also did this on the K75S I just brought back from the dead. When delivering the bike to Sacramento I kind of wandered down the Cascades and ended up going through 4,000 feet quite a few times and found the switch to be quite handy compared to using the plug. Here’s what the plug looks like:
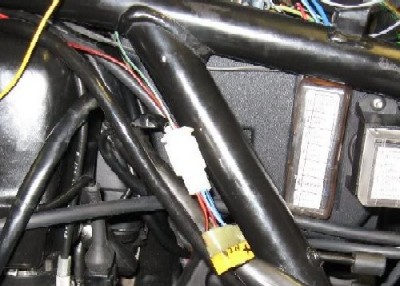
And here it is plugged in:
Since I didn't know exactly how this function works inside the L-Jetronic I thought the safest approach would be to isolate the altitude circuit using a relay. For low load applications such as this or LEDs, I don’t use automotive relays, I use 12V DPDT PCB (printed circuit board) relays. They’re inexpensive and smaller and lighter than automotive relays. (In doing some later analysis I discovered that the altitude plug connects the fuel injection power (green/red wires) to a black wire that enters the L-Jetronic on Pin 11.) First I solder the needed wires to the relay pins. Then I wrap it in electrical tape, put it on it’s back and fill the tape with epoxy or JB Weld. After it’s cured I remove the tape and VOILA! A compact waterproof relay wired up and ready to go. I’ve been using these for years on my bikes and have yet to have one fail. Here’s my altitude relay installed:
Next up, headlight relays. Since I've got a bag of small BMW relays I use those and just build my own instead of buying one of Jim Davis' Eastern Beaver kits.
Not only do the headlight relays prolong hi/lo switch life due to the greatly reduced current and get more voltage to the headlight with upgraded thicker gauge wiring but it also allows me to run a 90/100W Xenon which puts out a heck of a lot more light than the stock setup. I had the headers coated in "Chromex" ceramic coating:
While I was there I had them ceramic coat an exhaust heat shield in their shiny black stuff. What was once older and a tad rusty now looks brand new:
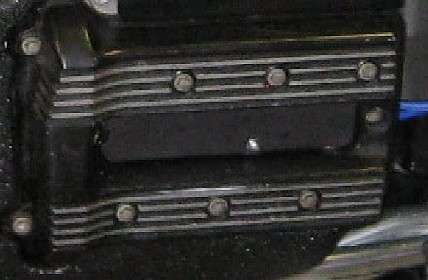
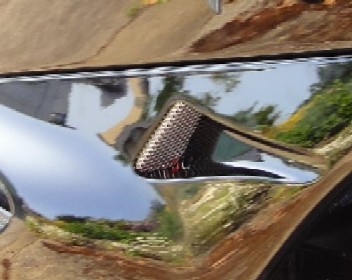
You may not have noticed but there aren't any roundels on this bike. The tank and tail cowl I used came from a K100RS4V where a PO had filled in the roundel indents prior to painting. I also made own non-BMW spark plug cover and had it powder coated black.
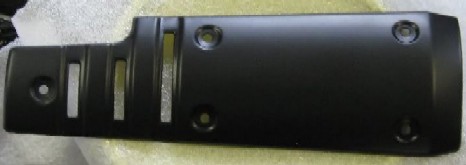
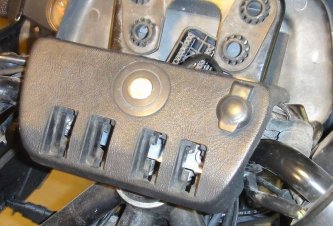
I also made a fuel injector cover and had it
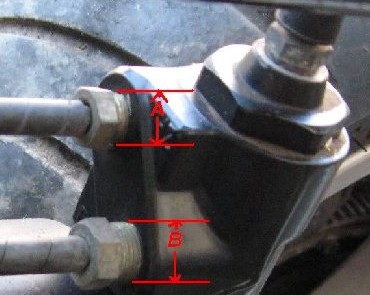
powder coated too to hide all of that junk: Then came dealing with the ABS. The rear ABS for K75s and (ABS I) K1100s both use the same ABS modulator and sensor so that part was plug-n-play easy. Since the bike had a K1100 front end I decided that the best approach was to utilize a K1100 ABS control unit along with a K1100 front modulator and sensor. After comparing the pinouts I determined that, with respect to wiring, all I needed to do to get the K1100 control unit to work with a K75 ABS wiring harness was to take the wiring harness connector apart and move the control unit power from pin 15 to pin 16. Then came the next hurdle. I hadn't realized it until I tried to hook things up but the K75 metal brake lines both connect to the modulator with 10mm connectors while the K1100 front modulator has one 10mm connector (A) and one 12mm connector. (B) Rut roh.
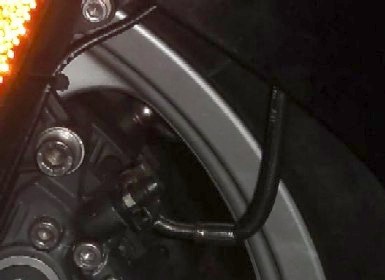
I tried much online surfing to find some sort of adapter but to no avail. Then I tracked down a local brake guy and asked him if he could help. He couldn't answer over the phone but said he'd take a look if I brought the bike by his shop so he could see things in person. The good news was that he could cut off K75 connector and replace it with a larger K1100 connector I'd looted from a parts bike. The bad news was that he had to do it on the bench. Ugh. So I had to drop the front wheel, disconnect the rear of the frame to rotate it up so I could remove the line. Well, many hours of my labor and $17 later I finally had the line with the right connector and bubble on the end of it. When I finally got everything hooked up and went for a test ride, my hybrid ABS functioned flawlessly and just as I'd planned. I also installed new Galfer braided stainless steel brake lines in the front. Smoke colored so it's not really obvious they're stainless.
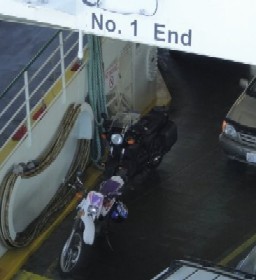
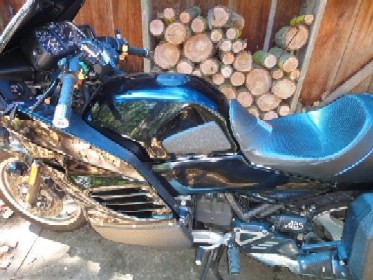
As time went on I did a few other things to the bike as well. After riding it around on the freeway some I decided that there was too much chest blast. As luck would have I scored a complete C fairing over the summer for $150 shipped - in black no less. Then, I took it out for a ferry boat ride across Puget Sound and 50 miles or so to my family's cabin. That's where the law of unintended consequences came into play. My whole reason for building this bike was to get better front brakes. I hadn't even thought about the forks. The K1100 forks are made for a heavier bike and come from the factory with progressive springs. Turns out they work quite well on this bike and I'm VERY happy with how the front end behaves. Ferry ride:
The K75C fairing for some better wind protection without adding too much weight:
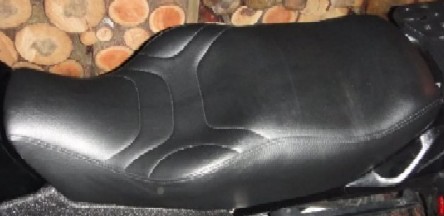
I also scored a virtually brand new Rick Mayer seat on Fleabay:
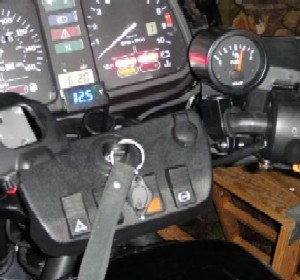
It's got an LED voltmeter and I added a bar mounted VDO fuel gauge:
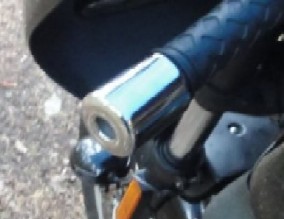
And also some 18oz Manic Salamander chromed bar end weights.
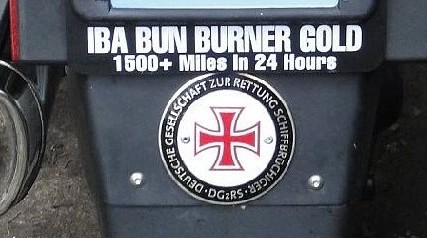
And an IBA license plate back:
Although I generally tried to use as low mile parts as possible I installed an inner gas cap flap from a 159,xxx mile K1100LT just for grins. Later I installed these Line-X'd knee pads:
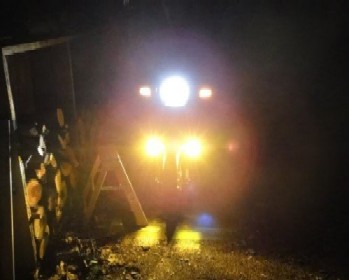
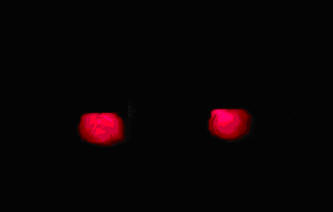
Some night shots:
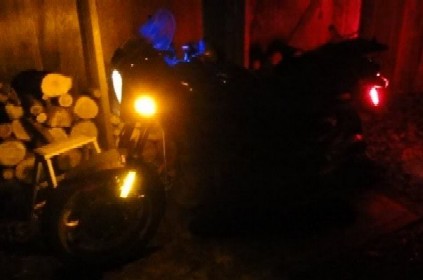
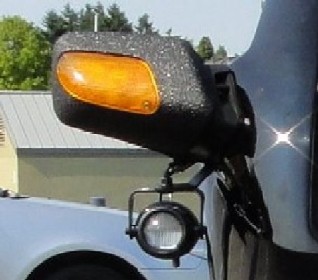
The fork mounted aux lights are 70W "acid orange" CATZ XLO lights that make it virtually impossible not to be seen when riding in traffic. (I still ride like I'm invisible though.)
As you can see in the picture above, I also backlit all four side reflectors. Each has a 6 LED strip in it. These are wired into the turn signals so that they flash off when the turn signals flash on so they double as both side running lights and side turn signals.
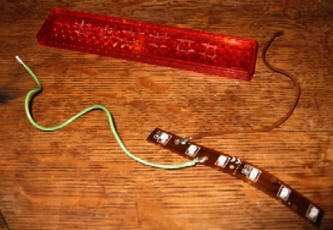
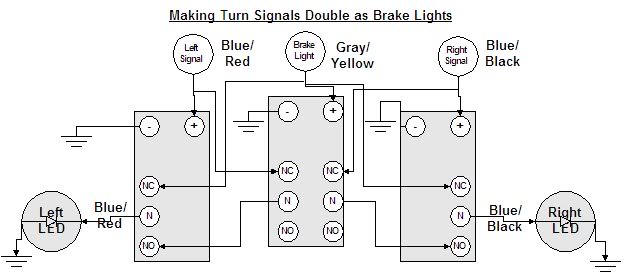
I put red SMD LEDs in the rear turn signals and built a relay so that they work as both brake lights and turn signals. I also added a couple of six LED bars to each of the sides of the tail light lens to serve as additional tail lights. They're complimented in each side by another set of 6 LED bars that "flicker" when the brakes are on. Click on the video below to see them in action.
And here's a video of the turn signals working with the brakes applied:
Here's the schematic for the relay I designed to do this:
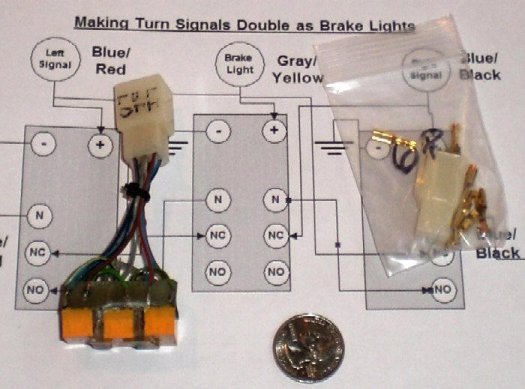
And here's the finished product ready to install:
I couldn't leave well enough alone so I decided to swap in some K1100RS peg plates. Not only do they look better IMO and cover the frame-tranny mounting bolts but the ABS modulators mount to the rear of the K1100RS peg plate bracket so I was able to get rid of the kludgy L brackets and rubber cushions for the rears of the modulators so all in all I think it's a much cleaner look this way.
It was kind of a PITA to do because I had to take the front wheel off and then disconnect the drive train from the frame so that I could rotate the frame up enough to get the K1100RS bracket in between the frame and the tranny. I rode it pretty hard and the monolever "jacking effect" was bothering me so I broke down and converted it to a paralever which required swapping in a 24K K1100 transmission and a 32/11 paralever final drive. I just happened to have a spare 4V Ohlins lying around so I installed that too. While I was at it I installed some rear braided stainless brake lines that I got off of one of my parts bikes.
Since it was the best they had on the shelf at the auto parts store the transmission has Royal Purple 140-75 synthetic gear oil and the final drive has some Red Line 90-75 synthetic gear oil that I had on hand. I tried some of the Guard Dog moly gear oil additive in my K1100LT with good results (smoother shifting after about 1,000 miles) so I added that to both the transmission and final drive since it also helps reduce wear. I’d also been running a Staintune exhaust on it for a couple of months. I liked the looks and it wasn't extremely loud but it was loud enough to annoy me when listening to music while riding so I reverted to the OEM exhaust can. I'd used a Twinmax before but when my new Carbtune Pro showed up I resynch'd the TBs again just to try out the Carbtune:
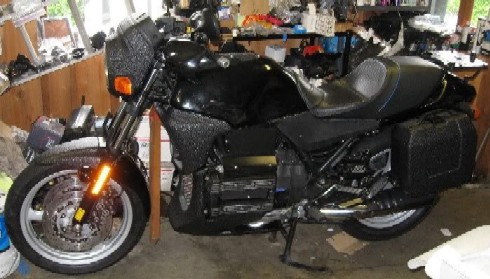
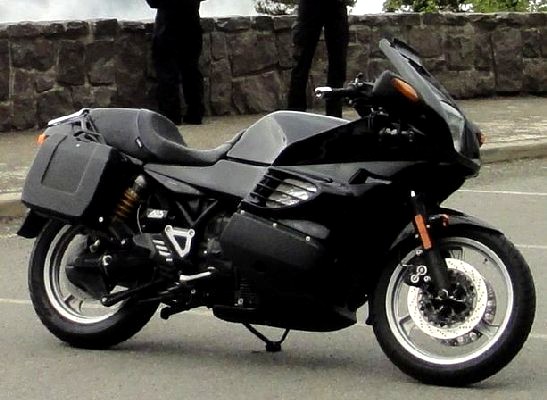
Out of curiosity, before converting it to a paralever I took it out on the freeway to get a pre-paralever speed/RPM benchmark. With the K75 transmission and 32/10 gear ratio K75 monolever final drive the bike ran at 57/58 MPH (calibrated speedometer) at 5,000 RPM in fifth gear. The K1100 fifth gear is about 3.6% taller than the K75 fifth gear. The 32/11 BFD is about 9.1% taller than the 32/10 K75 final drive. Compounding these gear ratios yields a net change of 13% (in fifth gear anyhow, only 9.1% in the lower gears) so the bike now runs at about 4,425 RPM for the same speed. Eventually I broke down and decided to give it a K1100RS fairing that would: a) provide more protection b) look cool c) hide the last BMW on the bike (crank cover) in keeping with my BMW "stealth" theme So, here it is with a K1100RS fairing. This is just a "beater" K11RS fairing for prototyping to see if it would fit. It did. I had some better K1100RS fairing parts that I needed to get painted black for the real deal. But this was handy for figuring what custom brackets I'd have to make and assuring the fit. Fortunately it has a K100 tank so the inner knee panels lined right up once I had the bracketing nailed down. So here it is in prototype/proof-of-concept mode:
A couple of things I did in the spring of 2011: Installed a K1100 gear shift lever with an Ilium Works shift lever extender. It had some diamond hashing on it which I suspected would cause accelerated boot wear on my left boot so I put a piece of 1” heat shrink on it.
To reduce wind I scored a K75C Laminar Lip for half price on Fleabay and installed that:
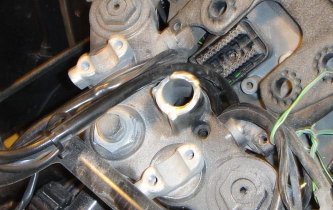
Shot this pic while I had the valve cover off to check/adjust the valves:
I haven't mentioned it but earlier I'd replaced the spark plug leads with new aftermarket ones from Magnecor and also installed some NGK iridium spark plugs. I wasn’t happy with how the valve and crank cover bolts looked so I went through my collection, found some nicer ones and cleaned them up a bit. I replaced all of the rubber grommets for them with brand new grommets.
After doing the valves I installed these Series 2 Bosch fuel injectors that fart gas instead of peeing it. The four hole spray pattern atomizes the fuel better resulting in better, more complete combustion. This supposedly adds torque, (though I can’t find a dyno chart anywhere that actually proves it) makes the engine run smoother and slightly increases MPG.
And then I synched the throttle bodies:
Of course while I was doing that the clutch boot started leaking so I replaced that:
Click on the video below to see the difference between Series 1 and Series 2 injectors:
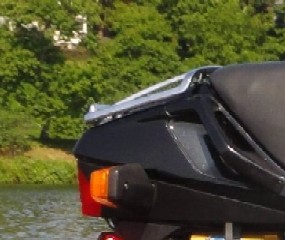
I don’t see why they wouldn’t include a dyno in that video but it makes it impossible to tell if this is a snake oil mod or not. But I ordered a set of three on Fleabay for the K75F anyhow. It seemed to run a bit smoother/better but we all know how reliable butt dynos are. And then I finally got around to installing radials on it: a Bridgestone BT 023 on the front and an Avon Azaro on the rear. Good handling improvement. Wish I'd done it sooner This was mostly a “city bike” for me and since building it I hadn't used the top case once. (I'd decided on an EMGO Travel Trunk initially since it'll hold a fullface helmet while you're in the store shopping.) So I decided to install a chrome OEM tail rack because I think it looks better. I also scored a nice BMW 22L top case on Fleabay for $50 over the winter.
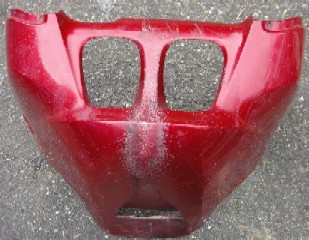
Next up: The K1100RS fairing. I had a black tank for another K75 that needed to be repainted and since the K75F already has a black tail cowl and tank I decided to go with black. And have the belly pan and mirrors pods done in Line-X. This is the belly pan from my K1100RS that was on it when I bought it. It was pretty hammered and a good candidate to get Line-X’d for the K75F.
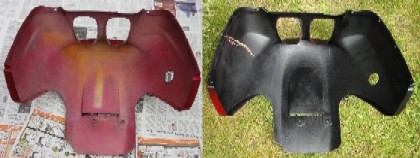
Since you can see it from above when standing next to the bike, I rattle-canned the inside of it with matte black paint before taking it to Line-X.
And here are the mirrors I had Line-X’d:
Meanwhile the main fairing with right and left lowers went off to the painter with the tank from the other K75:
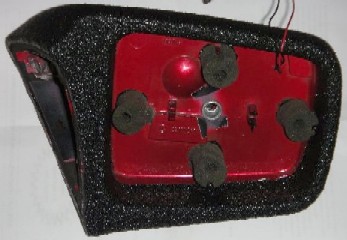
When the mirrors came back I added the little BMW foam sticks to minimize vibration of the mirror glass:
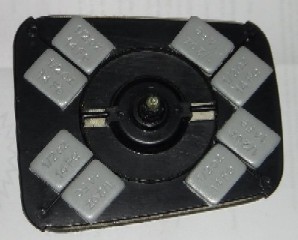
And put some wheel weights on the backs of the mirror glass to increase their weight and reduce their resonant frequency:
And used some stainless fishing leaders as leashes in the event a mirror gets knocked off so it won’t fall to the ground and get busted up or fall off and disappear onthe freeway.
I added Radiantz 10-LED pods to the mirrors as additional turn signals:
A while back Shogs had some custom mirror mounting brackets made for her K1100RS and was nice enough to let me have a couple of sets. (Thanks, Shogs.)
The tops of them are flat since Shogs mounts hers in the mirror extender.
And then surround them with some 3/16” rubber sheeting.
They’re stainless steel but I noticed that just sitting in my basement for a year that one of them had started to corrode so a little bit so I had them coated in an uber-hard black ceramic. Adding the rubber pushes the mirror out a tad more for slightly better rearward visibility and less elbow in the mirror.
For lights I scored a pair of Hella Micro DE lights for $60 on Fleabay and converted them to 4300K HID with a kit from DDM.
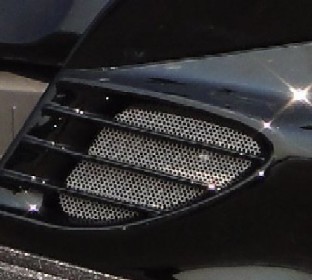
Several years ago I added some perforated stainless steel grills to the lowers of my K1100RS and liked how that came out so I decided to do that on the K75F as well. I also upped it a notch and built some perforated stainless steel grills for the forward upper vents as well. IMO, it looks even better contrasting with the black than the ones on my Mystic Red K1100RS do.
I mounted the belly pan with some M5 stainless button heads with fender washers.
I replaced the 10W filament parking light bulb with a wide angle high power white LED parking light in front. Hard to see how good it is in the bright sunlight though.
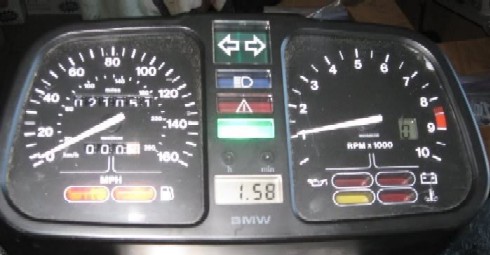
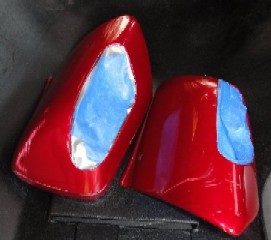
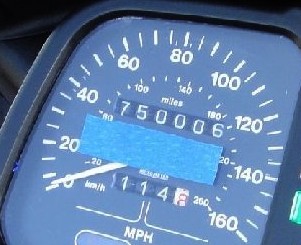
And while I had the cluster off I tweaked the odometer a wee bit.
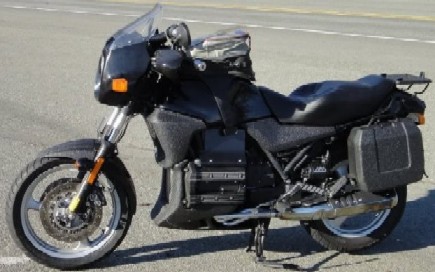
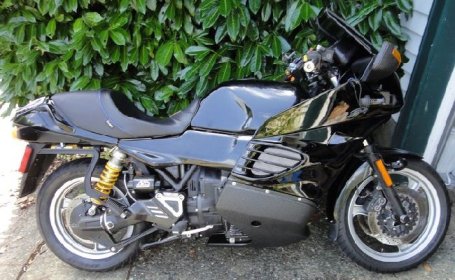
I figure that if I added up all of miles from all of the bikes that contributed parts to the K75F that would be well in excess of that number. (The blue painter tape is on there to remind me that I don’t have my new tires scrubbed in yet.) And here’s the almost “finished” K75F:
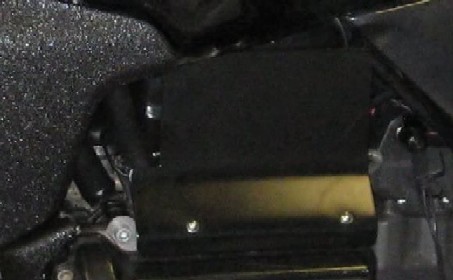
And the K1100RS fairing covers up the last BMW on the bike. (Crank case cover) I had some K1100RS side covers with broken plastic clips so I Dremeled them off and installed some tool clips from McMaster-Carr:
Installed:
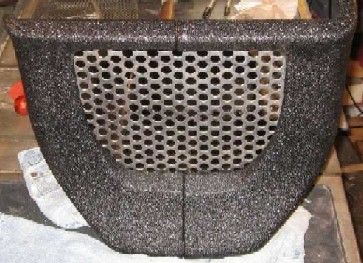
I replaced the radiator grill with stainless steel and added one for the belly pan:
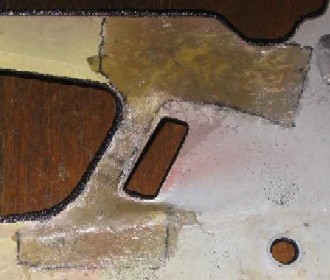
Then I created an insulating blanket that covers underneath the tank, fairing lowers, side covers and seat out of some synthetic rubber and reinforced foil firewall insulation. It has adhesive on one side so I doubled it up. Here's a picture of a leftover scrap:
Before:
After:
Here's a picture that I took of it later on when I had the tank off.
I also finally got around to installing the Line-X'd knee pads:
And my "stealth" approach of having no roundels or visible BMW lettering on it has worked out perfectly. When people come up to BS about the bike when I'm stopped to take pics or gassing up they always ask what kind of bike it is.
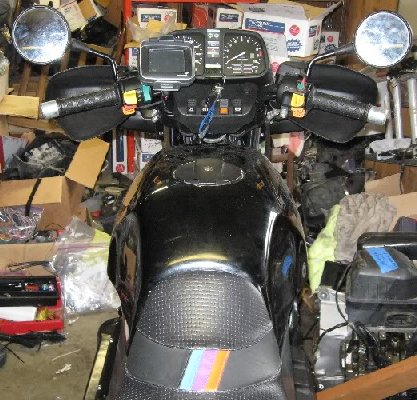
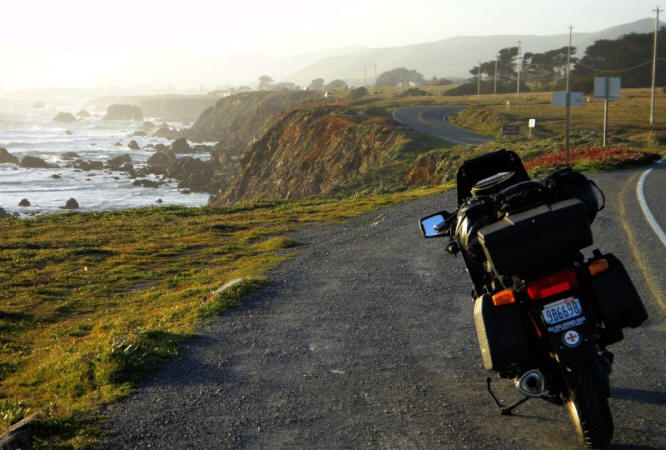
With the beefier K1100 front end and brakes, the paralever, the Ohlins and radial tires it feels completely dialed in. Very planted through turns and rides pretty much like my K1100RS, only lighter and more flickable. I let the K100RS4V rider I was with one weekend take it for a little spin and he gave it two thumbs up as well. In hindsight, things I did “wrong” along the way: Starting out with C bars. Being 6-2 with 34” arms, C bars don’t let me get my weight in over the tank and to the inside for more aggressive riding. The change to K1100RS bars (the same as S/RS bars but with bar ends) makes a world of difference in that regard. Fairing: Though my favorite K fairing is the K1100RS fairing, I initially swore not to put one on this bike because I already have a couple of K1100RS’s. Bad decision to try the naked K100 and K75C fairings as I’m now much happier with the K1100RS fairing. It looks the best and is very comfortable for me to ride behind. Final drive: I initially wanted to go with the K75 32:10 monolever final drive for the gear ratio but I ride it pretty hard so the jacking effect was kind of annoying. It rides much mo betta now with the 32:11 K1100LT paralever final drive with the gear ratio being somewhat offset by the peppier fuel injectors. Engine: I just built this bike around an old engine I had lying around. I think it’s an 88 with the old “smoker” rings. (Oil seeps past the rings when the bike is on the side stand so it smokes a little on start-up when left on the side stand.) It’s a minor nit really but if I had to do it over again I’d go with an 89+ engine with the newer rings. I’m kind of neutral on the ABS thing. It would’ve been simpler/lighter to just go non-ABS but what inspired me to do it was the challenge of seeing if I could make the hybrid K75/K1100 ABS system work and since I did get it to work I’m happy with it. Things I did “right:” The K1100 front end. I really did it initially just to get the better “two finger” brakes but the K1100 forks feel a lot more sturdy and stable as well. Going with K1100LT, not K1100RS, wheels. The K1100RS wheels are wider and look more studly which was tempting but the thinner K1100LT wheels turn in easier, have less mass and spin up easier so I’m glad I went that route. Radial tires. Just like when I converted my K1100LT from bias ply to radials, this bike handles oh so much better on radials. What next? Well ride down and then back up the California coast of course! I hadn't noticed at any time before but, when riding in the rain on my way down to SoCal with the waterproof cover on my tank bag, I discovered that using a square dash pad mounted to the upper K1100 fork tree pushed the dash back and down some. This made it harder to operate the switches while riding with a tank bag on. In this picture you can see how the dash pad installed on the K1100 fork tree ends up positioned farther back and down than it would be on a K75 with K75 fork trees.
The first step was to cut down the mounting for the K1100 ignition switch since it would be in the way.
I added some right angled aluminum bar stock bolted onto the lower handlebar clamp bolts to move the dash pad up and farther forward. Then I modified the mounting brackets on the dash pad to fit onto that.
And viola! Now the dash pad was back where it should be on a K75:
And, while I had the switches off of the bike, I came up with a way to backlight them with LEDs to make them easier to find at night.
Also, while in California, I also replaced all of the external fuel lines with new ones. Homeward bound...
|
![]()