![]()
|
© 2013 Drake Smith - Please do not use or reproduce this elsewhere. Feel free to link to it though. Soldering 101
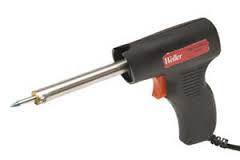
If you've never soldered before then at some point in your career as a DIY "shadetree" motorcycle mechanic career you may decide that you need to solder some wires together. Here's how I do it. It's actually not the "right" way to solder (more on that later) but it does work. What you'll need: 1-Soldering Iron: I prefer one that's at least 20 Watts. The one I use these days is a Weller TB100 that's a 30 Watt model. Cheapo ones from Harbor Freight will burn out in a week so it's worth the $25 to get a decent one.
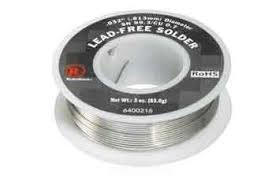
2-Solder: I use 0.032" solder from Radio Shack because the skinny stuff heats up and melts quickly. Solder used to be made of lead but given how nasty lead is to the human body, ask the Romans, solder is now lead-free.
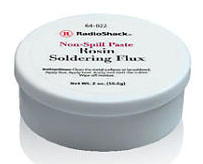
3-Electrical Soldering Flux: Flux helps solder flow onto and cling to metal. Radio Shack 64-022 for example.
4-Heat Shrink Tubing: To insulate and protect the soldered connection. This can be found in varying diameters at Radio Shack, Fry's Electronics, McMaster-Carr and a zillion other places. How To Solder: Step 1: Plug in your soldering iron and place it in the safety cradle that came with it. Soldering irons take a minute or two to heat up to their operating temperature. Step 2: Strip the ends of the two wires that you wish to solder together. 3/4 to 1" is usually good for typical motorcycle wiring.
Step 3: Put some 1" sections of heat shrink tubing on each wire. I always double heat shrink my solders. Be sure to push it back from where you intend to solder. Otherwise the heat conducted by the wire when soldering will shrink it prematurely. Step 4: Apply flux to the ends of the wires. I usually rub it into the wires with my thumb and forefinger to make sure the wires get adequately saturated with it. Step 5: Twist the two wires together.
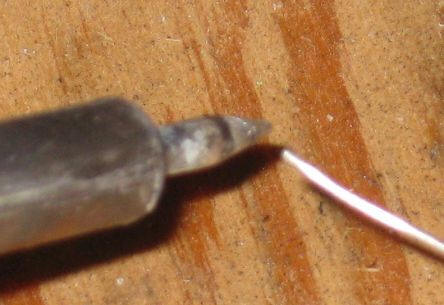
Step 6: Solder the two wires together. OK, the "right" way to solder is to heat up the splice of the wires twisted together and then apply solder. However, what I've found is effective and efficient is to make a little ball of solder on the tip of the soldering iron and then apply that to the twisted wires. I refer to my technique as "solder bombing" and it's how I do all of my soldering these days.
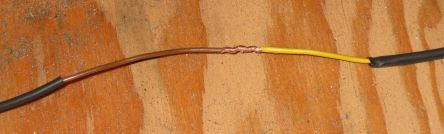
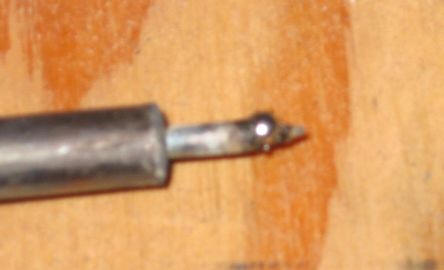
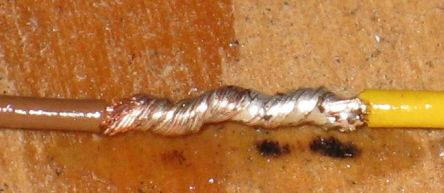
Hold the soldering iron on the twisted wires until the wires fully "absorb" the solder. This usually takes only a second or two. A decent soldering job will look something like this:
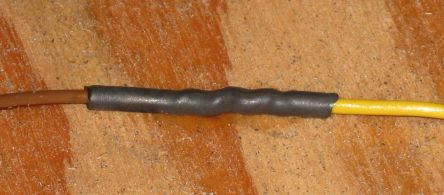
Step 7: Slide the first piece of heat shrink tubing over the soldered wires and shrink it with a heat gun or Bic lighter.
Step 8: Then the second piece of heat shrink tubing. Finished:
By the way, always use stranded, not solid, wire for motorcycle wiring as it is more resilient to the vibrations that occur on motor vehicles. © 2013 Drake Smith - Please do not use or reproduce this elsewhere. Feel free to link to it though. |
![]()