![]()
|
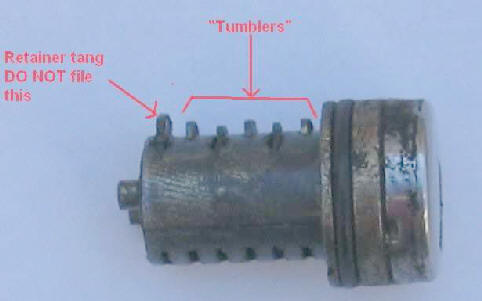
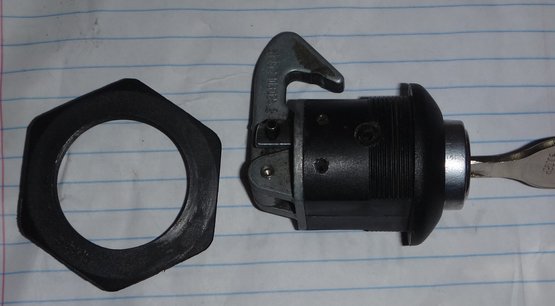
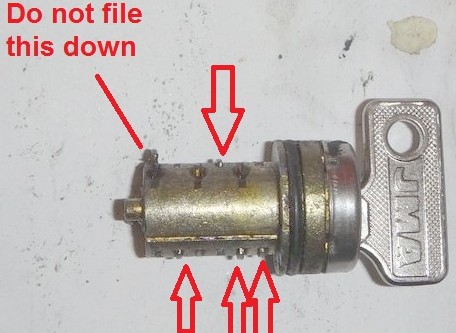
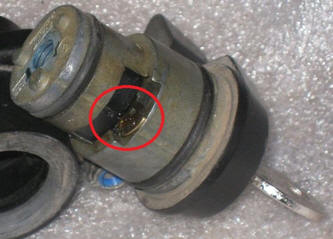
2018 Drake Smith - Please do not use or reproduce this elsewhere. Feel free to link to it though. "Rekeying" K Bike Locks BMW K bikes have a variety of locks. Many times a K bike will have more than one key. A common example is that the side cases have been purchased separately and use a different key than the ignition key. Fortunately, for many of the locks, the lock cores can be removed and modified to work with a particular key. The basic procedure is pretty simple: remove the lock core, insert the key that you want to use and file down the tumblers (a.k.a. wafers) sticking out. Here's a K bike lock core. (from a system case lock) They are all basically the same with respect to how they work. They have six metal slats with tiny springs in them. Since we're dealing with locks, I'll call them the "tumblers." The last tumbler is what holds the lock core in the lock. I call it the retainer tang. Do not file down the retainer one at the end.
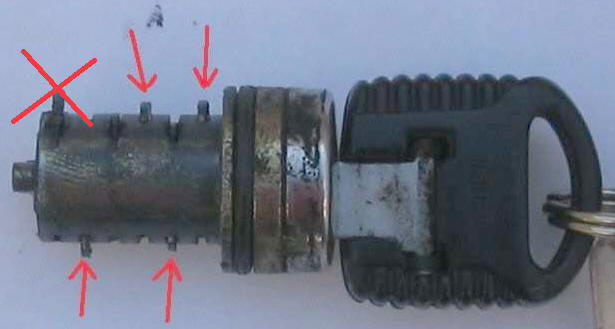
What you do to make the lock work with a particular key is to insert your key and then file down (I use a Dremel grinding wheel) anything that sticks out. Here's a lock core from a 35L top case:
To rekey a lock core, insert the "new" key and then file down anything thing sticking out - except for the very last one as that is what holds the lock core in place in the lock:
The table below lists the various locks on K bikes and has some comments on rekeying each. LOCK LUBRICATION: Use spray silicone or a lubricant specifically made for locks. Do not use WD-40. It is solvent based water displacement (WD) formula and does not contain any actual lubricants. It captures dust and can gum up locks over time.
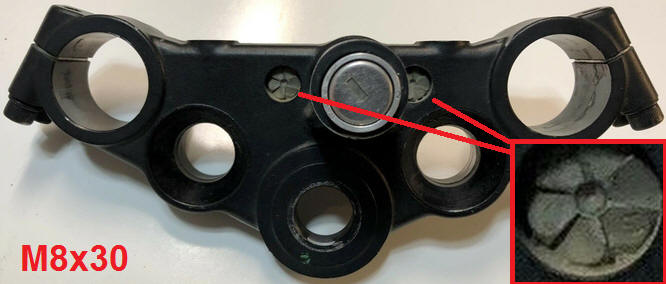
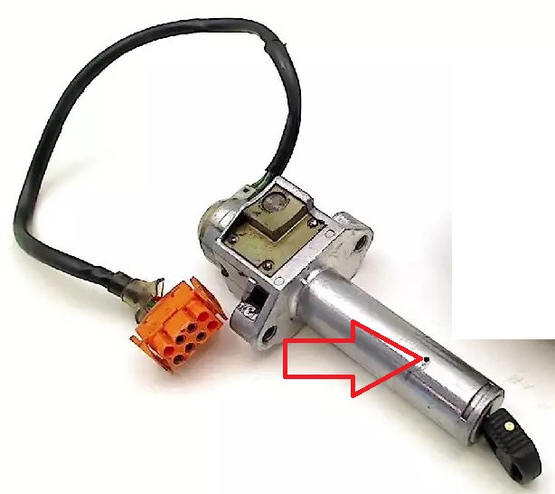
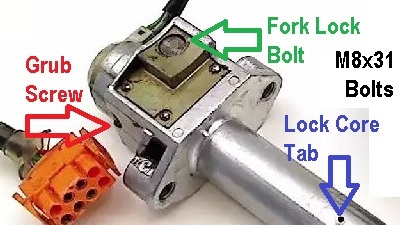
4V Ignition (K100RS4V, K1, K1100) The 4V ignition switch is held into the upper fork tree by two security bolts whose heads break off when they are installed at the factory. In order to remove the ignition switch from the fork tree you need to drill the heads off of these bolts and push the ignition switch assembly down. When drilling the heads off of the security bolts first use a small drill bit to drill a shallow pilot hole in the center of the bolt head. This will make it easier to keep the larger drill bit centered when drilling the bolt head off.
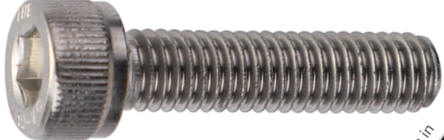
When reinstalling the ignition switch back into the upper fork tree these security bolts can be replaced by regular M8x30 socket cap bolts.
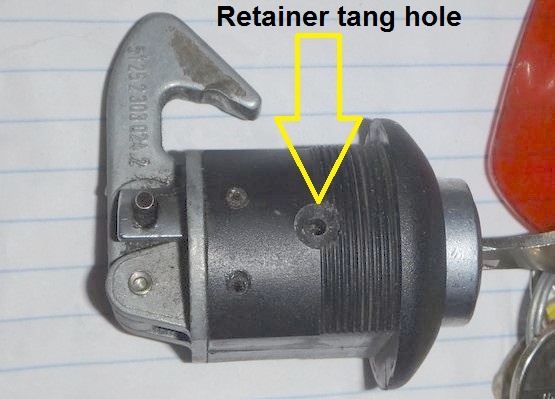
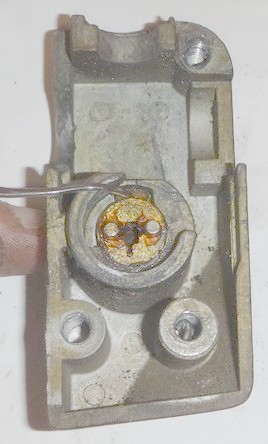
Once the 4V ignition switch is removed from the upper fork tree, stick a pin or whatever into the small hole shown below and wiggle the key to remove the lock core.
While you have the ignition lock removed you may want to spray some silicone lubricant into the fork lock bolt to keep it well lubricated.
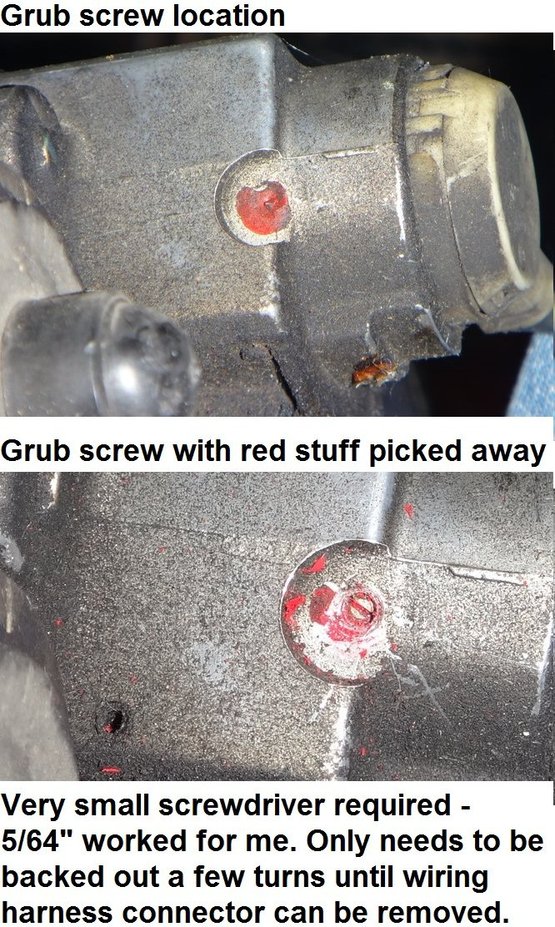
If you're replacing the wiring harness (part 61322305292) then you need to loosen the grub screw a few turns:
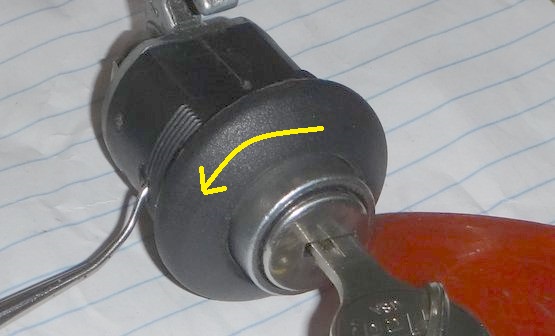
Turn the key to the open position, open the lock, turn the key to the locked position and then use a 3mm or 4mm Allen wrench at the back of the lock core to depress the retainer tang. Then slowly wiggle the lock core out:
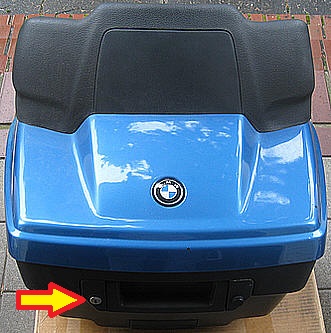
In order to rekey the lock for the 22 liter top case you will need the original key to remove the lock core from the lock body. The lock is held into the case by a large plastic nut that you should be able to unscrew by hand. Once loosened you'll need to press the lock in so that the hook opens up in order to get the nut all of the way off and remove the lock from the case.
In order to depress the retainer tang you'll need to turn the key to the unlocked position.
While depressing the retainer tang with a pick or pin, turn the key/lock core counter-clockwise into order to get the lock core out of the lock body.
Then insert the "new" key into the lock core and file things down as described at the top of this page.
If the 35L top case is unlocked then you can rekey it to a "new" key without having the original key. 1 - Unscrew the three Phillips screws from the left inside of the case:
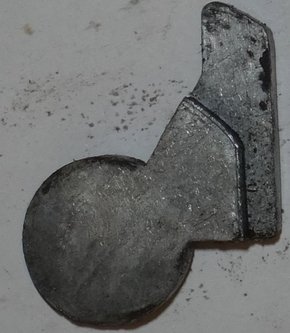
2 - When you remove the lock assembly don't lose this part that will fall out:
3 - Use a pick or pin to depress the tang that holds the lock core in and push the lock core out:
4 - Fully insert the "new" key into the lock core and use a rotary tool (a.k.a. Dremel) to file down anything that sticks out. Be careful not to file down the last one as that is what holds the lock core in the lock.
5 - Insert the lock core back into the lock body. 6 - When screwing the lock body back onto the case install the piece from 2) above like this:
7 - Before closing the lid and locking the case, experiment to make sure that the lock now unlocks and locks as it should with your "new" key. You don't want to close and lock the case and then not be able to unlock it.
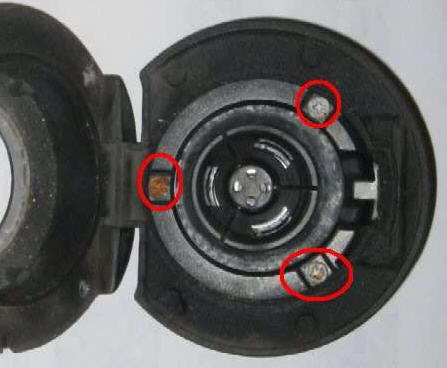
I recommend doing this off of the bike so parts don't fall into the tank. The gas cap is removed by unscrewing the four countersunk Phillips screws you see around the perimeter when the gas cap is open. Since they are mounted in aluminum, the dissimilar metals can cause corrosion in the threads. Therefore you need to be careful removing them or you can strip the heads of the Phillips screws. First clean out the heads with a dental pick or something so that you can get a Phillips screwdriver all of the way in. Then, using your best fitting/best quality Phillips screwdriver apply a lot of downward pressure while initially turning the screw to break it free. Once you have the gas cap off of the bike remove the three Phillips screws that hold the lock assembly to the gas cap.
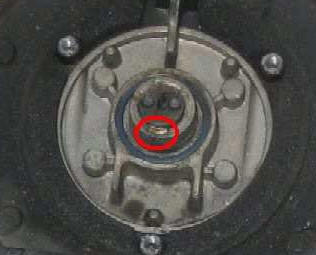
Then use a screwdriver or whatever to depress the retainer tang and remove the lock core:
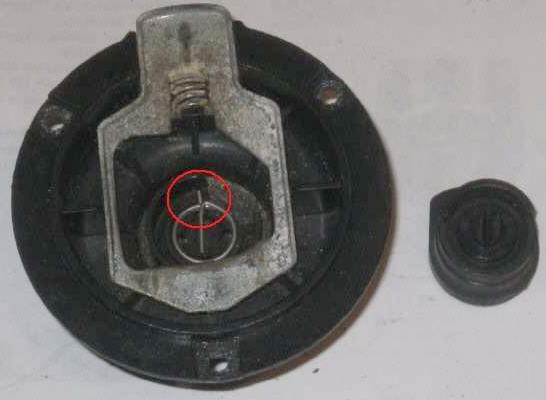
Putting the gas cap back together can be a little tricky installing the cup and return spring properly. Start by putting the return spring in with the part sticking out at a right angle positioned in it's groove in the lock housing:
Then put the "cup" on so that the groove on the bottom of it sits on the center straight part of the spring:
Applying constant downward pressure, slowly turn the cup counterclockwise until you feel it drop into place:
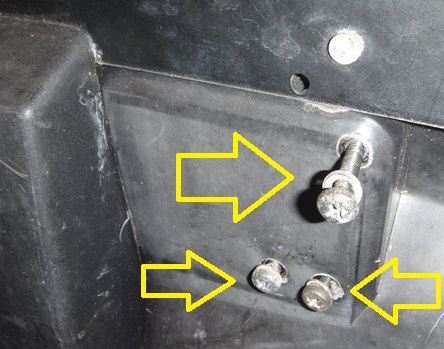
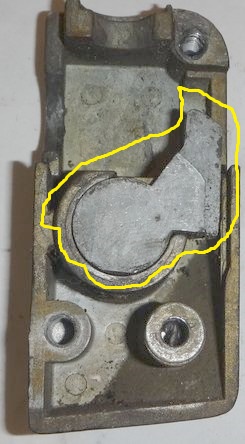
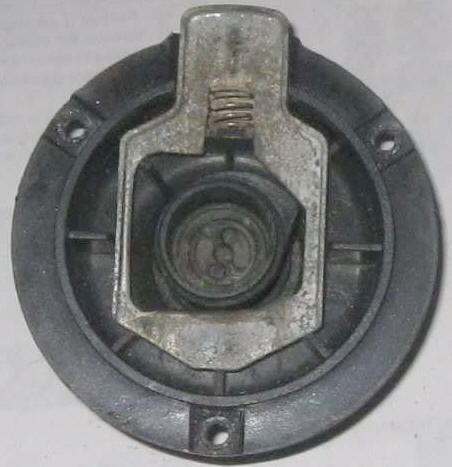
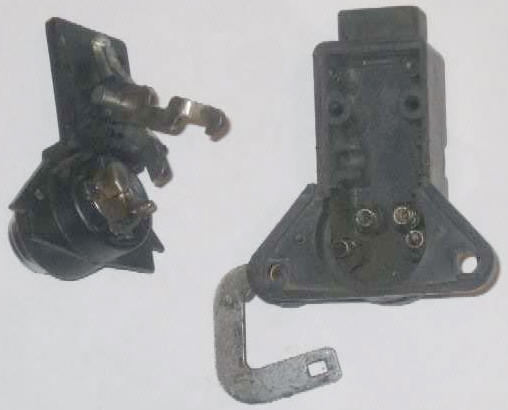
Then carefully reattach the assembly to the gas cap with the three Phillips screws. Sometimes the little bucket with the cam on it won't stay in place. If this is the case then hold the cup in place with a pen or screwdriver through the lock hole in the gas cap lid while reassembling. Once the assembly is held onto the lid of the gas cap that will keep it in place. Remove the seat lock from the frame by unscrewing the two 8mm nuts on the back of it and the two small Phillips screws from the front. Use some small screwdrivers to break the face plate off of the rear housing. It will look like this:
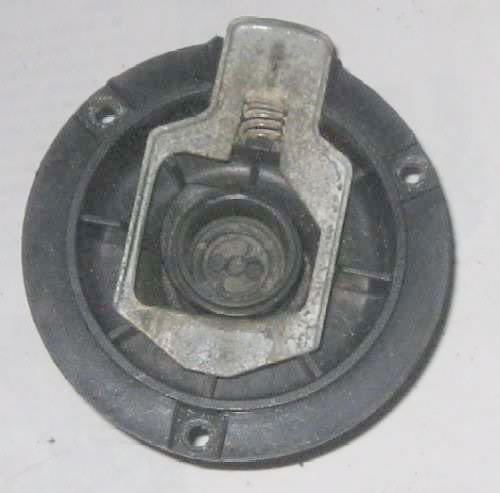
(Hopefully your seat lock hook isn't busted off like this one. It's just an old one I'm using for demo purposes here.) Pop the latching bars out of their pivot and then you can remove the lock. Use a dental pick or sewing needle to depress the retainer tang and remove the lock core:
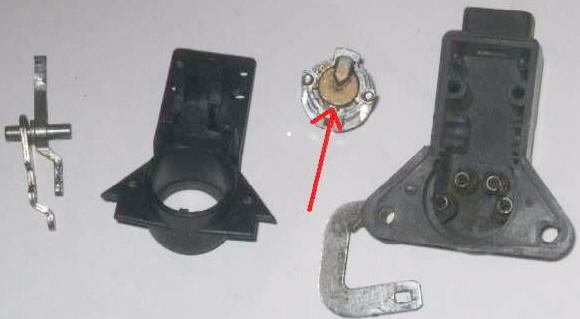
Once you've modified the lock core, glue it back together with some epoxy or JB Weld around the outer edge. One nice thing about the design of the seat lock is that the two bolts at the bottom that attach it to the frame help hold it together. Remove the machine screw on the back of the lock. Insert the key and pull inner assembly out. The lock core can be removed by depreesing the reatiner tang.
© 2018 Drake Smith - Please do not use or reproduce this elsewhere. Feel free to link to it though. |
![]()