If your K75 or 2 valve K100 cuts
out mysteriously then it is not unknown for this to be
caused by a dirty ignition switch. This page describes how
to remove, disassemble and clean the contacts of the
ignition switch.
It's best to do this on the bench, not on the bike, because there are tiny parts and
springs to lose.
Remove:
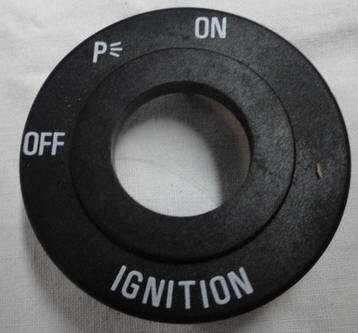
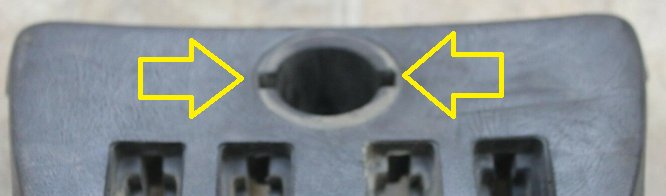
1) From the top, pry off the
plastic ring that surrounds the ignition switch. You
can do this with your fingernails.
2) You will then see a
rectangular slot on each side of the ignition switch. Place
a small screwdriver or other tool into each slot to depress
the plastic tangs that hold the ignition switch in place.
You should then be able to push the ignition switch down.
3) Removing the two bolts that
hold the dash pad to the upper fork tree will make it easier
to get the switch all of the way out of the dash pad.

4) Remove or pull back the gas
tank in order to follow the ignition switch wiring to its
connector and disconnect it.
Disassemble, Clean and Lubricate:
5) Wiggle off the plastic
protective cap from the bottom of the switch.
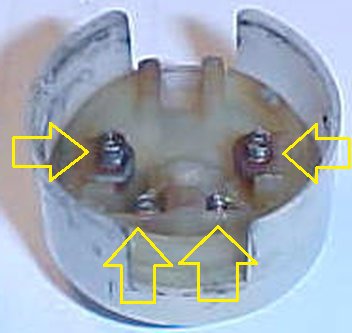
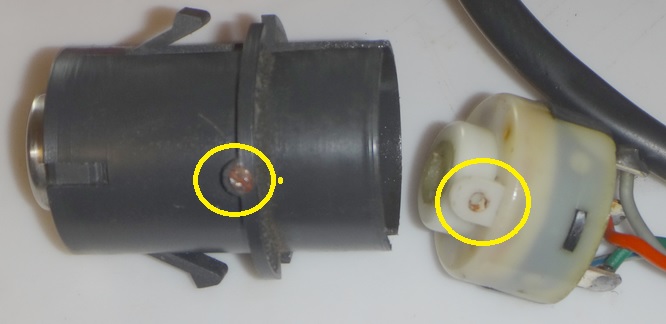
6) Inspect
the soldering at the terminals to ensure that the wires are
all well connected.
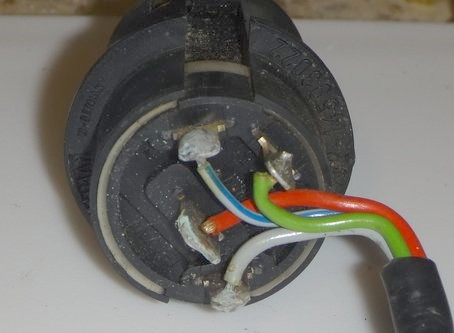
Wires connect to:
|
Red |
12V+ in from battery |
|
|
|
|
Green |
12V+ out to load shed relay, etc… |
|
|
Gray |
12V+ out to Fuse 2 (Parking light & BMU to tail
light) |
|
Gray/Blue |
12V+ out to Cluster & add'l instrument backlighting |
7) Test the switch with a
multimeter. Terminal continuity for each switch position:
|
Off |
Nothing |
|
|
Position 1(park) |
Red-Gray |
|
Position 2 (on) |
Red-Green |
|
|
Gray-Gray/Blue |
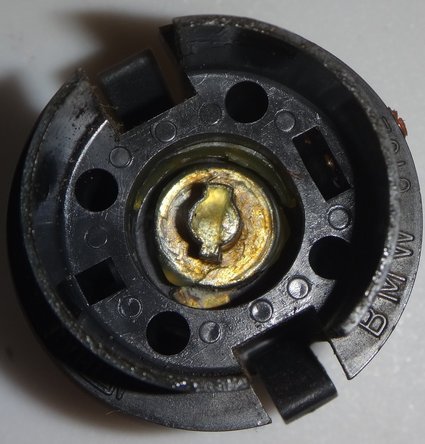
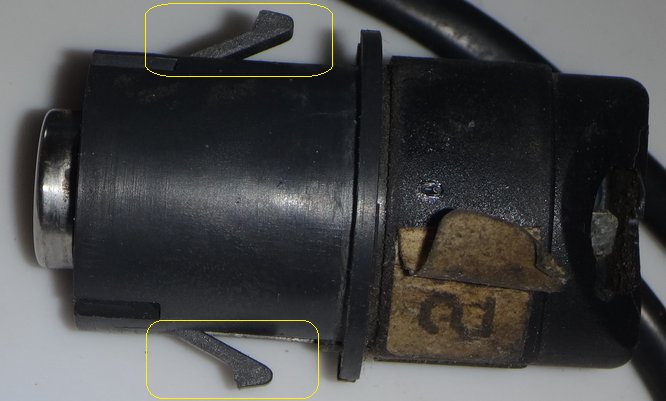
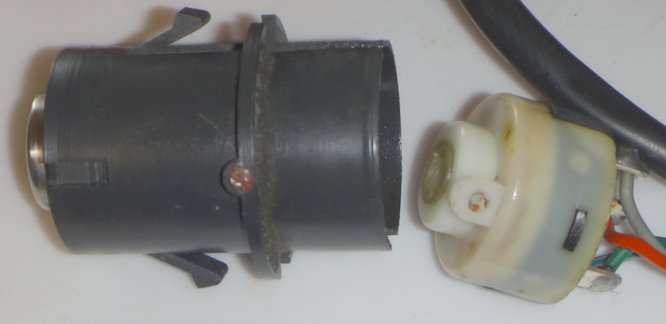
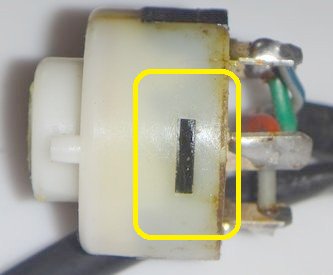
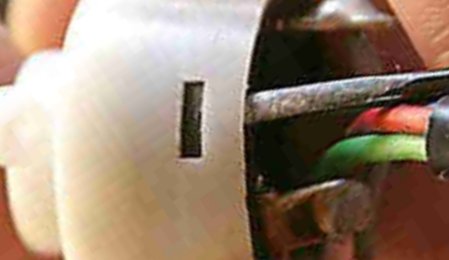
8) Locate the set screw covered
in red paint.
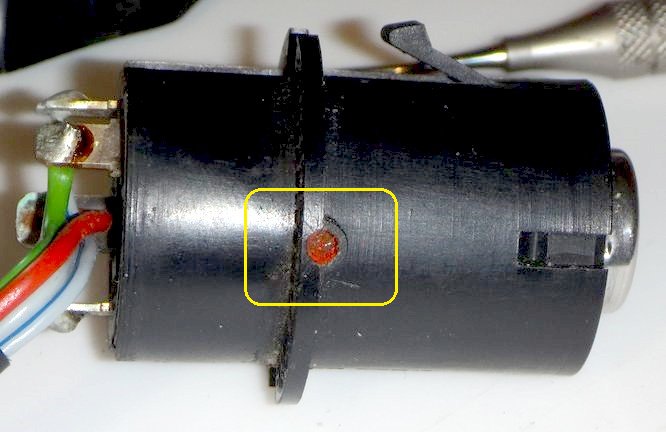
Pick out the red paint - being
sure to clean the screwdriver slot out well.
Use a small regular screwdriver
(I used a 2mm screwdriver) to loosen the set screw. You do
not need to completely remove the set screw. Just back it
out 4 or 5 turns so that the white switch subassembly comes
out of the switch body.
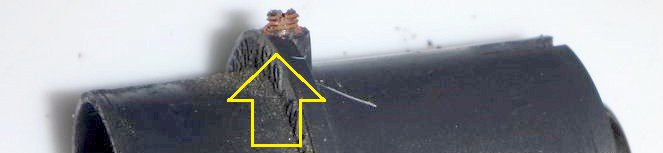
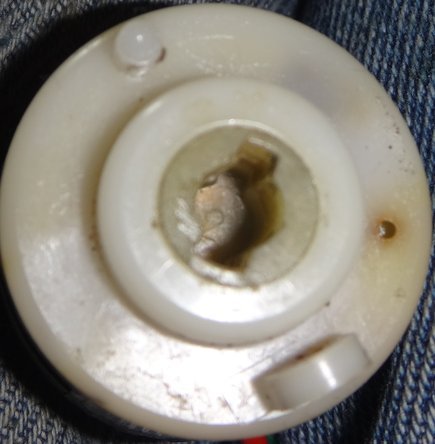
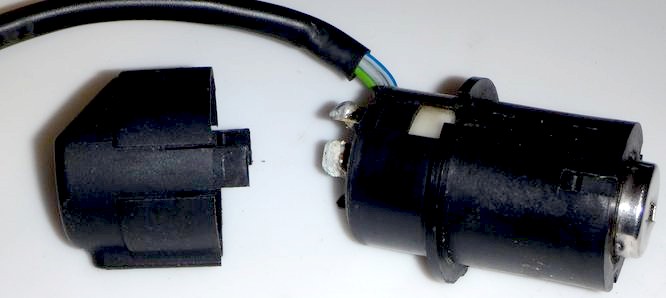
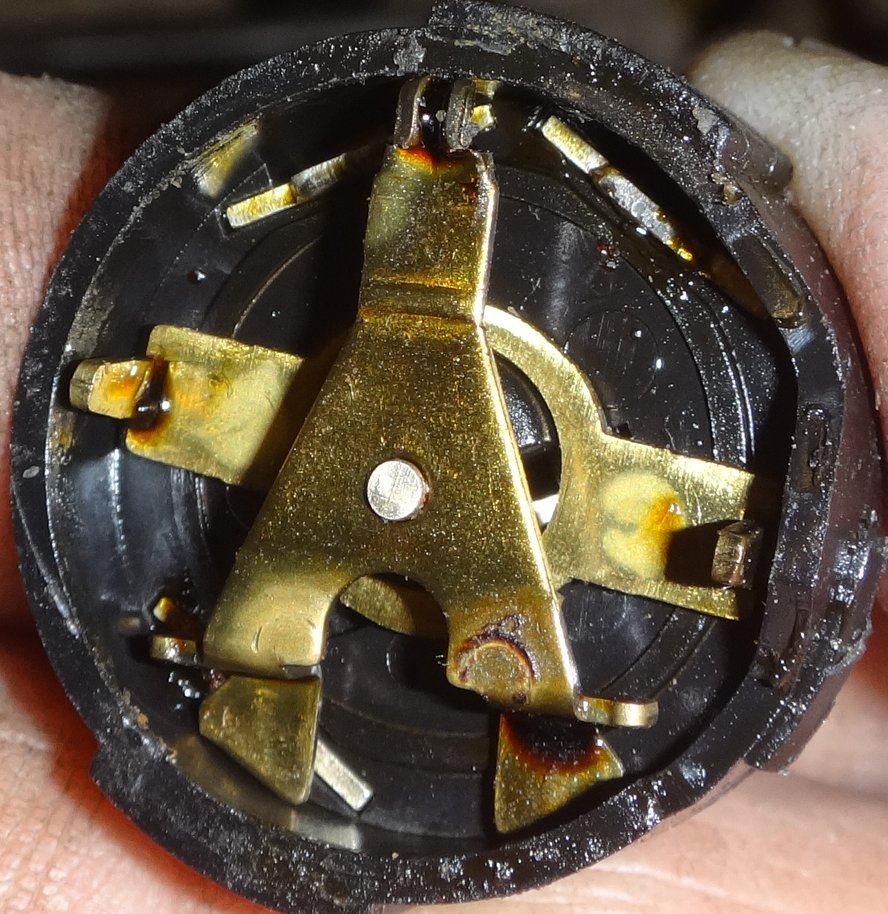
9) Take the switch subassembly
apart. There's a small black tang on each side of the switch.
Use a small screwdriver at each
tang to pop the white top of the switch off of the black
bottom.
There are four tiny springs in
the white top part. Make sure they are in place when you
reassemble the switch.
10) Clean the two metal parts
that are now loose, the "tepee" part and the crossbar part.
Then put them back into the black body of the switch
subassembly.

11) Using your favorite
lubricant, (I use aerosol spray silicone.) lubricate
both the black bottom parts shown above and also the part
that turns in the white top part.
Reassemble:
12) Making sure that they are
aligned to meet up, clip the white part and black part back
together.
13) Put the switch subassembly
back into the bottom of the switch body and tighten the set
screw.
Align the hole in the side of the
switch subassembly with the set screw in the switch body
when reassembling.
If the switch subassembly has
turned during servicing then you may need to turn it a
little so that it aligns with post in the switch body. You
can use a large screwdriver to do this.
14) Once you have the switch back
together, test for correct continuity for each switch
position.
|
Off |
Nothing |
|
|
Position 1(park) |
Red-Gray |
|
Position 2 (on) |
Red-Green |
|
|
Gray-Gray/Blue |
15) Slide the protective cap back
on the bottom of the switch.
Replace Ignition Switch:
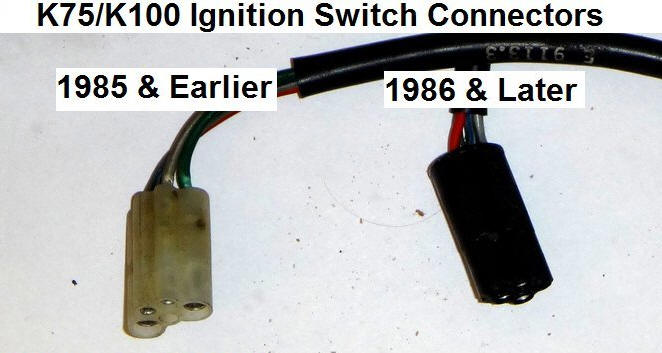
If you find that your ignition
switch is beyond repair then be careful when buying a
replacement ignition switch. 1985 and earlier K100 ignition
switches (part 61311459345) have a white five terminal
connector while 86 and later K100 and all K75 ignition
switches (part 61311459594) have a black four terminal
connector.
© 2022 Drake Smith - Please do
not use or reproduce this elsewhere. Feel free to link
to it though.