![]()
|
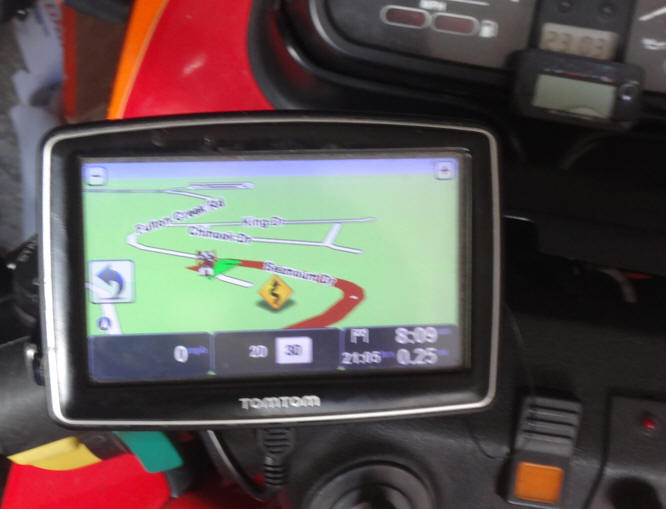
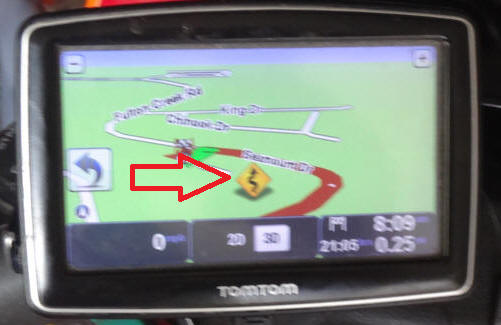
© 2019 Drake Smith - Please do not use or reproduce this elsewhere. Feel free to link to it though. Motorcycle GPS for $25 Introduction: Back in the day I used to use a TomTom Rider GPS. It was OK but the power mounts were notoriously not very long lasting so I ended up having to run it with a USB power cable in the top of my tank bag. The TomTom GPS software is so-so but I found a freeware 3rd party app called Tripmaster that runs simultaneously with the TomTom software that provided a large digital speedometer and also recorded a limitless GPX track log. Both apps are always running so you can switch back and forth between them on the fly. TomTom software:
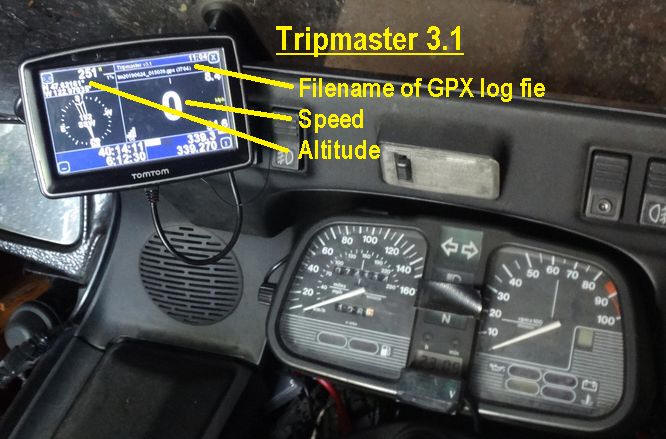
Tripmaster provides a compass and a bunch of other features but the GPX logging, digital speedometer and altitude are my favorites:
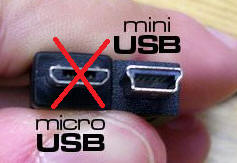
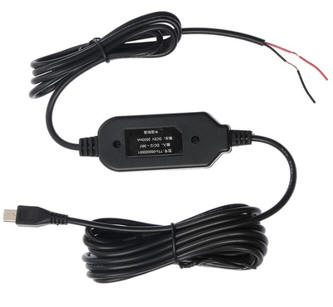
Since I was used to the TomTom software when riding I later purchased a TomTom XL for use in the car. That is also compatible with the Tripmaster software. I got tired of the power issues on the TomTom Rider so one day I decided to "waterproof" the TomTom XL and mount it on the handlebars with a normal USB mini plug for the power supply. I did that quite a few years ago and have been using that as my riding GPS ever since. Since the TomTom XL is pretty old these days you can easily find them on Ebay for only $15-$20. The XL has a 4.3" display but what I do also works with the 5" TomTom XXL model. I use the XL on my S and RS K bikes and the XXL on my K1100LTs. (One nice thing about this setup is that since the GPS costs less than $20 you can just leave it on the bike when you go into a store or go to eat since it's not that big a deal if someone steals it. I've left it on my bike for years though and never had one stolen.) The 12V to mini USB power supply can be found on Ebay for about $3 by searching for "mini USB power 12v cable." Note that these come with either right angle or straight mini USB connectors. I prefer the straight ones. (Make sure that it has a mini USB, not micro USB, connector.)
The TomTom cigarette lighter adapter puts out 2 amps of 5V USB power so I use power supplies rated for 2 amps.
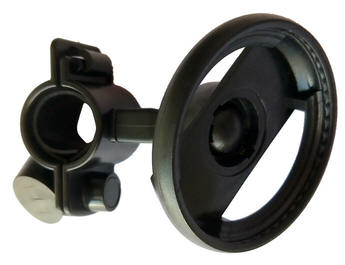
The handlebar mount can be found on Ebay for about $4 by searching for "tomtom xxl bar."
What you'll need to do this:
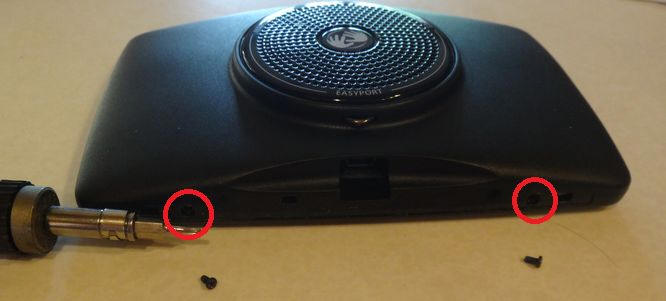
Sometimes the battery is old on these old GPS units so you may want to consider replacing the battery while you have it open but since it's going to be powered by the USB power supply anyhow a strong battery isn't 100% essential. Replacement batteries usually run about $6-7 on Ebay. Sometimes the replacement batteries come with the T5 Torx driver and screen removal tool but you can also buy a laptop screen repair kit with the tools you'll need on Ebay for $0.99. Step 1: Open up the TomTom When you peel the sticker off of the bottom of the TomTom you'll see two small Torx screws that hold the unit together. Remove those.
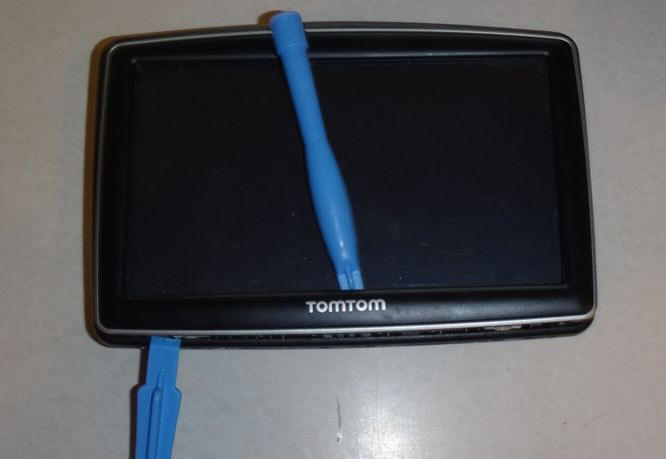
Step 2: Split the TomTom open Using the screen removal tool pry up the bottom center of the screen frame from the inside. Then work around the outside of the frame to separate the frame from the body of the TomTom.
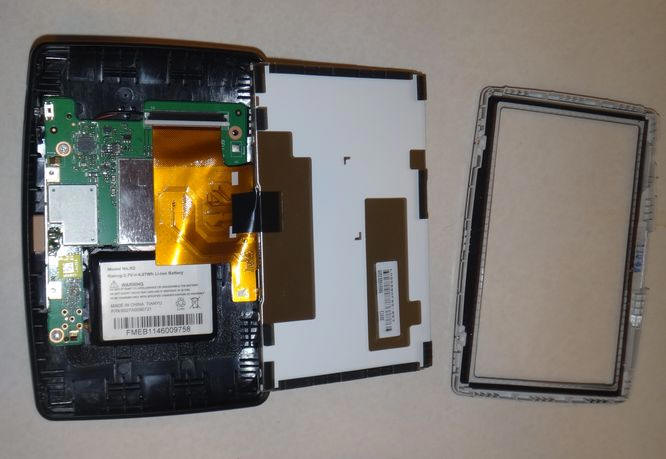
Then carefully pop the display out of the frame.
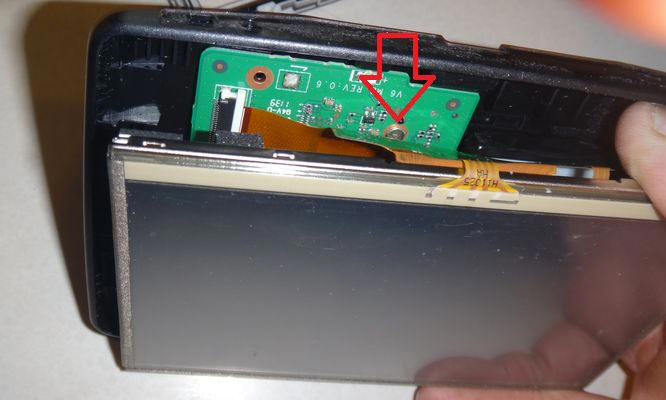
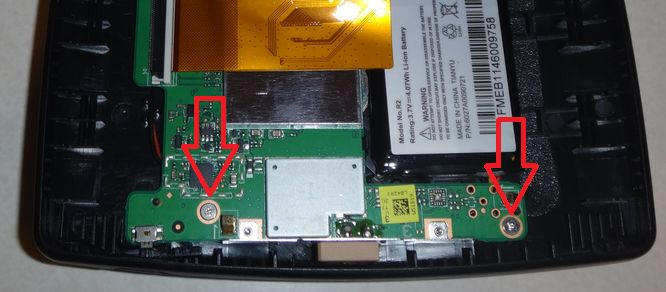
Step 3: Cut and remove the speaker wires Since you're not going to hear it anyhow, I take the circuit board out and cut the wires from the speaker and unplug the other end from the circuit board. (Just in case the speaker ever gets wet and might decide to short circuit.) The circuit board is held on by three small Phillips screws. One is hiding under the connector film.
The other two are hiding in plain sight.
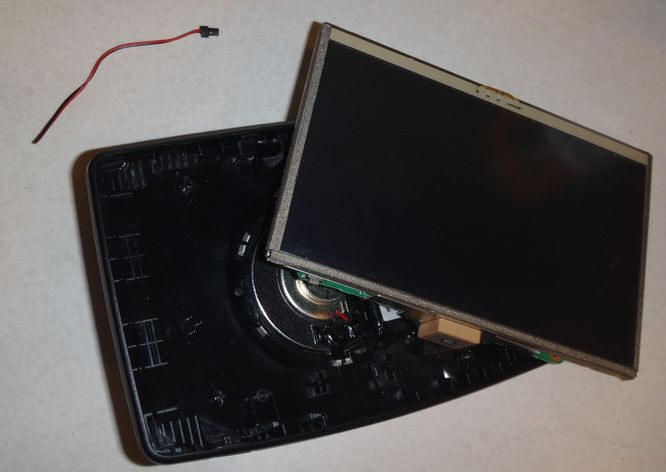
Speaker wire removed.
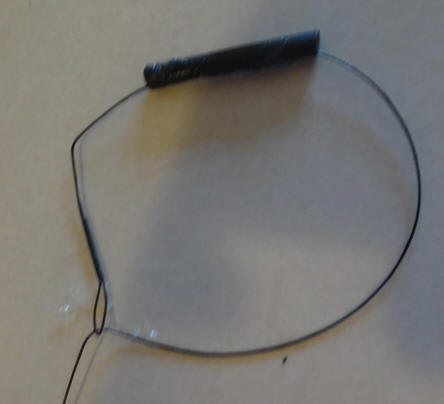
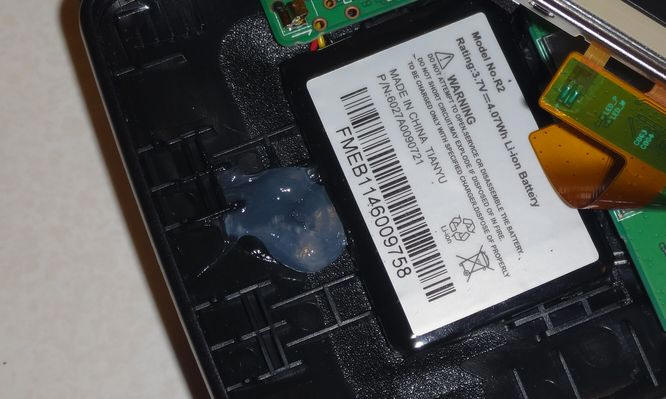
Step 4: Replace battery (optional) The battery is held to the back of the TomTom by double-sided tape. Just pry it off, unplug it from the circuit board and then install the replacement battery. Step 5: Install the fishing leader Although the handlebar mount is pretty secure it's not foolproof in case you bump into it or whatever. Therefore I use the fishing leader as a "leash" to catch the TomTom in case it gets dismounted. I just put the loop around the handlebar mount so if it does come out of the handlebar mount the leash is there to save it.
To start with I put a short section of heat shrink tubing to keep the loop open.
Then drill two tiny holes next to each other in the back of the case near the battery.
Then I feed the other end of the leash in from the back and then back out before passing the other end through that end to complete the leash.
Step 6: Reassemble the TomTom
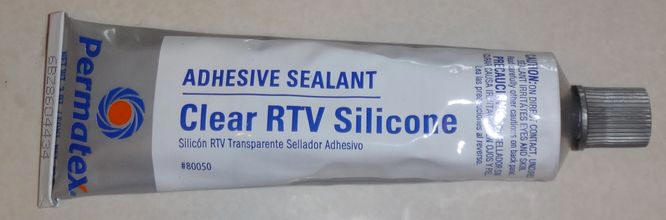
Prior to reassembly put a big dollop of clear RTV where the leash passes through.
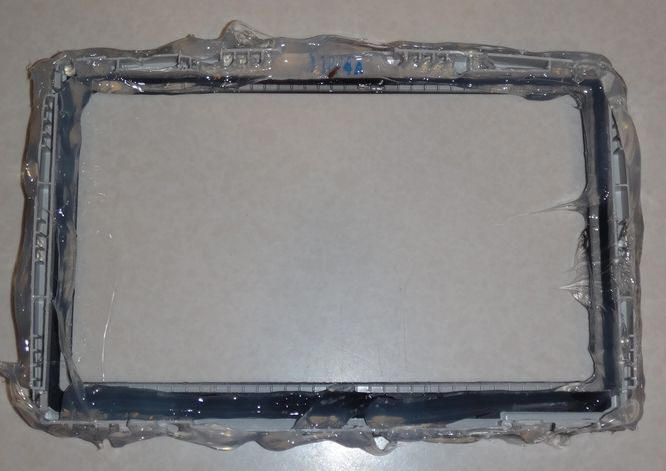
Before snapping the unit back together place copious amounts of clear RTV around the inner and outer edges of the frame in order to "waterproof" around the TomTom.
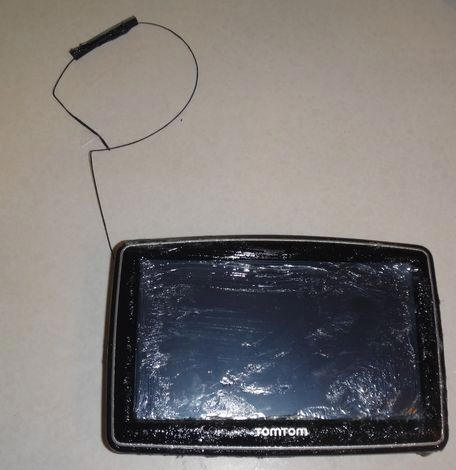
When put back together it will look something like this big mess.
Reinstall the two Torx screws on the bottom and then let it sit overnight to let the RTV cure. Once the RTV has cured you can rub off the excess with your thumb and fingers. In order to avoid damaging it, do not apply too much pressure to the TomTom's touchscreen when removing the excess RTV. Take your time and do it carefully.
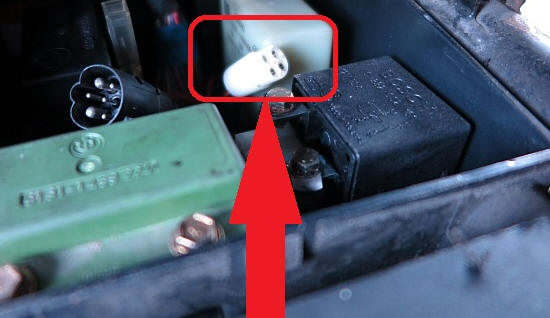
Power Supply: In order to provide switched 12V power to the USB power supply I tap into the brown wire (ground) and green/brown wire (switched 12V via Fuse 7) of the white alarm connector in the relay box under the rear of the tank.
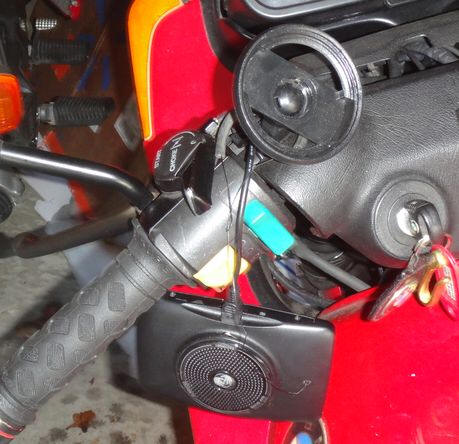
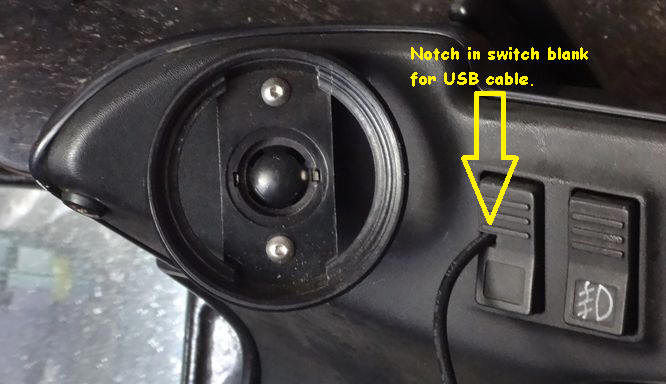
Mounting: On a K75S or K100RS the mount will attach to the handlebar without having to cut or mutilate the dash pad. On a K1100RS or K100RS4V you need to cut a square notch into the handlebar cover in order to accommodate the handlebar mount.
On a K1100LT you can throw away the back part of the handlebar mount and mount the remainder using two M4 screws.
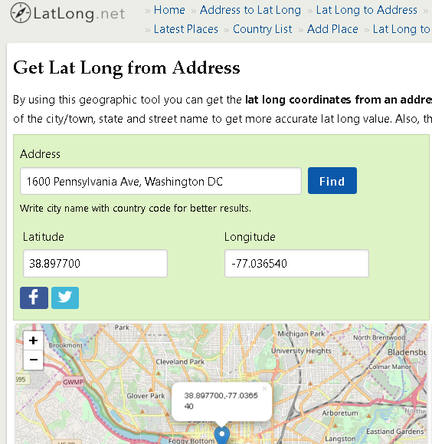
TomTom: Old maps and addresses that you can't enter The TomTom maps that come on your XL or XXL will probably be from 2012-2014. There are newer maps available but these units only have 2GB of internal memory and the newer maps won't fit because they're larger than 2GB. (At least for the US & Canada map set.) For the most part roads don't change that often so having slightly out of date maps is not a big deal to me. Another issue with TomToms is sometimes they won't let you enter the exact address you're looking for. (As I stated at the outset the old TomTom software is of mediocre quality.) However, when that happens to me I use a free website on my phone or PC that converts addresses to latitude and longitude and then navigate to that lat/lon and that has always worked so far.
Custom car icons:
TomTom lets you use custom car icons. (Stored in the art/cars directory of the TomTom's memory.) Here's a few BMW/riding ones I made that you can right click on to download:
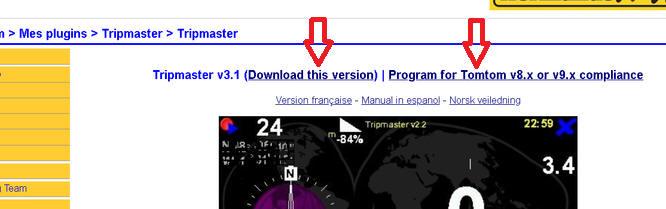
Tripmaster v3.1 Software: The Tripmaster free software can be downloaded at this link: http://www.webazar.org/tomtom/tripmaster.php?lang=uk You'll need to download the files at both of these links:
Once you've downloaded and unzipped those files you'll need to hook up the TomTom to a PC with a USB mini cable and load the following directories and file to the root directory of the TomTom:
© 2019 Drake Smith - Please do not use or reproduce this elsewhere. Feel free to link to it though. |
![]()