![]()
|
© 2013 Drake Smith - Please do not use or reproduce this elsewhere. Feel free to link to it though. K Bike Fuel Pumps K Bike Bosch Fuel Pumps: Two Sizes:
Fuel pump relief valve pressure: Some where in the 65-80 psi range Regulated fuel pressure: 2.5 bar (36.26 psi) Ethanol: Despite rumors to the contrary, ethanol will not harm the fuel pump, hoses or vibration dampener. BMW has issued a TSB (technical service bulletin) indicating that up to 10% ethanol is fine in K bikes. Fuel Pump Filtering The main fuel filter on K bikes is after the fuel comes out of the pump to keep contaminates from entering the fuel system. However, both types of fuel pumps have pre-pump filters. For the 52mm fuel pump it is a screen cup over the bottom of the fuel filter - part 16121455126.
For the 43 mm fuel pump it is a sock with a spring in it at the bottom of the fuel pump - part 16141341233.
Fuel Pump Failure Although typically a K bike fuel pump should last well over 100,000 miles, sometimes they just wear out. More common is that a K bike is left to sit for an extended period of time (years, not months) and water from the atmosphere builds up in the gas. This causes one of two problems: 1) the fuel pump vibration dampener (rubber collar that holds the fuel pump in place) decays, bits of it get past a damaged screen or sock and these bits jam up the fuel pump or 2) water causes corrosion inside of the fuel pump. Replacing The Fuel Pump With New OEM Parts The BMW OEM 52 and 43mm fuel pumps by themselves cost $409 and $374 respectively. A complete 43 mm assembly costs $435 and includes all of the parts you need for replacing everything. This will fit both early and late K bikes. In my opinion, if you choose to buy new OEM parts then it makes sense to buy the complete 43 mm assembly - #1 in the diagram below. (2013 prices)
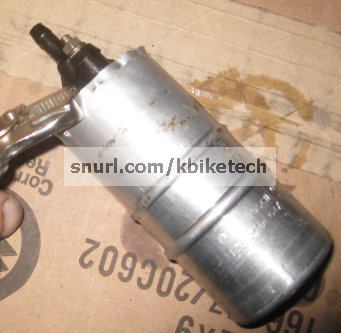
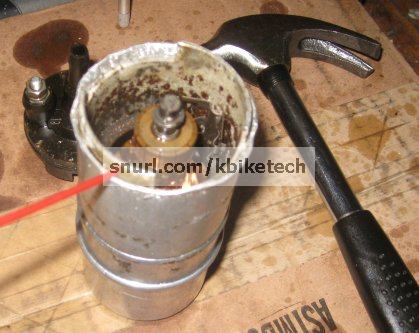
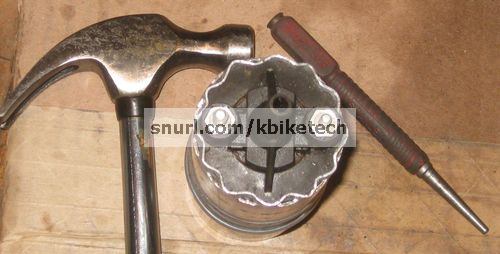
Replacing The Fuel Pump With An Aftermarket Fuel Pump Repairable? My test to see if a fuel pump is repairable is to remove it from the tank, hook it up to 12V (the smaller terminal is positive) and see if I hear a small clunk when power is applied. If I hear that then I know that the electrical motor is "trying" but that the fuel pump is jammed, either by small bits of foreign matter or corrosion. Try This First If it's just minor corrosion in the fuel pump then sometimes all you need to is turn it over, fill the bottom of it with a fuel system solvent (Sea Foam or Techron Concentrate for example) and let it soak for a few days. Then try applying power to see if the fuel pump has freed up and whirs as it should. Fuel Pump Disassembly If the fuel pump is obstructed by foreign objects or larger bits of corrosion then you can disassemble the fuel pump, clean it and re-assemble it. This is a fair amount of work but given that fuel pumps cost about $400 from BMW these days it is worth trying. The following are pictures of a fuel pump from a 1985 fuel pump that sat in some wet gas for a couple years. When power was applied I could hear a clunk, indicating that there was some foreign matter jamming the fuel pump. The first step was to bend the top lip back so that the fuel pump assembly could be removed from its outer aluminum housing.
I then tapped it out from the bottom using a small hammer until the top fell out. Then I sprayed some penetrating oil in to help the rest of it come out easier.
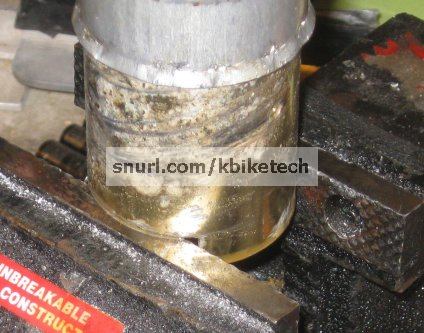
Then I placed the top in a bench vise to keep it from turning. Note that I did not tighten the vice to avoid deforming the inner housing. I just closed the vice enough so that it would keep the inner housing from turning while I twisted the outer housing up and off.
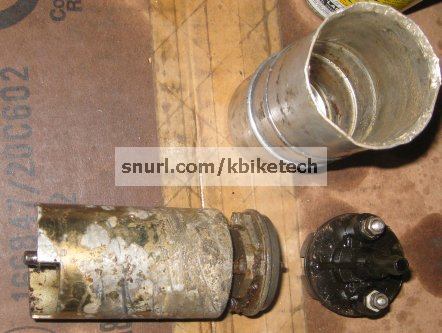
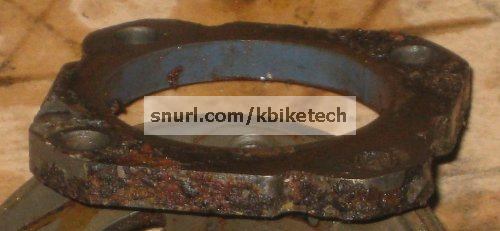
Here it is after I removed it from the outer housing.
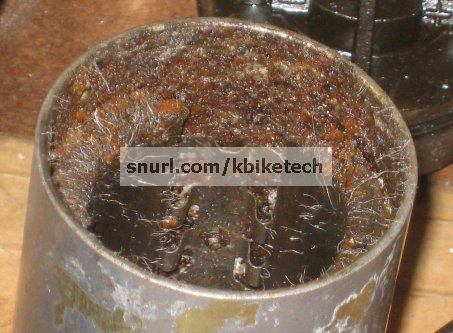
The inside of the inner housing was pretty dirty. (I took this picture after I'd cleaned the outside of the inner housing with some steel wool so the silver strands you see are steel wool bits picked up by the magnet.)
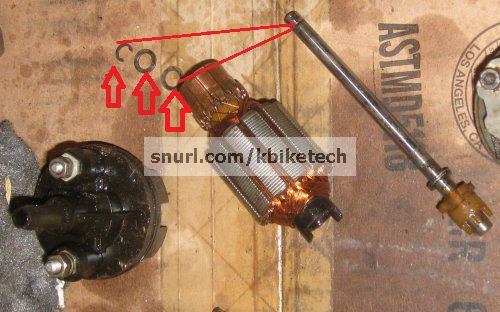
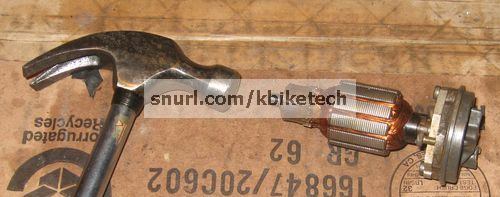
Then I removed the armature from the shaft by removing the C-clip and two washers at the top of it. (This step is probably optional.)
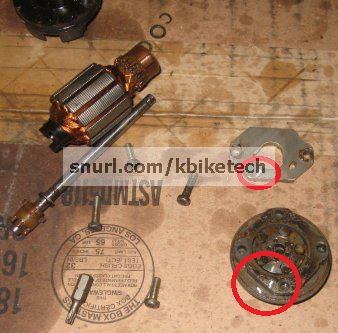
The fuel pump below the motor is housed in three plates held together by four Torx 20 machine screws. Before disassembling it I put a mark on each of the three pieces with a small grinding bit to make sure I re-assembled it correctly.
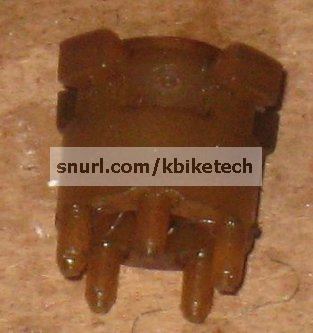
Here's a close-up of the nylon driver that transmits power from the electric motor to the fuel pump mechanism at the base.
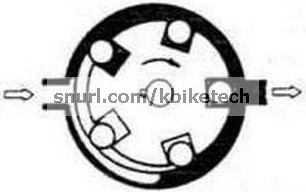
Here's a diagram that shows how the fuel pump works.
Here's the fuel pump disassembled.
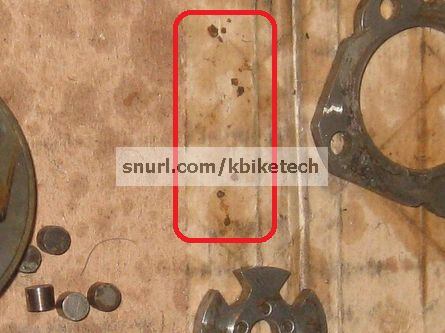
When I took it apart these little chunks of corrosion fell out. I suspect they were what was jamming the fuel pump.
The middle part of the fuel pump has a Teflon ring inside of it. I used rubbing alcohol and a paper towel to clean that and used steel wool to clean up the metal parts.
When putting the fuel pump back together I determined that if I screwed the Torx machine screws in too tightly that the fuel pump would not spin. Therefore I only got them finger tight and used medium Loctite on the threads to make sure that they stayed in place. Before installing the pump and armature in the inner housing I tapped the shaft into the base with a small hammer.
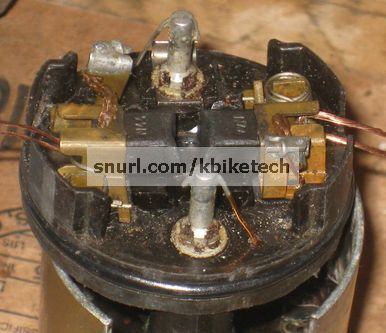
I used some small wires to pull the brush springs back to in order keep the brushes far enough apart so that I could install the top of the armature in the brushes.
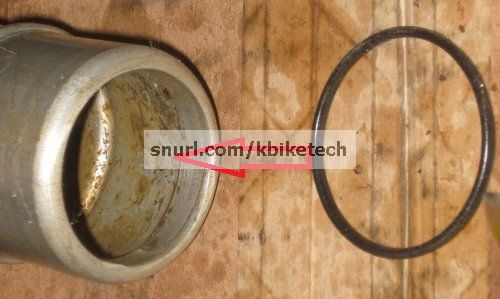
When re-assembling it be sure the O-ring at the base of the outer housing is in place.
Once I had it back together I used a hammer and nail set to bend the aluminum to hold the top of it back in place.
© 2013 Drake Smith - Please do not use or reproduce this elsewhere. Feel free to link to it though. |
![]()