© 2013 Drake Smith - Please do not
use or reproduce this elsewhere. Feel free to link to it
though.
Clutch
Work w/o BMW Special Tools
According to BMW and other shop
manuals, you need a couple of special tools to perform
maintenance on K bike clutches. In reality, you don't.
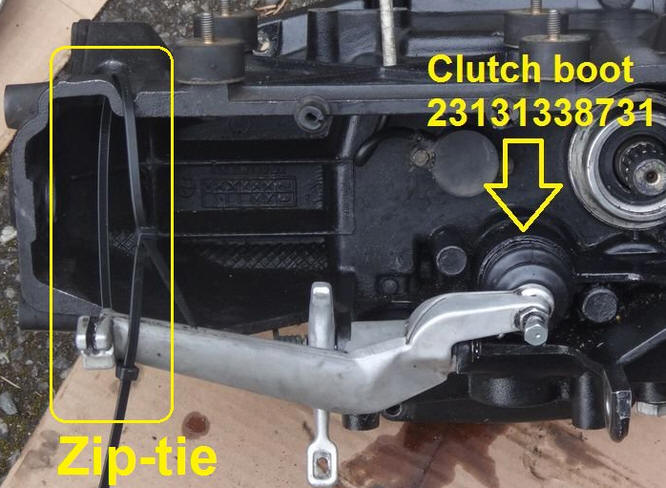
Saving The Clutch Boot
At the rear of the clutch pushrod
there is a rather expensive rubber boot - part 23131338731.

There is a spring inside of this
boot and if you fully release the clutch arm with an old
boot then the spring inside of the boot can tear it.
You can often avoid this if, when
the clutch cable is detached from the clutch arm, you use
zip-ties (or string/wire) to keep the clutch arm from fully
releasing.
Getting The Clutch Apart
Once the six bolts around the
perimeter of the clutch assembly have been removed, it is
often difficult to remove the rear piece to get the clutch
apart. You can carefully pry the clutch apart around the
outer edge using a 5 1/2" long mini pry bar/nail puller.
Examples are the Vaughan 222 or Titan 11505.

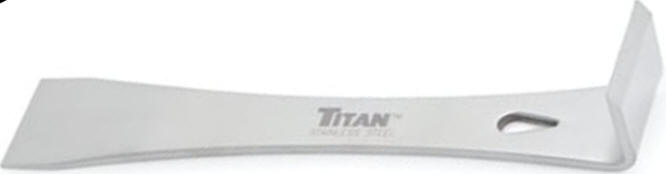
Be sure to get a 5 1/2" mini pry bar.
The heads on 7" pry bars are usually too large to fit in between
the bellhousing and clutch assembly.
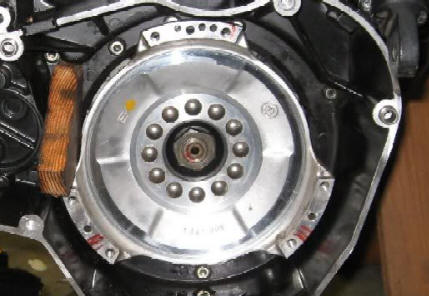
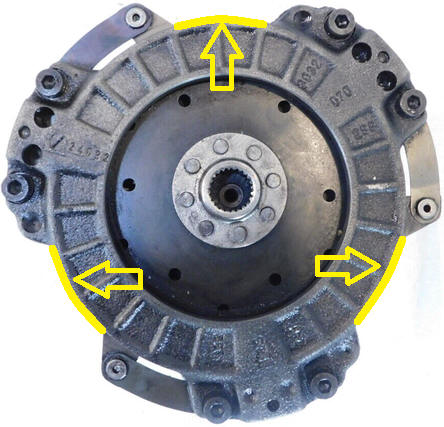
BMW Holder - Part 112800
The purpose of this special tool is to
hold the clutch housing in place so the you can
remove/install the clutch nut without having it turn the
engine.
By inserting a block of wood into
the upper left corner between the bellhousing and one of the
clutch housing flanges, you can accomplish the same thing.
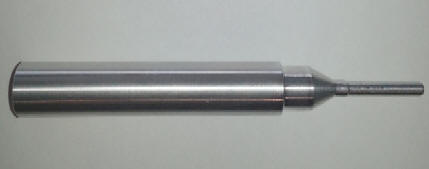
BMW Clutch Centering (Alignment) Tool - Part 212670
The purpose of this tool is to
center the clutch plate before retightening the six clutch
bolts so that the splines of the clutch plate are aligned
with transmission input shaft when the transmission is
re-installed.
You can buy aftermarket machined
aluminum clutch centering tools on eBay for about $25
shipped.
However, I developed my own
approach without the need for a special tool of any kind.
Namely, using the transmission itself as your centering
tool.
When you install the clutch
plate, tighten the six clutch bolts only enough to hold the
clutch plate in place by light friction so that it can still
move. Then feel around the edges and use your fingers to get
it as well centered as you can.
DO NOT
LUBE THE SPLINES YET. Only lube the splines upon
final installation of the transmission. Put the transmission in fifth
gear (makes turning the input splines via the output shaft
easier) and, without the pushrod in, temporarily install the
transmission, wiggling it around a little and using the
output shaft at the back to turn the input shaft
until it mates with the clutch plate.
Then push the
transmission all of the way on. The clutch plate is
now centered. Carefully pull the transmission STRAIGHT
back and then, once it is off, tighten the six clutch bolts.
(19 Nm)
Before lubing the splines and
inserting the clutch pushrod, install the transmission once
more to ensure that the clutch plate is properly centered
with the six clutch bolts tightened. Then remove the
transmission, insert the clutch pushrod, lube the
transmission input splines and execute the final transmission
installation. (16 Nm transmission to bellhousing)
© 2013 Drake Smith - Please do
not use or reproduce this elsewhere. Feel free to link
to it though.